EPSON AcuLaser CX11/CX11F Revision B
DISASSEMBLY AND ASSEMBLY ADF Section 505
REINSTALLATION
1. Insert the right shaft of the PICK UP ASSY into the bearing of the ADF BASE,
and insert the left shaft of the PICK UP ASSY into the bearing of the ADF BASE.
2. Place the left ADF SHAFT with its flat surface facing upward, and attach the ADF
ROLLER FIX PLATE matching the positioning hole of the ADF ROLLER FIX
PLATE with the guide pin on the ADF BASE.
3. Secure the ADF ROLLER FIX PLATE to the ADF BASE with the screw (M3 x 8
mm, P-type, A-head).
4. Hitch the both ends of the TENSION SPRING to the hook of PICK UP ASSY and
the hook of ADF ROLLER FIX PLATE respectively.
5. Attach the E CLUTCH UNIT. (p501)
6. Attach the ADF BASE ASSY. (p498)
7. Attach the ADF COVER C. (p496)
8. Attach the ADF COVER R. (p492)
9. Attach the ADF Unit. (p481)
10. Install the Scanner. (p306)
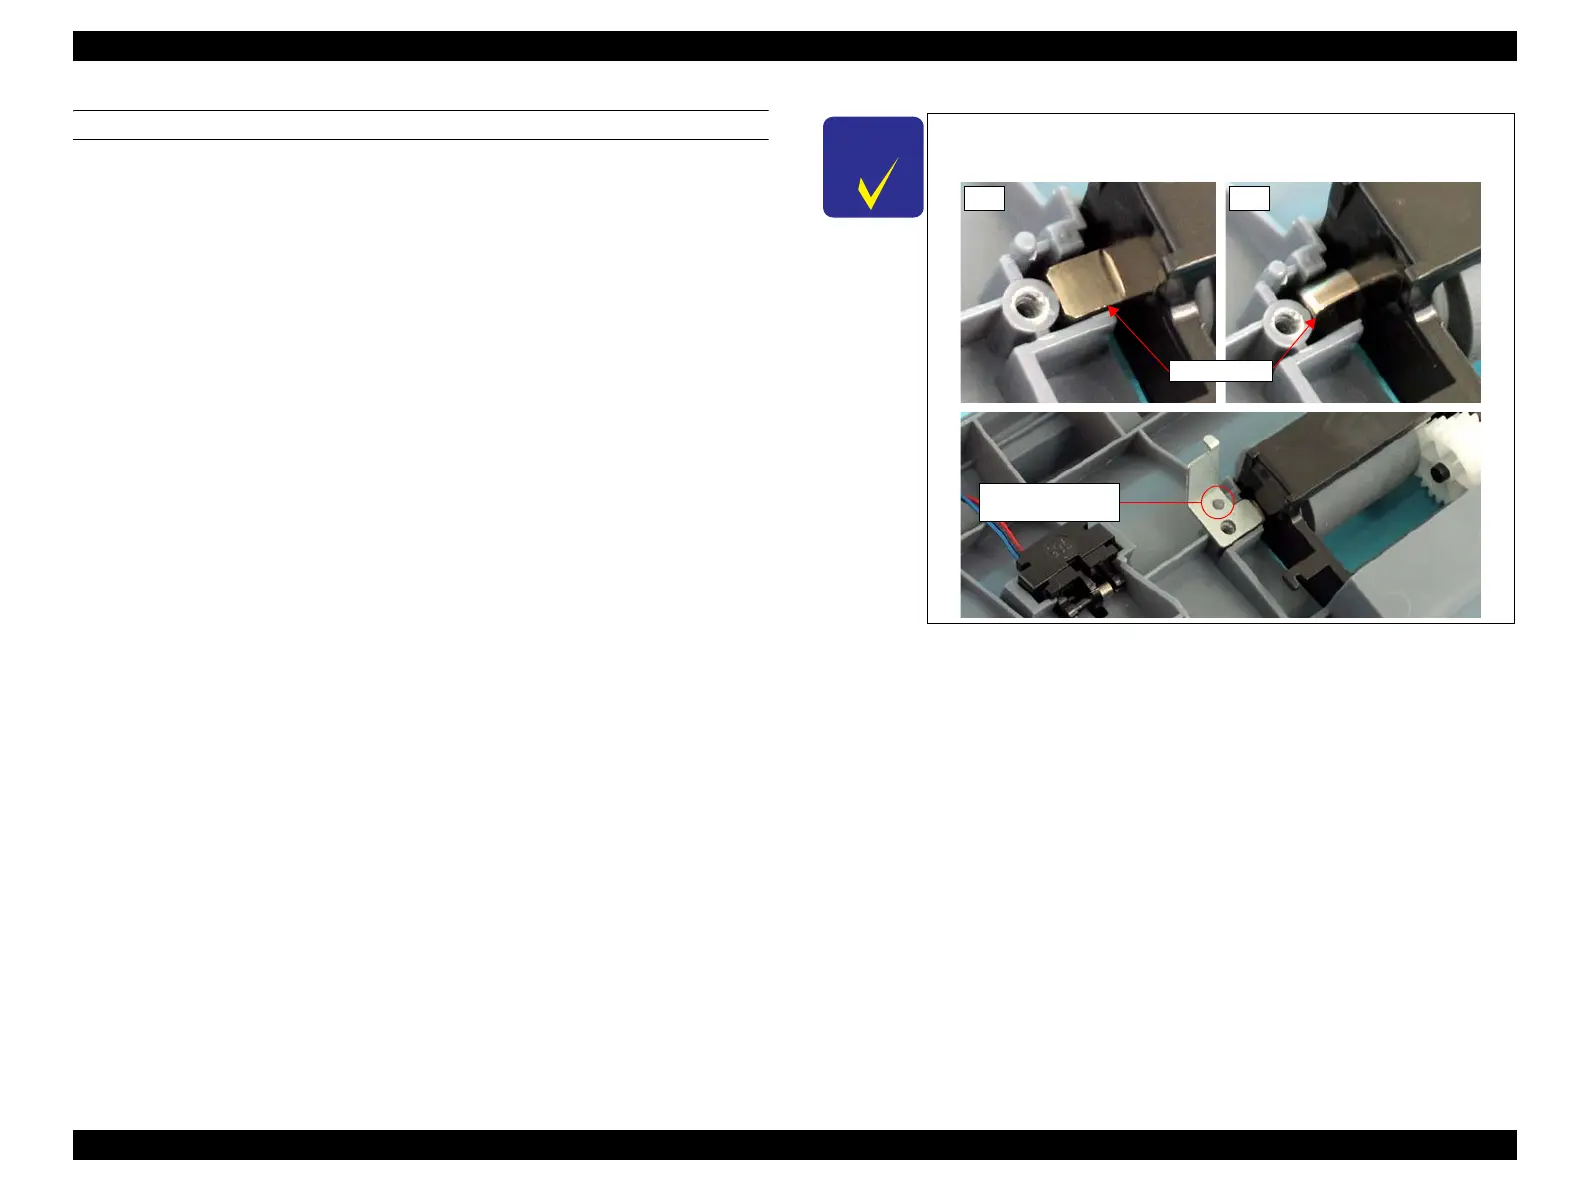
C H E C K
P O I N T
Before attaching the ADF Roller FIX PLATE, make sure that the
flat surface of the ADF SHAFT faces upward.
NGOK
Positioning Hole
and Guide Pin
ADF SHAFT
 Loading...


