EPSON AcuLaser CX11/CX11F Revision B
DISASSEMBLY AND ASSEMBLY Printer 312
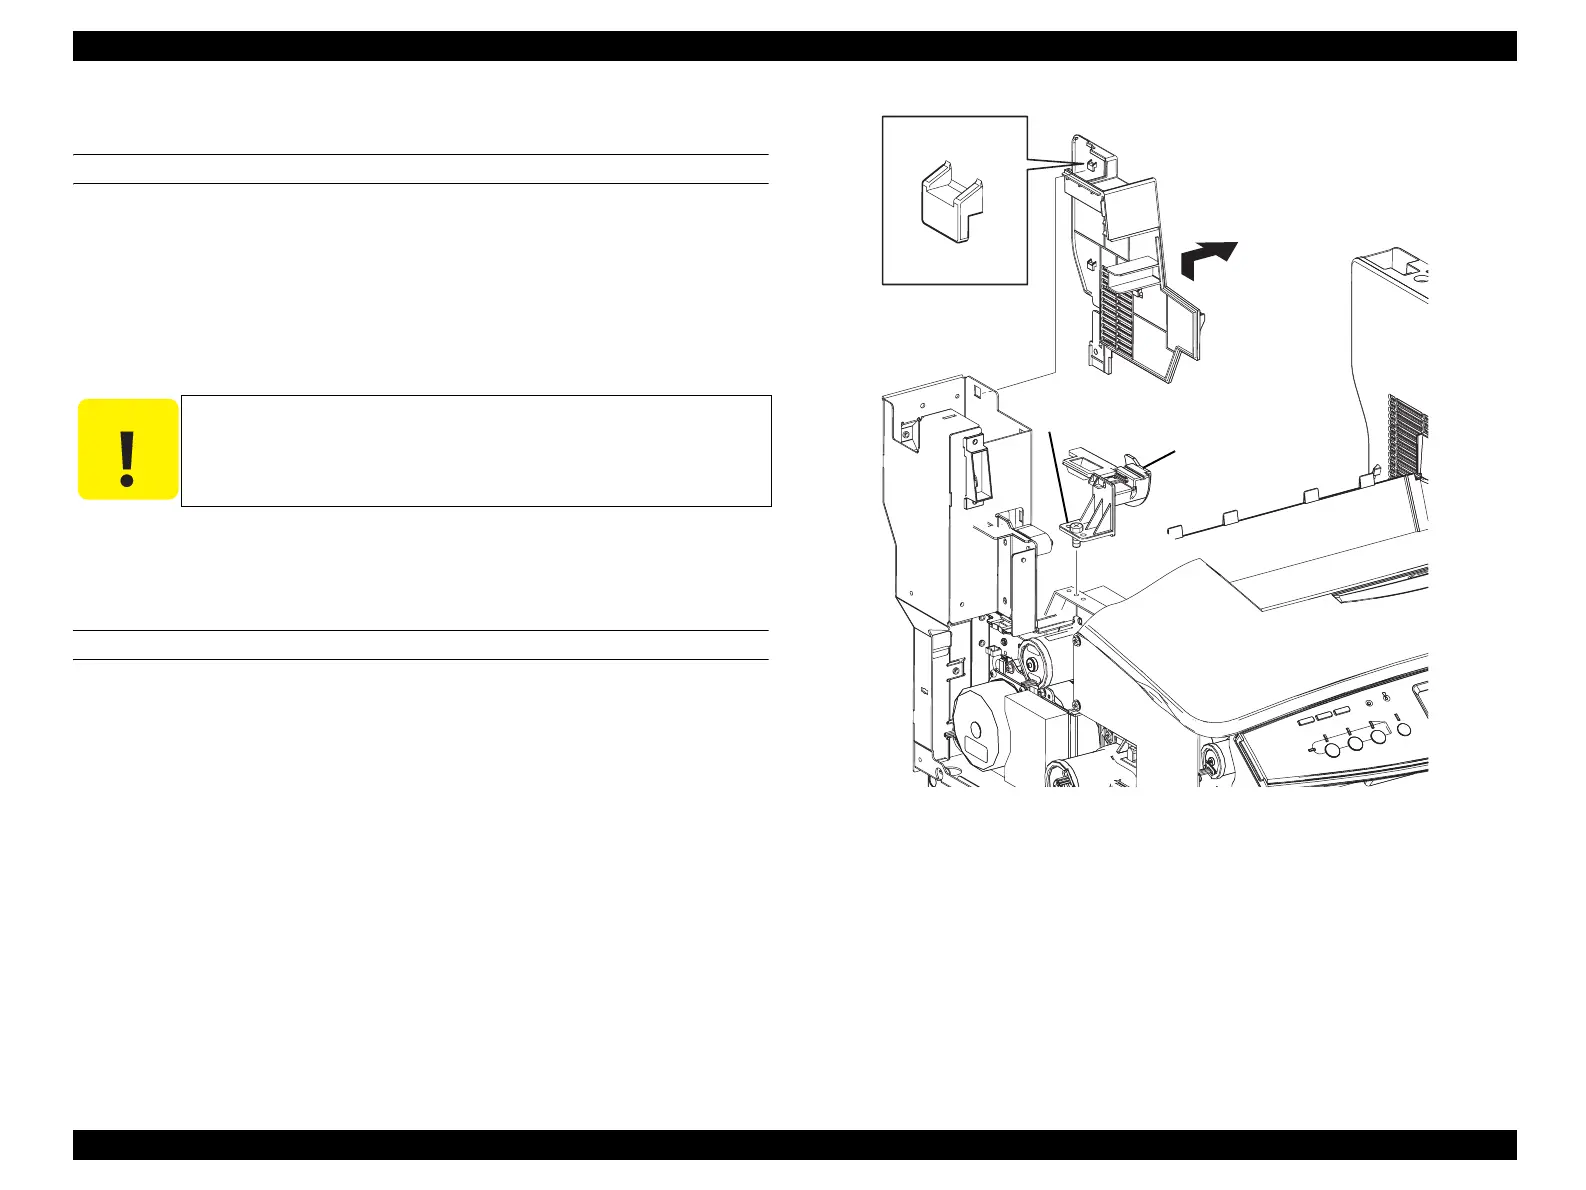
4.2.2.4 COVER TOP SIDE L
REMOVAL
1. Remove COVER ASSY LH. (p321)
2. Remove Fuser ASSY. (p415)
3. Slide COVER LEG RH INNER upward and remove it.
4. Loosen the screw (silver, with flange, 8mm) fastening the COVER LEG LH
INNER to the main unit.
5. Remove COVER TOP SIDE L together with the COVER FUSER GUIDE from
the main unit.
REINSTALLATION
1. Match the hole on the COVER TOP SIDE L with the boss on the main unit.
2. Fasten COVER TOP SIDE L to the main unit with the screw (silver, with flange, 8
mm).
3. Fit COVER LEG LH INNER to the main unit.
4. Secure COVER LEG LH INNER to the main unit with the screw (silver, with
flange, 8mm).
5. Install Fuser ASSY. (p415)
6. Attach COVER ASSY LH. (p321)
Figure 4-7. Removal of COVER TOP SIDE L
C A U T I O N
The screw fastening the COVER TOP SIDE L is designed not to
come loose from the COVER TOP SIDE L.
Leg_Sec03_502RC
3)
5)
4)
manuals4you.commanuals4you.com
 Loading...


