EPSON AcuLaser CX11/CX11F Revision B
DISASSEMBLY AND ASSEMBLY Printer 308
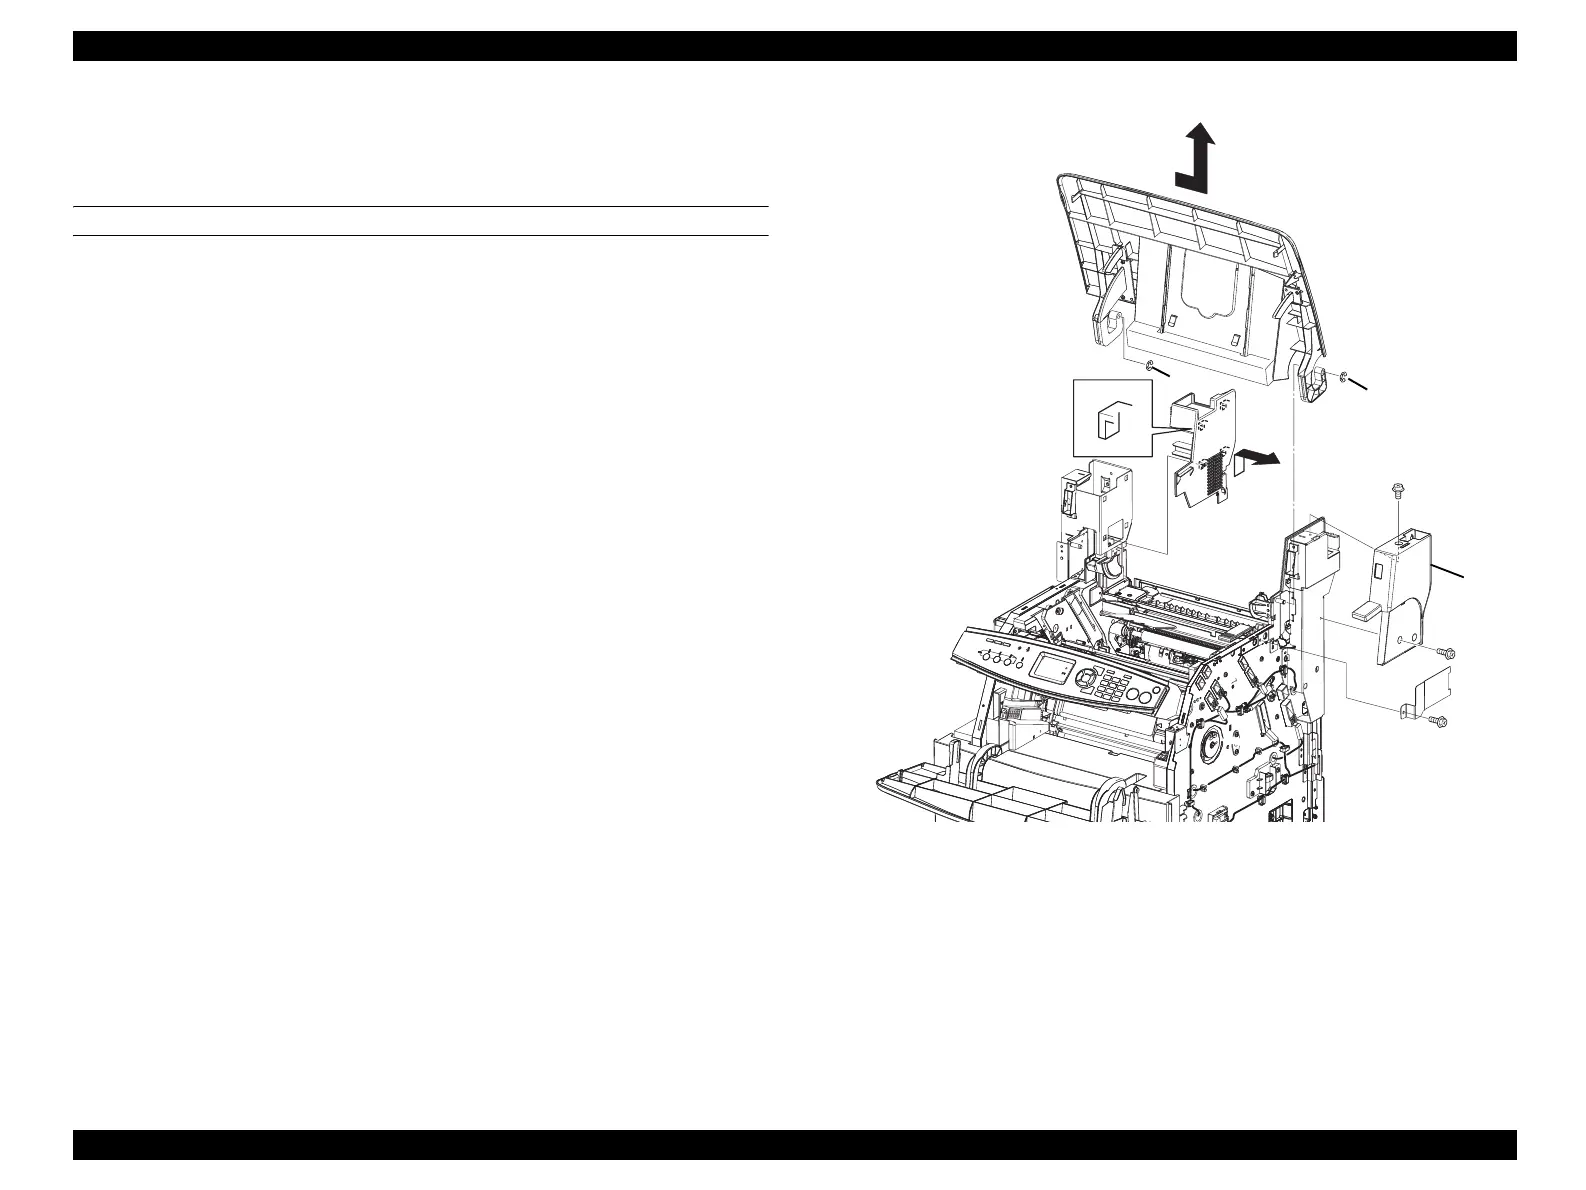
4.2.2 COVER
4.2.2.1 COVER ASSY TOP
REMOVAL
1. Remove COVER ASSY LH.
(p321)
2. Remove COVER ASSY RH.
(p326)
3. Remove Fuser ASSY.
(p415)
4. Loosen the two screws (silver, with flange, 8mm) fastening the COVER LEG RH
OUTER to the main unit.
5. Remove COVER LEG RH OUTER from the main unit.
6. Slide COVER LEG LH INNER upward and remove it.
7. Remove the screw (silver, with flange, 8mm), and remove the STOPPER PLATE.
8. Remove the 2 E-rings fastening the COVER ASSY TOP to the main unit.
9. Open COVER ASSY TOP and silde it to the right to remove it.
Figure 4-3. Removal of COVER ASSY TOP
Leg_Sec03_002RC
8)
5)
9)
8)
6)
4)
4)
7)
manuals4you.commanuals4you.com
 Loading...


