EPSON AcuLaser CX11/CX11F Revision B
DISASSEMBLY AND ASSEMBLY Printer 353
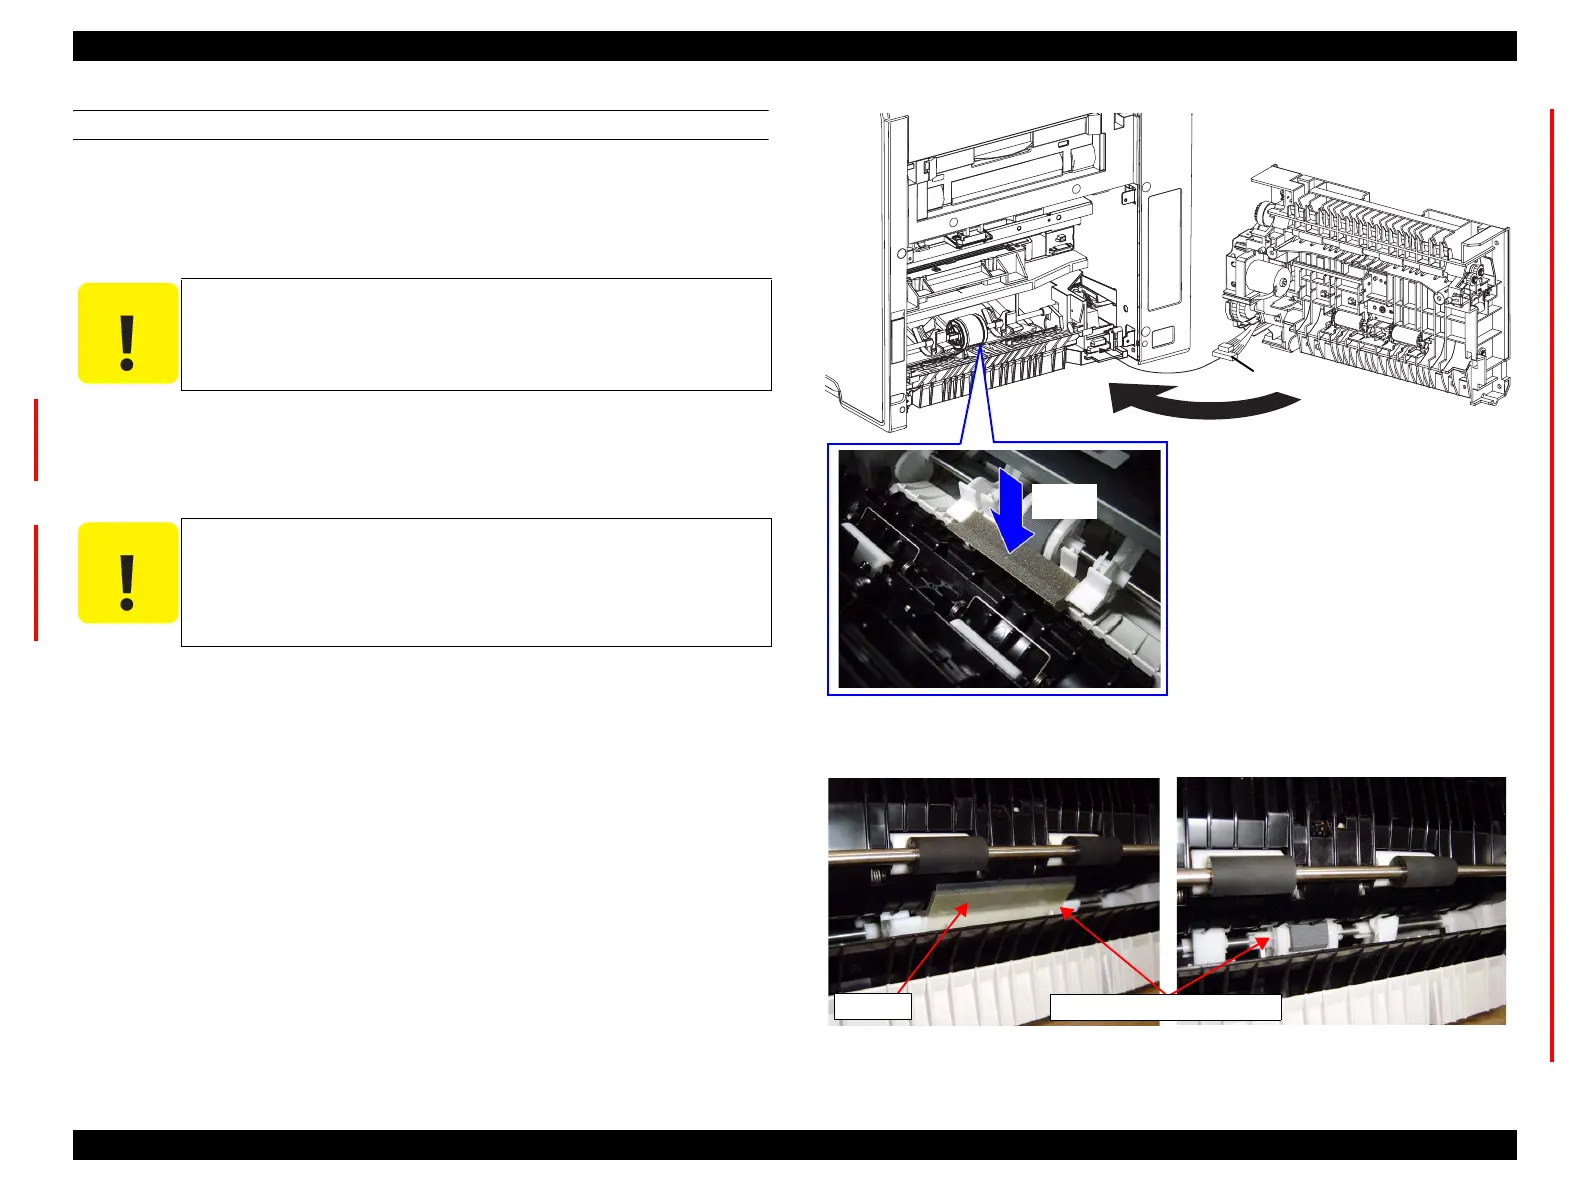
REINSTALLATION
1. Attach CHUTE ASSY-REAR. (p350)
2. Connect P/J603 and P/J604 connectors with the FRAME ASSY-PH open 90
degrees as shown in the figure.
3. Open CHUTE ASSY-REAR.
4. While pushing down the film part of the HOLDER ASSY RETARD MSI, match
FRAME ASSY-PH with the attachment position of the main unit.
5. Fasten FRAME ASSY-PH to the main unit with the 4 screws (silver, with flange,
8 mm).
6. Close CHUTE ASSY-REAR.
7. Attach COVER-PH. (p349)
Figure 4-45. Reinstallation of FRAME ASSY-PH
Figure 4-46. Check point after installing FRAME ASSY-PH
C A U T I O N
When performing the following procedure, be careful not to let the
harness caught between the main unit and the FRAME ASSY-PH.
C A U T I O N
Make sure to confirm that the film part of the HOLDER ASSY
RETARD MSI is located lateral to the FRAME ASSY-PH after
installing the FRAME ASSY-PH to the main unit. If the film part
gets through the inside of the FRAME ASSY-PH, a paper jam is
occurred by blocking a paper feeding path. (See Figure 4-46)
Leg_03_510EB
[2)]
[4)-1]
[4)-2]
OK
NG
HOLDER ASSY RETARD MSI
Film part
 Loading...


