EPSON AcuLaser CX11/CX11F Revision B
DISASSEMBLY AND ASSEMBLY Printer 374
4.2.5.4 2ND BTR ASSY
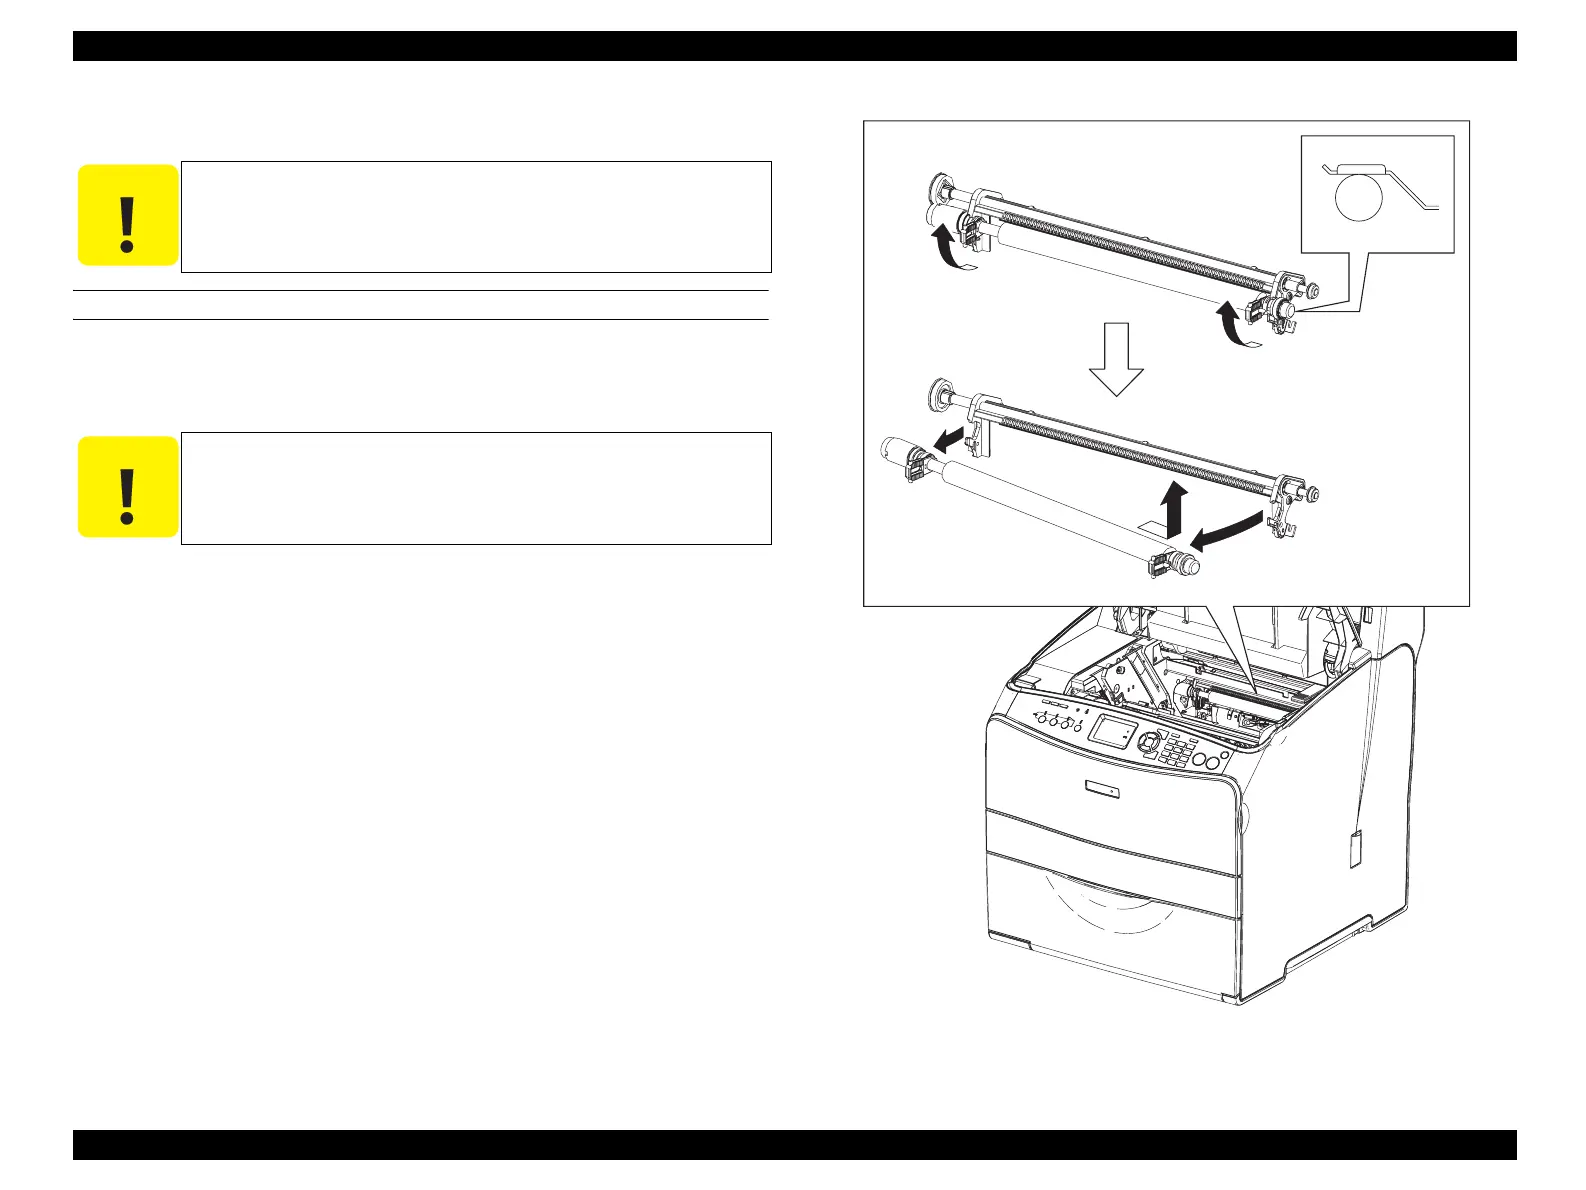
REMOVAL
1. Open COVER ASSY TOP.
2. Remove Photoconductor Unit.
3. Turn the levers on both the left and right sides of 2ND BTR ASSY towards you,
and unlock the lever lock from FRAME ASSY-2ND.
4. Hold the lever on 2ND BTR ASSY, draw out the right side of 2ND BTR ASSY
from FRAME ASSY-2ND, and then draw out the left side to remove 2ND BTR
ASSY from the main unit.
Figure 4-64. Removal of 2ND BTR ASSY
C A U T I O N
Do not touch the roller surface with bare hands.
C A U T I O N
When performing the following work, press LATCH ROTARY on
LATCH ASSY ROTARY to release the latch, turn FRAME ASSY-
ROTARY by hand, and move HOUSING ASSY-DEVE to prevent
it from contacting MAG ROLL.
Leg_Sec03_070RB
CAUTION
3)
3)
4)-2
4)-3
4)-1
manuals4you.commanuals4you.com

 Loading...


