EPSON AcuLaser CX11/CX11F Revision B
DISASSEMBLY AND ASSEMBLY Printer 379
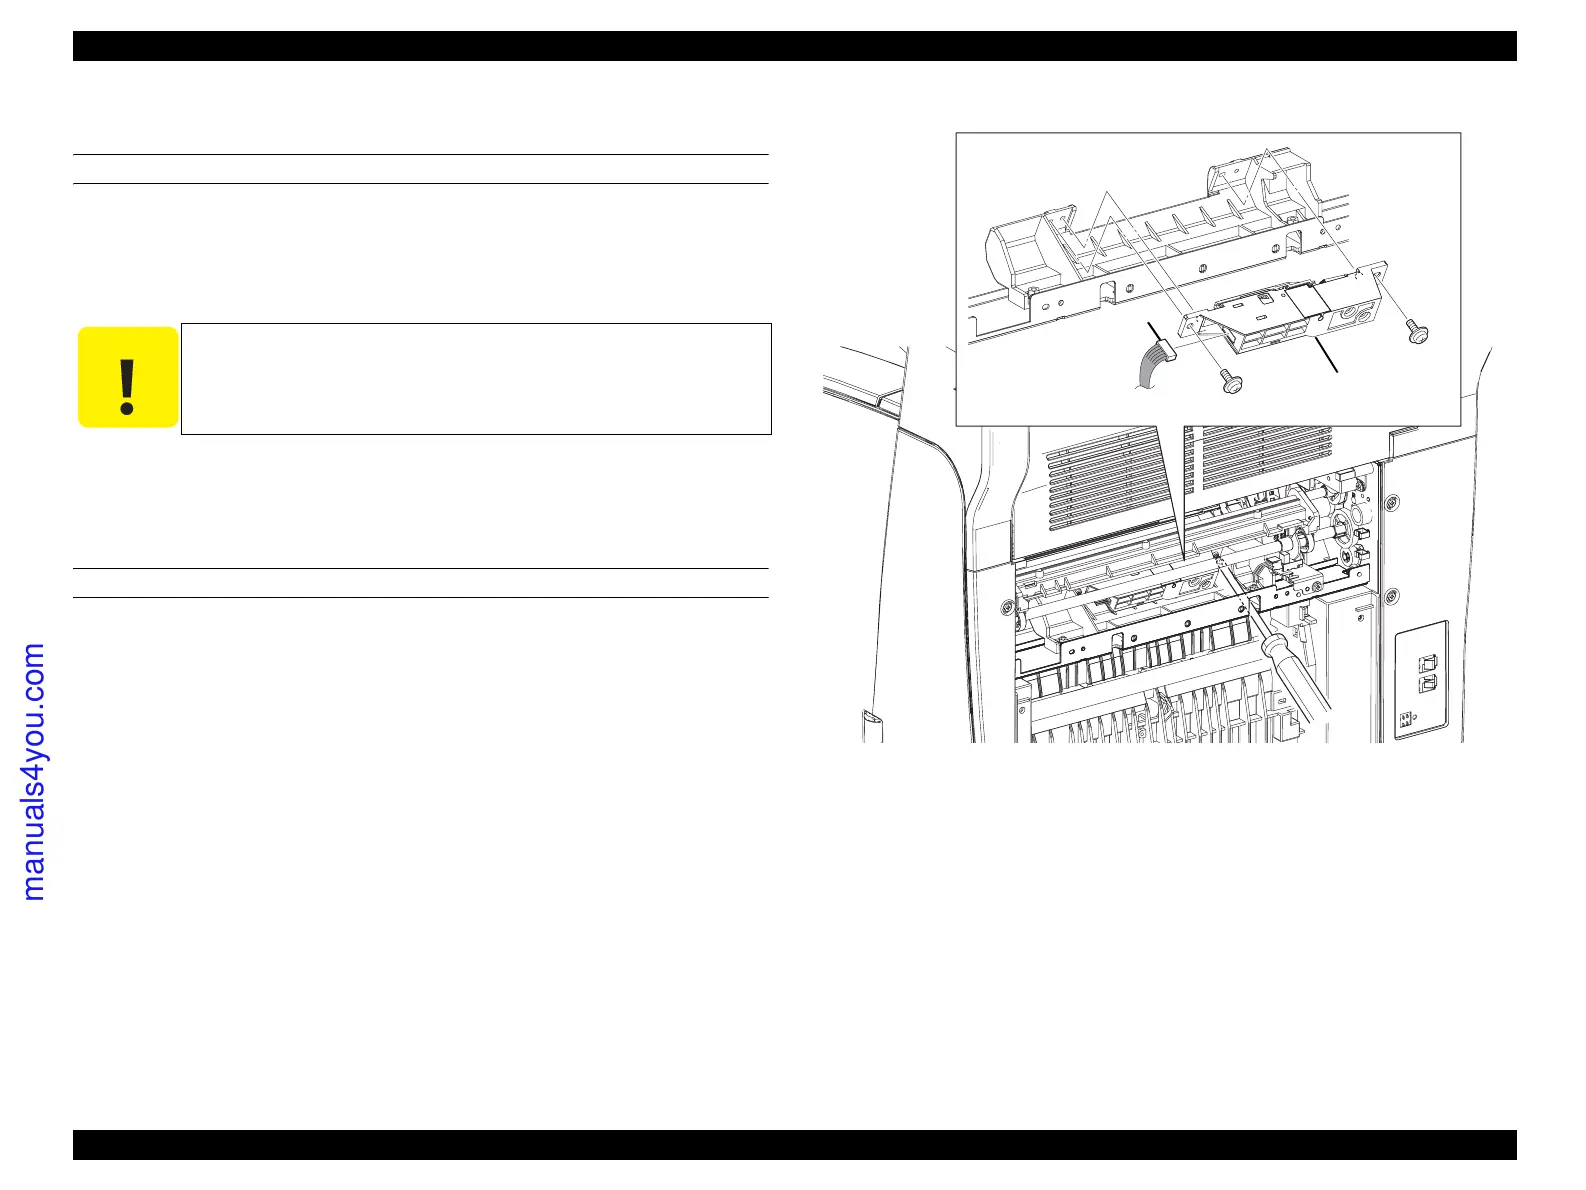
4.2.5.7 SENSOR ASSY ADC
REMOVAL
1. Remove CHUTE ASSY-FSR and COVER ASSY-RR 2ND. (p366)
2. Remove the 2 screws (silver, with washer, tapping, 8 mm) fastening SENSOR
ASSY ADC to the main unit.
3. Remove SENSOR ASSY ADC from the main unit.
4. Disconnect connector (P/J431) from SENSOR ASSY ADC.
REINSTALLATION
1. Connect connector (P/J431) to SENSOR ASSY ADC.
2. Match the boss on SENSOR ASSY ADC with the hole on the main unit, and
attach SENSOR ASSY ADC.
3. Fasten SENSOR ASSY ADC to the main unit with the 2 screws (silver, with
washer, tapping, 8 mm).
4. Attach CHUTE ASSY-FSR and COVER ASSY-RR 2ND. (p366)
Figure 4-67. Removal of SENSOR ASSY ADC
C A U T I O N
When performing the following work, take care not to remove
SENSOR ASSY ADC too far as it is connected by a harness.
Leg_Sec03_072RB
4)
2)
2)
3)
manuals4you.com
 Loading...


