EPSON AcuLaser CX11/CX11F Revision B
DISASSEMBLY AND ASSEMBLY ADF Section 526
4.4.5 PAPER GUIDE ASSY
4.4.5.1 PAPER GUIDE ASSY
REMOVAL
1. Remove the Scanner. (p306)
2. Remove the ADF Unit. (p481)
3. Remove the ADF COVER R. (p492)
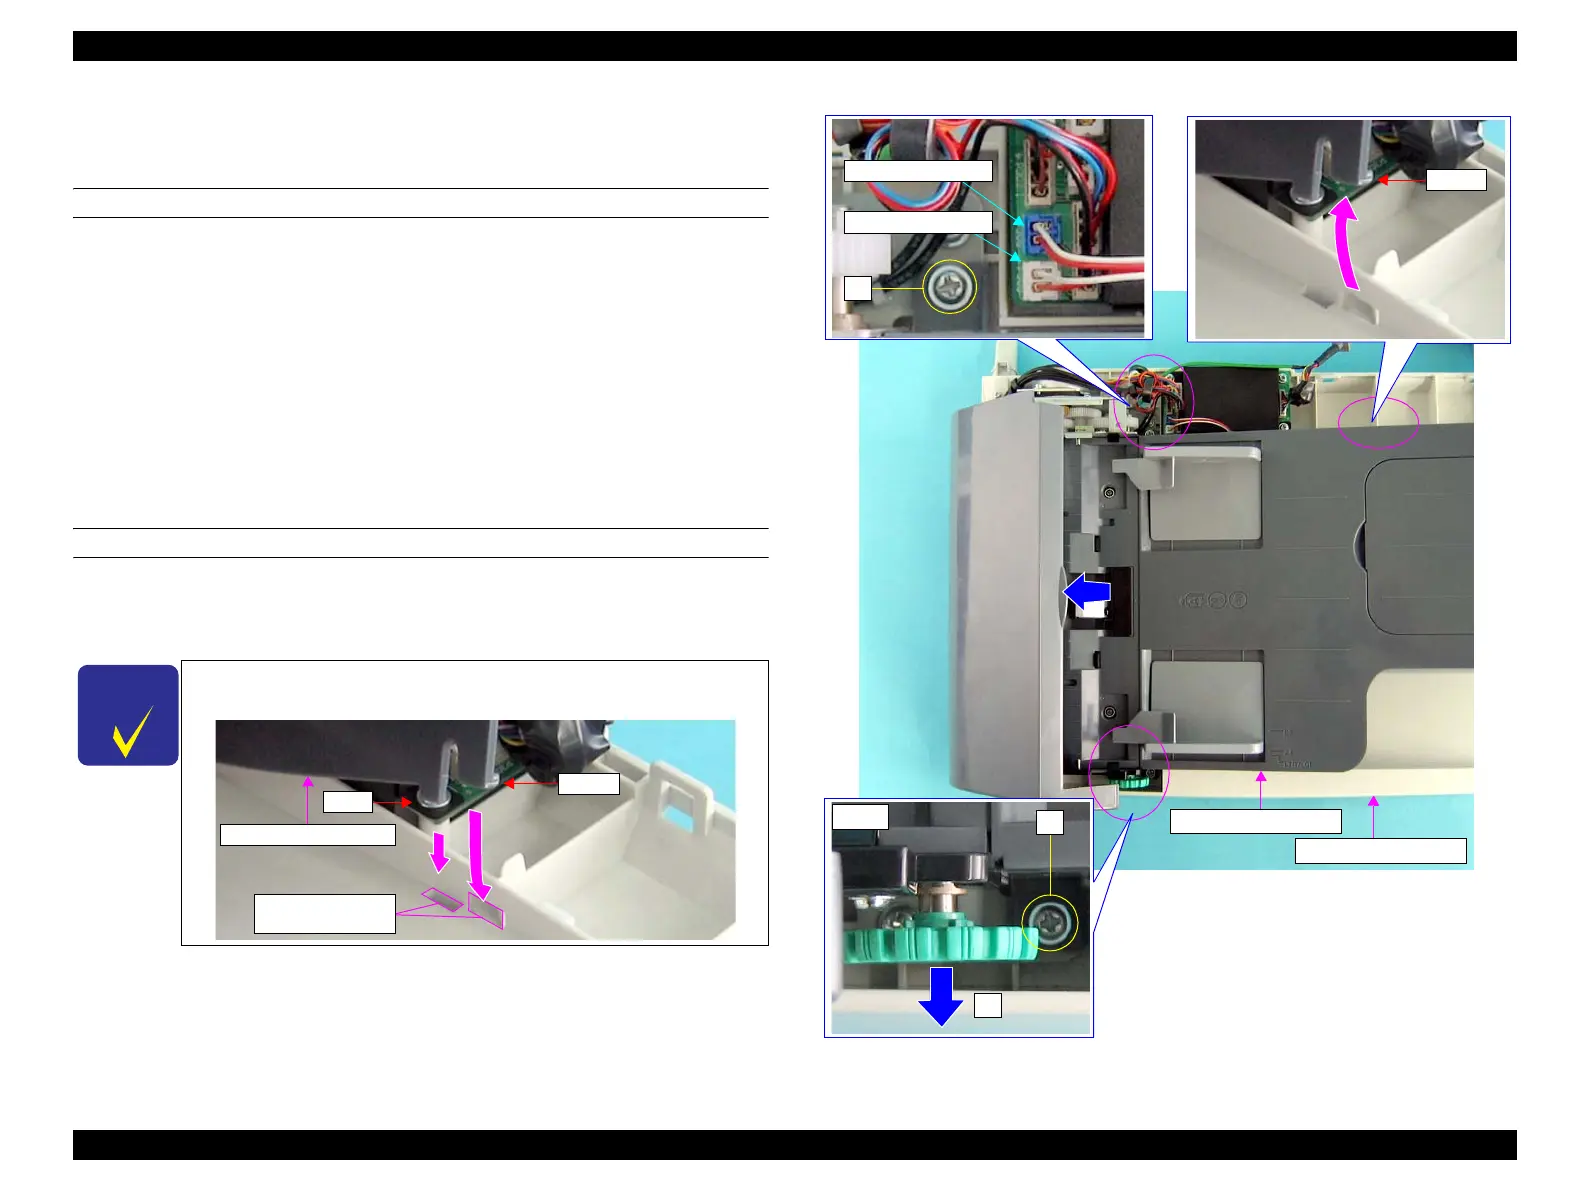
4. Open the ADF COVER and remove the KNOB from the ADF FRAME ASSY.
5. Remove the two screws (M3 x 8 mm, S-type, A-head) that secure the PAPER
GUIDE ASSY to the SDH COVER.
6. Disconnect P308 and P309 connectors of the PAPER GUIDE ASSY from the
ADF PCB ASSY.
7. Release the hook of the PAPER GUIDE ASSY to remove the PAPER GUIDE
ASSY from the SDH COVER ASSY.
REINSTALLATION
1. Attach the PAPER GUIDE ASSY to the SDH COVER matching the protrusion on
the PAPER GUIDE ASSY with the hole on the SDH COVER, and secure the
PAPER GUIDE ASSY with its hook.
2. Open the ADF COVER and attach the KNOB to the ADF FRAME ASSY.
3. Attach the ADF COVER R. (p492)
4. Attach the ADF Unit. (p481)
5. Install the Scanner. (p306)
Figure 4-219. Removal of the PAPER GUIDE ASSY
C H E C K
P O I N T
When attaching the PAPER GUIDE ASSY, match the rib on the
PAPER GUIDE ASSY with the hole on the SDH COVER.
Hook
Rib
PAPER GUIDE ASSY
Holes on the SDH
COVER ASSY
P309 Connector
P308 Connector
5)
Hook
KNOB
5)
4)
SDH COVER ASSY
PAPER GUIDE ASSY
manuals4you.commanuals4you.com
 Loading...


