EPSON AcuLaser CX11/CX11F Revision B
DISASSEMBLY AND ASSEMBLY Printer 346
4.2.3.11 SENSOR PAPER EMPTY
REMOVAL
1. Remove COVER ASSY RH. (p326)
2. Remove COVER ASSY LH. (p321)
3. Remove COVER MSI. (p317)
4. Remove COVER FRONT L and COVER FRONT ASSY U. (p318)
5. Remove FRAME ASSY-PH. (p352)
6. Remove MSI ASSY. (p329)
7. Unhook the three hooks on SENSOR PAPER EMPTY fastened to FRAME ASSY
BOTTOM using a small screwdriver or similar tool, and turn ACTUATOR
EMPTY to remove SENSOR PAPER EMPTY.
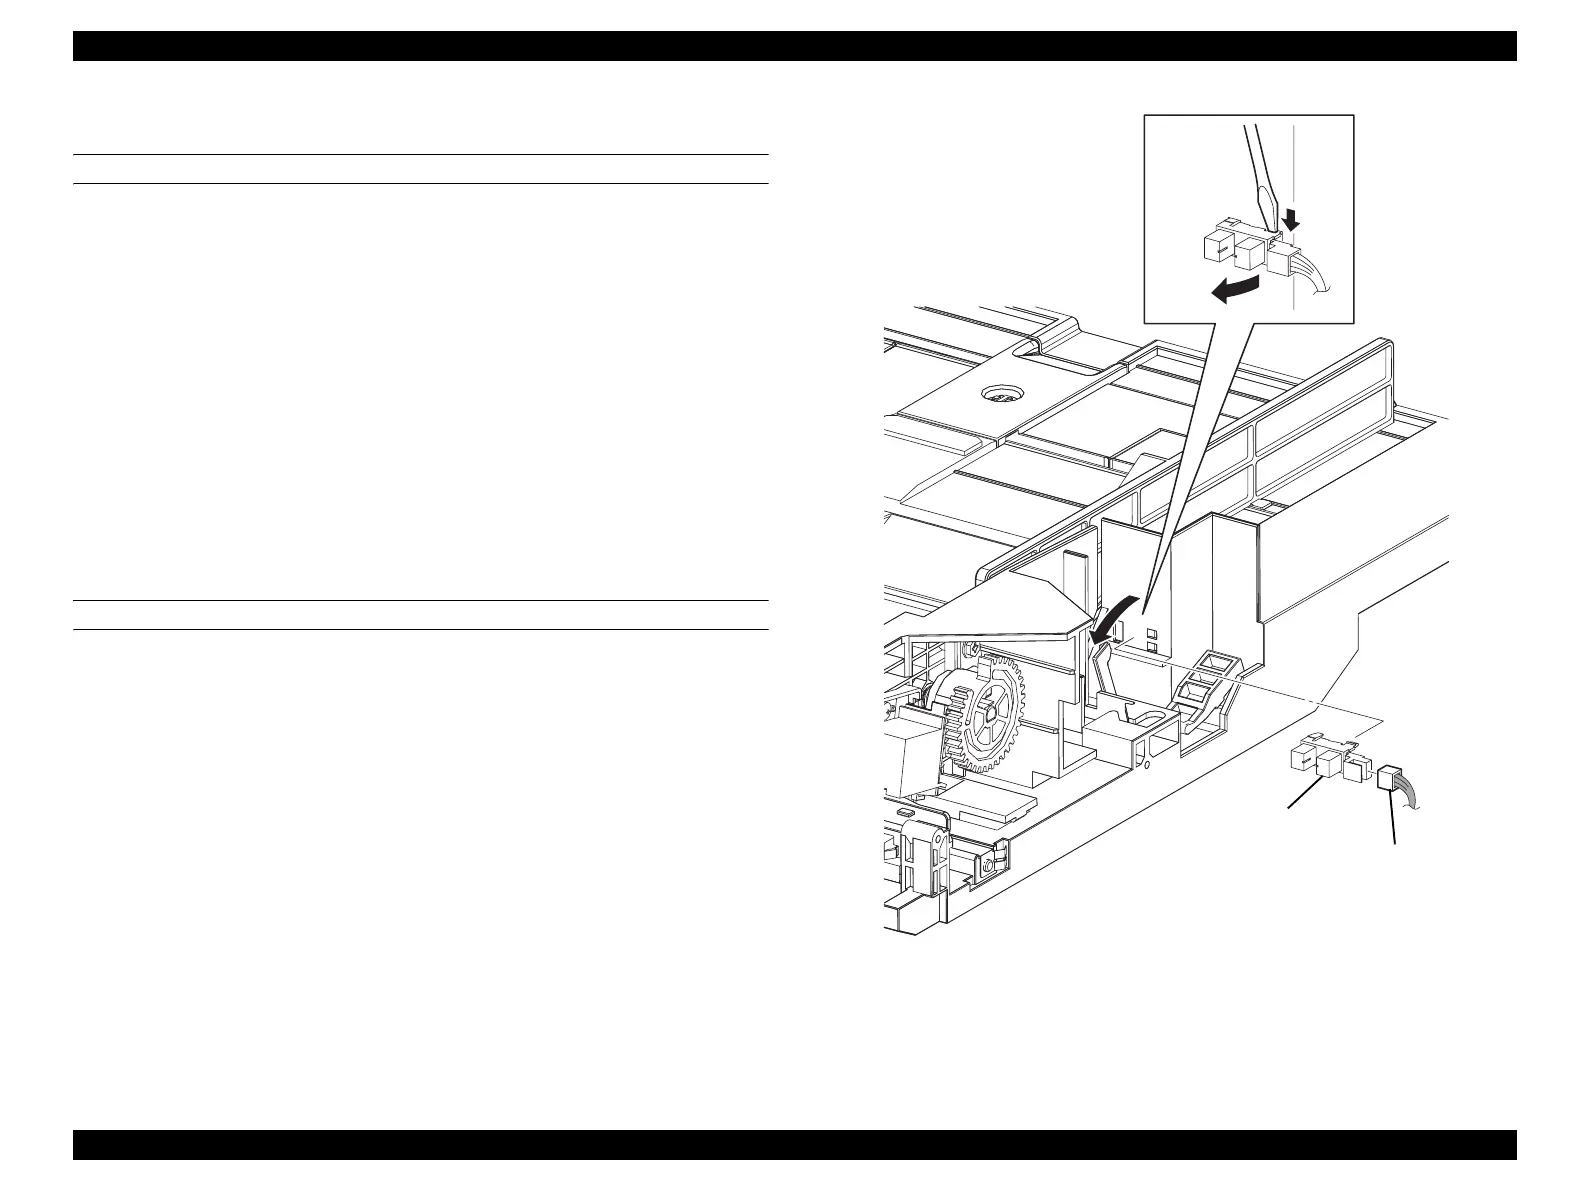
8. Disconnect connector (P/J103) from SENSOR PAPER EMPTY.
REINSTALLATION
1. Connect connector (P/J103) to SENSOR PAPER EMPTY.
2. Turn ACTUATOR EMPTY to align the three hooks on SENSOR PAPER
EMPTY to the attachment position, and attach SENSOR PAPER EMPTY to
FRAME ASSY BOTTOM.
3. Attach MSI ASSY. (p329)
4. Attach FRAME ASSY-PH. (p352)
5. Attach COVER FRONT L and COVER FRONT ASSY U. (p318)
6. Attach COVER MSI. (p317)
7. Attach COVER ASSY LH. (p321)
8. Attach COVER ASSY RH. (p326)
Figure 4-38. Removal of SENSOR PAPER EMPTY
Leg_Sec03_051FA
8)
7)-3
7)-1
7)-2
manuals4you.commanuals4you.com
 Loading...


