EPSON AcuLaser CX11/CX11F Revision B
DISASSEMBLY AND ASSEMBLY ADF Section 506
4.4.2.4 AS SENSOR
REMOVAL
1. Remove the Scanner. (p306)
2. Remove the ADF Unit. (p481)
3. Remove the ADF COVER R. (p492)
4. Remove the PAPER GUIDE ASSY. (p526)
5. Remove the ADF COVER C. (p496)
6. Remove the ADF BASE ASSY. (p498)
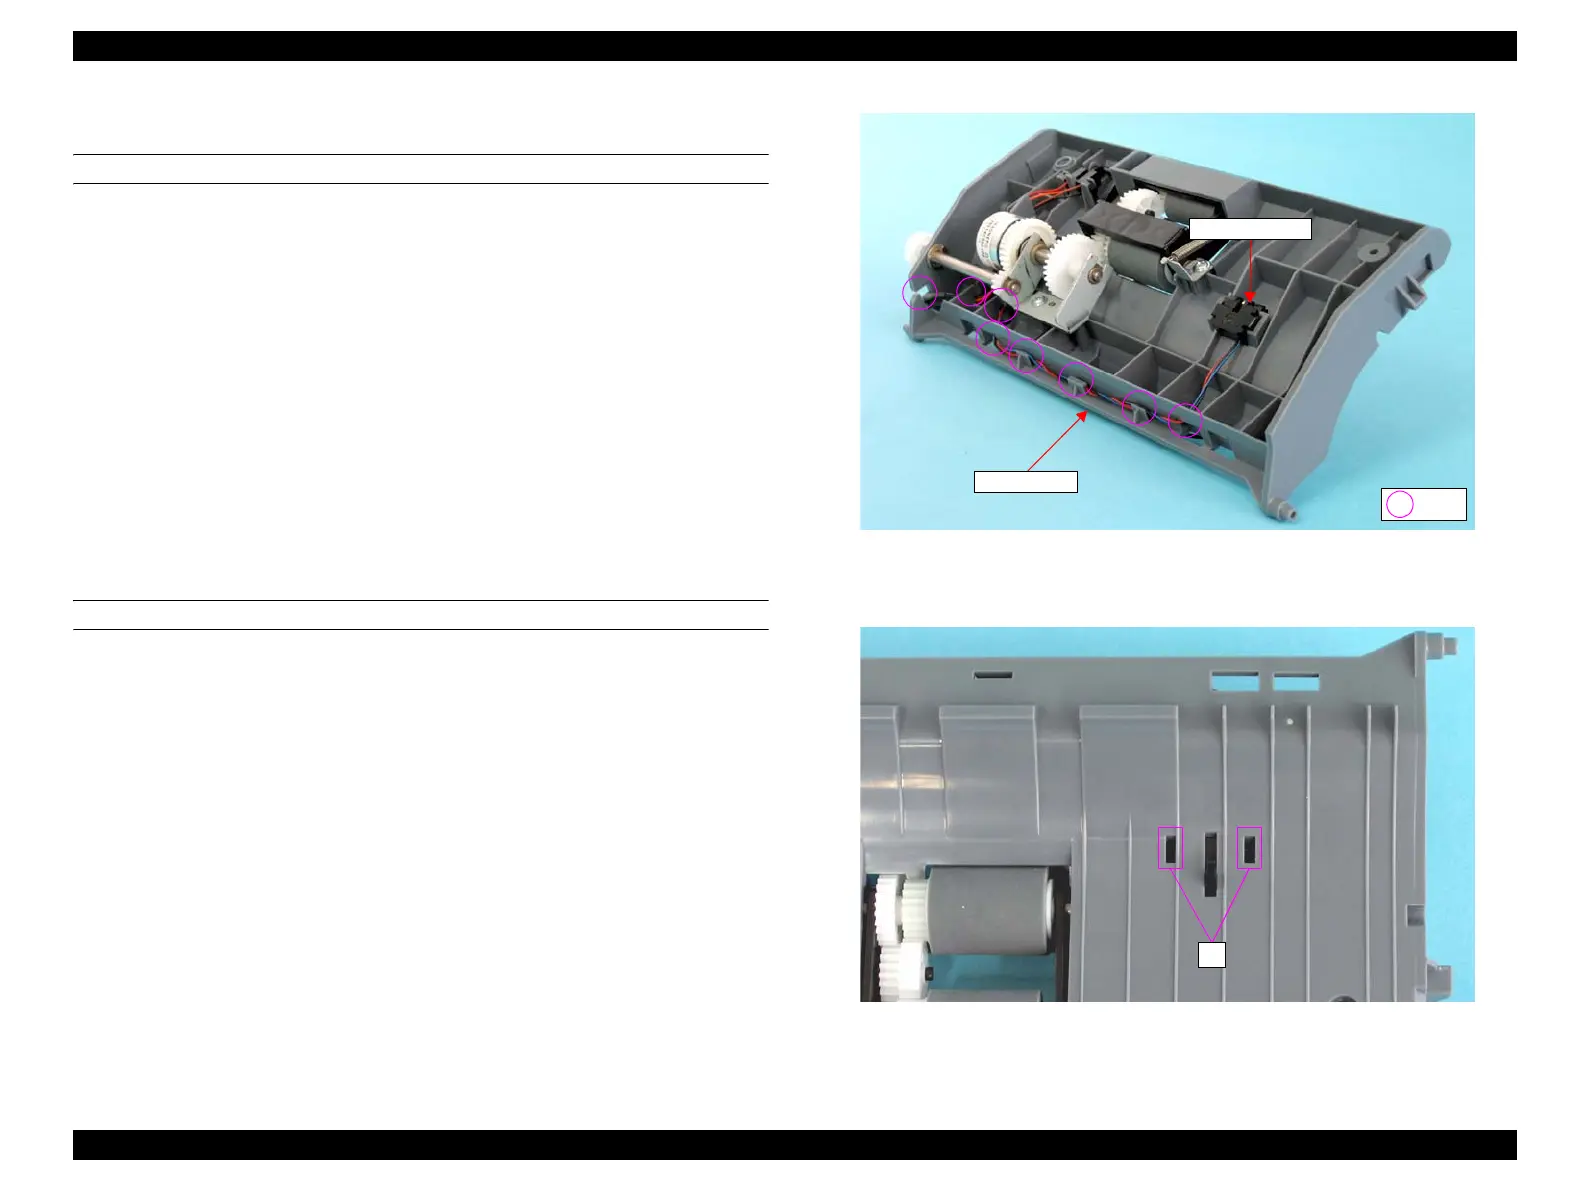
7. Release the harnesses of the AS SENSOR from the three hooks, two holes, and
three notches of the ADF BASE. See Figure 4-191.
8. Turn the ADF BASE ASSY over, and remove the AS SENSOR releasing its two
tabs from the ADF BASE. See Figure 4-192.
REINSTALLATION
1. Attach the AS SENSOR to the ADF BASE inserting the two tabs of the AS
SENSOR into holes on the ADF BASE. See Figure 4-192.
2. Route the harnesses of the AS SENSOR as shown in the figure, and secure them
with three hooks and three notches of the ADF BASE. See Figure 4-191.
3. Attach the ADF BASE ASSY. (p498)
4. Attach the ADF COVER C. (p496)
5. Attach the PAPER GUIDE ASSY. (p526)
6. Attach the ADF COVER R. (p492)
7. Attach the ADF Unit. (p481)
8. Install the Scanner. (p306)
Figure 4-191. Removal of AS SENSOR (1)
Figure 4-192. Removal of AS SENSOR (2)
7)
ADF BASE
AS SENSOR
8)
manuals4you.commanuals4you.com
 Loading...


