EPSON AcuLaser CX11/CX11F Revision B
ADJUSTMENT Overview 531
5.1 Overview
This chapter describes the adjustment procedures required after repairing or replacing certain parts in the AcuLaser CX11/CX11F.
There is no required adjustment for the Scanner/ADF.
5.1.1 Precautions
Be sure to observe the following precautions before starting adjustments.
5.1.2 Part/Unit-based Adjustment Items
The following table indicates the adjustment items and life counter clear items necessary when the specific unit is replaced or removed.
Note : Updating the firmware does not initialize the setup data stored on the EEPROM.To initialize the setup data, execute “Factory Setting” from the control panel.
"*" : X = Y, M, C, K
C A U T I O N
Refer to “ 5.1.2 Part/Unit-based Adjustment Items” (p531), always confirm the adjustment items and the orders for the replaced/removed parts and
units in advance.
Start adjustment after fully checking the Caution given in the explanation area of each adjustment item. Incorrect work may interfere with the product
operations and/or functions.
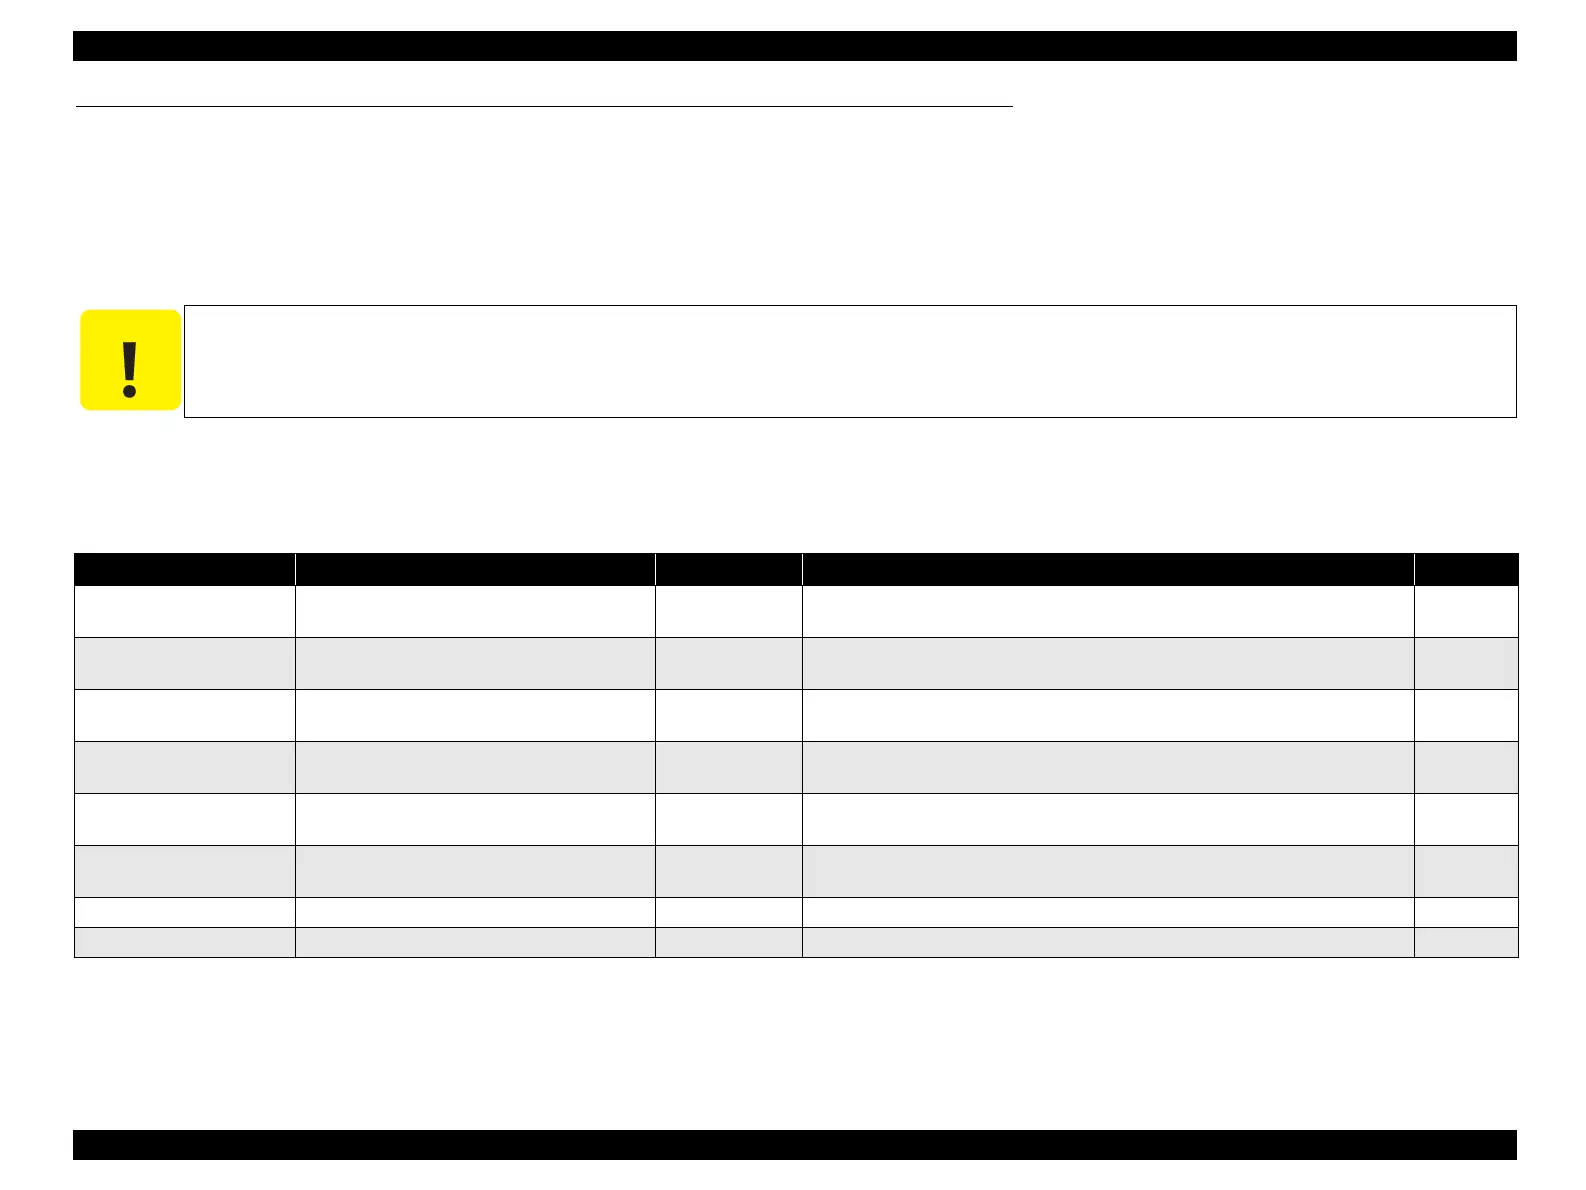
Table 5-1. Adjustment Item List
Repaired Part Adjustment Item Execution Timing Adjustment Execution Means Reference
FUSER ASSY Life counter clear After replacement
with a new one
With the control panel, execute “Reset Fuser Counter” in “Maintenance Menu”.
p553
2ND BTR ASSY Life counter clear After replacement
with a new one
With the control panel, execute “Reset 2ndBTRCounter” in “Maintenance Menu”.
p553
HOUSING ASSY-DEVE Life counter clear After replacement
with a new one
With the control panel, execute “Reset X* DvopCounter” in “Maintenance Menu”.
p553
PWBA ESS Writing USB ID After replacement
with a new one
Execute by the dedicated program
p532
--- Controller Firmware Update --- Start up the product in “Program ROM update” mode by performing special
operation, and send the firmware data from the PC.
p535
--- MCU Firmware Update --- Start up the product in “Engine Firmware Update” mode by performing special
operation, and send the firmware data from the PC.
p537
--- Color table update --- Start up the product in normal mode, and send the program data from the PC. p540
--- Fax unit Firmware Update --- Start up the product in normal mode, and send the program data from the PC. p541
 Loading...


