EPSON AcuLaser CX11/CX11F Revision B
DISASSEMBLY AND ASSEMBLY Printer 458
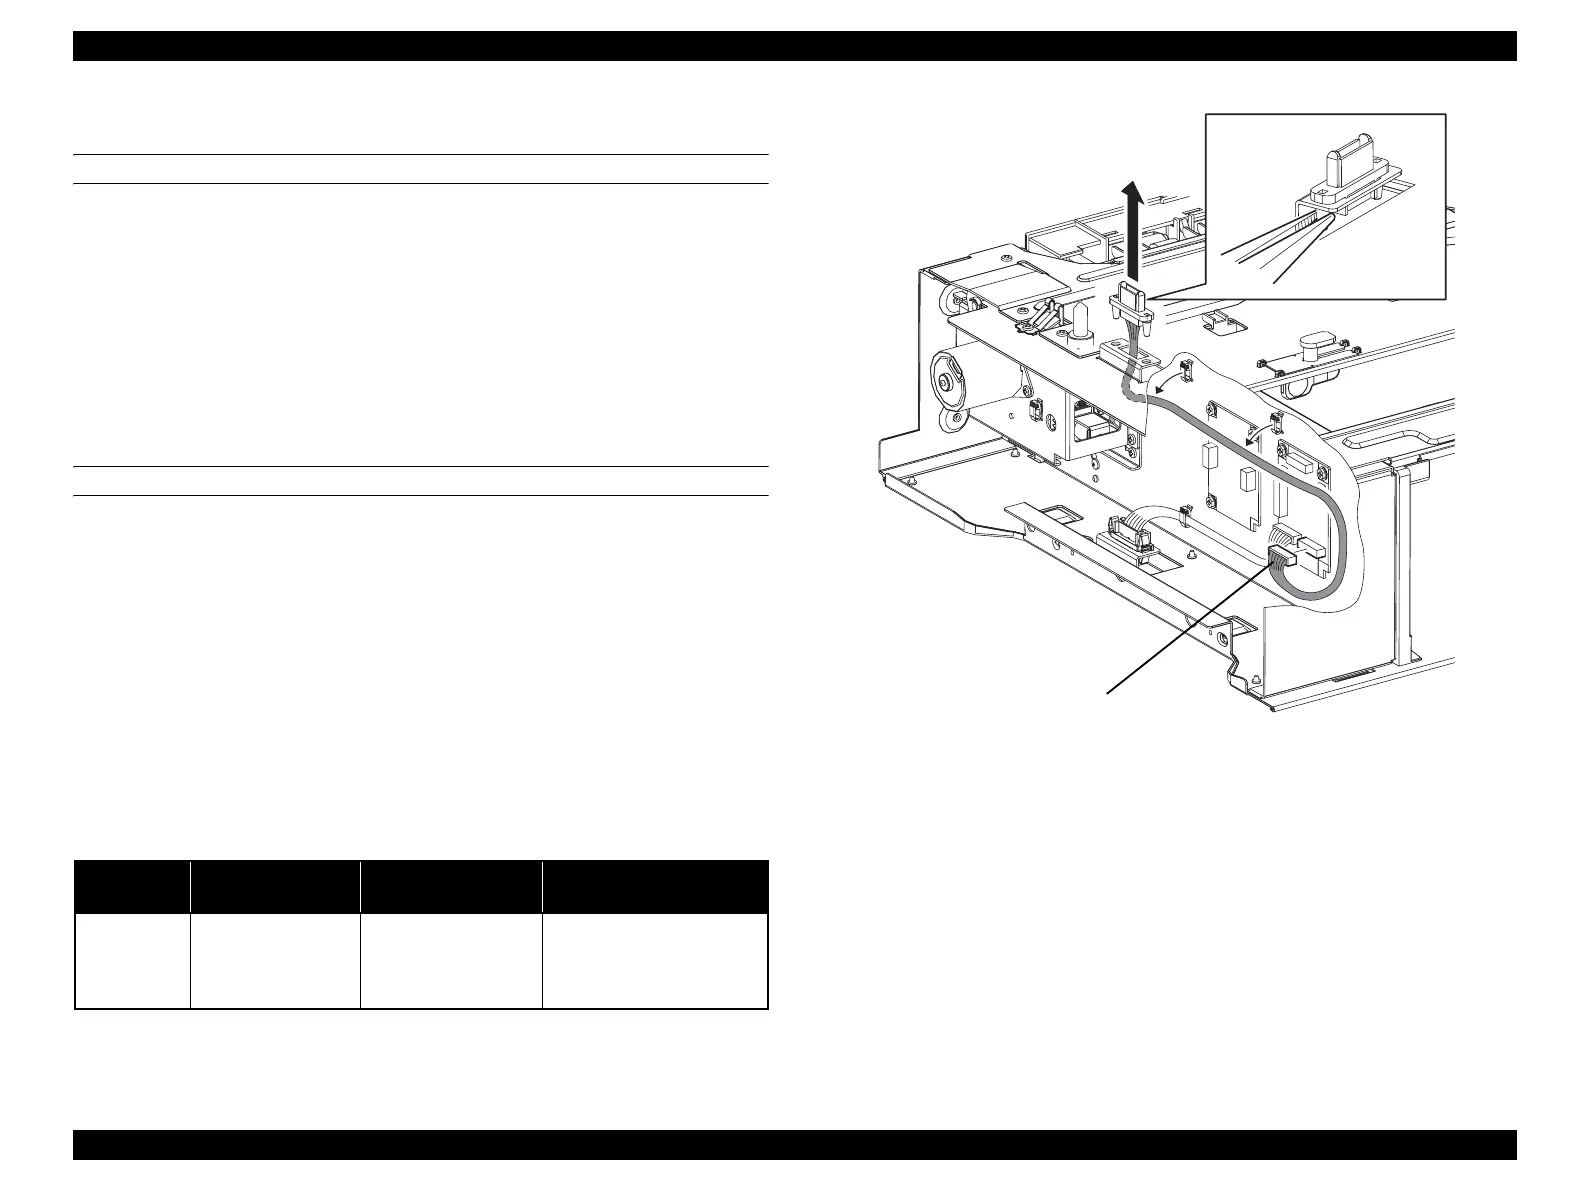
4.2.12.16 HARNESS-ASSY FEED 1
REMOVAL
1. Remove 500 PAPER FEEDER ASSY. (p448)
2. Remove COVER LEFT 500. (p449)
3. Unclamp the clamp fastening the harness of HARNESS-ASSY FEED 1.
4. Disconnect connector (P/J435) from PWBA-TRAY 500.
5. Unhook the 2 hooks fastening HARNESS-ASSY FEED 1 to 500 PAPER
FEEDER ASSY, and remove HARNESS-ASSY FEED 1.
REINSTALLATION
1. Pass the connector (P/J43) on HARNESS-ASSY FEED through the hole on 500
PAPER FEEDER ASSY.
2. Attach HARNESS-ASSY FEED 1 to 500 PAPER FEEDER ASSY, and fasten
with the hook.
3. Connect connector (P/J435) to PWBA-TRAY 500.
4. Fasten the harness of HARNESS-ASSY FEED 1 with the clamp.
5. Attach COVER LEFT 500. (p449)
6. Attach 500 PAPER FEEDER ASSY. (p448)
Figure 4-135. Removal of HARNESS-ASSY FEED 1
Table 4-24. Symptoms when the connector is loose
Connector
No.
Panel Indication Symptom
Error Caused by Connector
Disconnection
P/J435
Ready
Printing using the 500-
sheet Cassette cannot be
made. The main unit
prints normally.
The 500-sheet Cassette
cannot be recognized.
Leg_Sec03_026FA
5)-2
5)-1
4)
3)
3)
manuals4you.commanuals4you.com

 Loading...


