EPSON AcuLaser CX11/CX11F Revision B
DISASSEMBLY AND ASSEMBLY Printer 310
4.2.2.2 TRAY EXTENSION, COVER TRAY
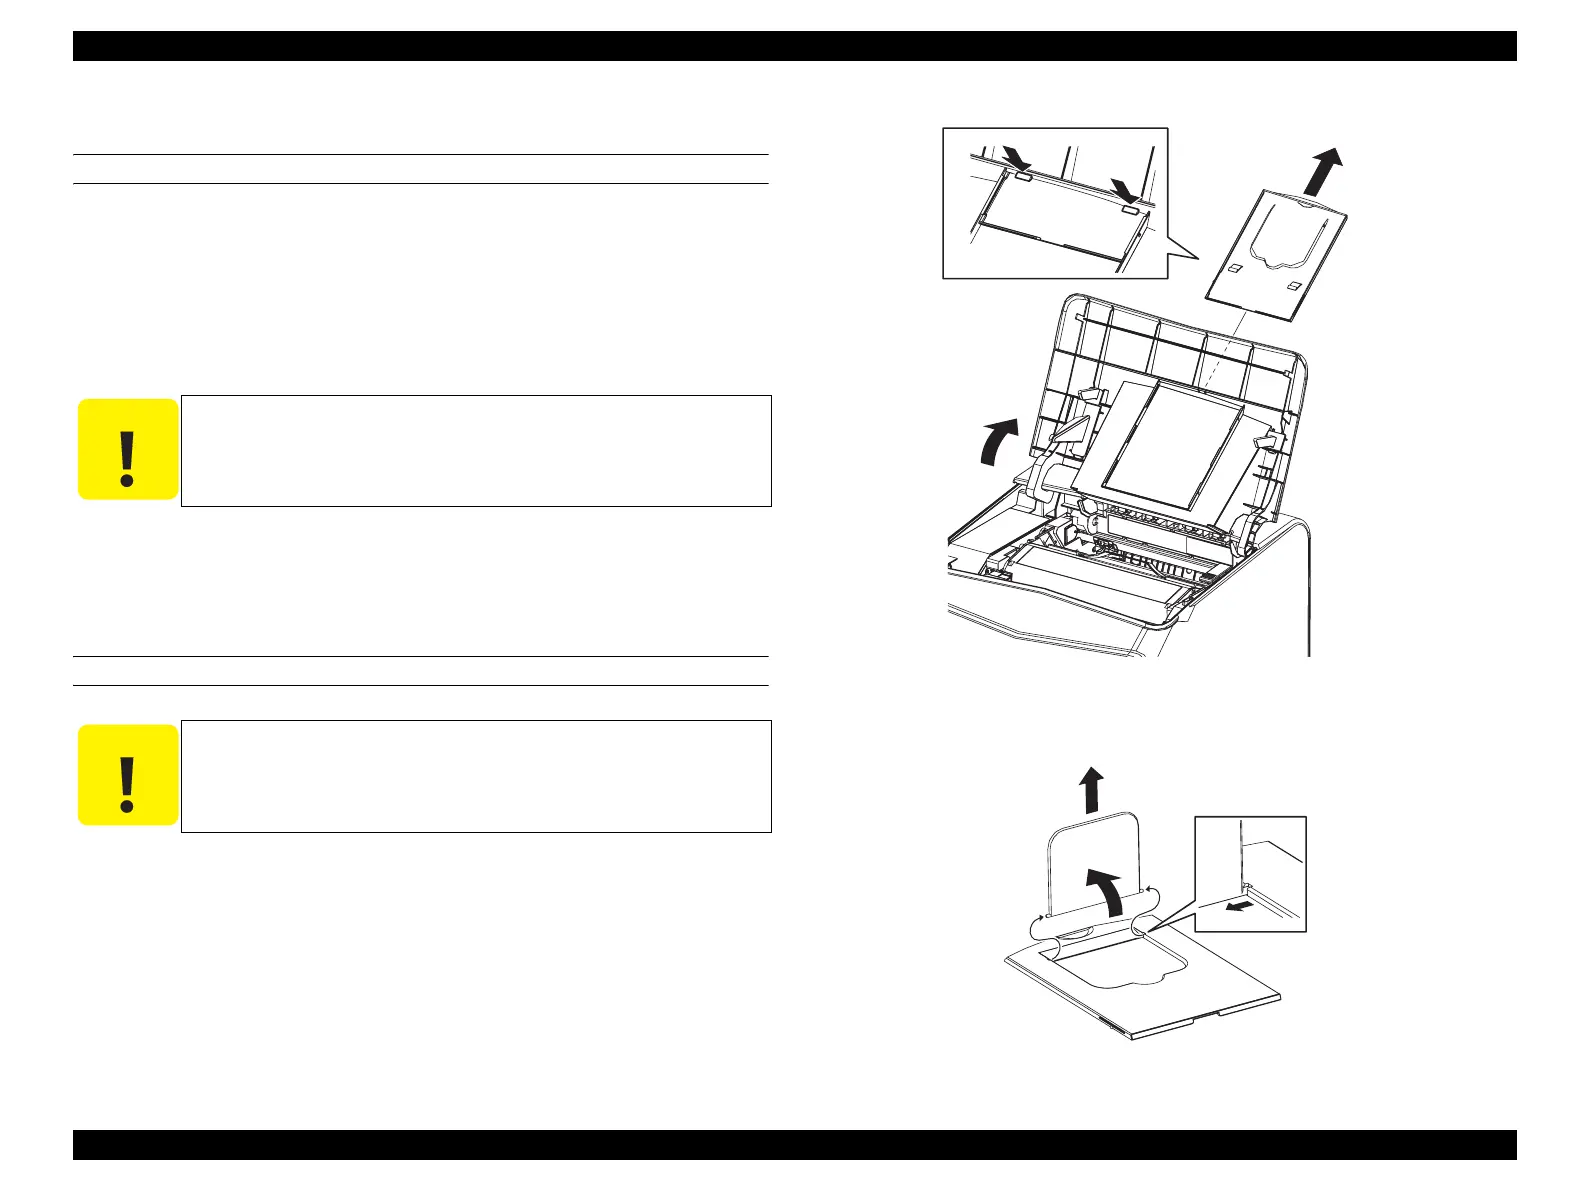
REMOVAL
1. Draw out COVER TRAY until it comes to a stop.
2. Open COVER ASSY TOP.
3. Unhook the hook fastening COVER TRAY to COVER ASSY TOP, and remove
COVER TRAY together with TRAY EXTENSION.
4. Open TRAY EXTENSION.
5. Bend the TRAY EXTENSION boss with a small screw driver or similar tool, and
draw out and remove the TRAY EXTENSION boss from the hole on COVER
TRAY.
REINSTALLATION
1. With TRAY EXTENSION opened, insert the boss on one side of the TRAY
EXTENSION into the hole on COVER TRAY, and attach the TRAY
EXTENSION boss on the other side into the hole on COVER TRAY while
bending down the TRAY EXTENSION boss.
2. Close TRAY EXTENSION.
3. Align COVER TRAY with the attachment position on COVER ASSY TOP, and
attach COVER TRAY together with TRAY EXTENSION.
4. Close COVER ASSY TOP.
5. Push in COVER TRAY gently until it comes to a stop.
Figure 4-4. Removal of TRAY EXTENSION and COVER TRAY (1)
Figure 4-5. Removal of TRAY EXTENSION and COVER TRAY (2)
C A U T I O N
When performing the following work, take care not to damage the
TRAY EXTENSION boss.
C A U T I O N
When performing the following work, take care not to damage the
TRAY EXTENSION boss.
Leg_Sec03_003EC
2)
3)-2
3)-1
3)-1
Leg_Sec03_501EB
5)-2
4)
5)-1
manuals4you.commanuals4you.com
 Loading...


