EPSON AcuLaser CX11/CX11F Revision B
DISASSEMBLY AND ASSEMBLY Printer 412
REINSTALLATION
1. Match the gear on the left side of HOUSING ASSY-DEVE of the same color as
the indicated color on FRAME ASSY-ROTARY with the gear on FRAME ASSY-
ROTARY, and attach HOUSING ASSY-DEVE.
2. Match the hole on HOUSING ASSY-DEVE with the attachment hole on the left
side of FRAME ASSY-ROTARY, insert the shaft on PIVOT ASSY, and fasten
the left side of HOUSING ASSY-DEVE with the screw (silver, with flange,
tapping, 8 mm).
3. Match the hole on HOUSING ASSY-DEVE with the attachment hole on the right
side of FRAME ASSY-ROTARY, insert the shaft of PIVOT AD, and fasten the
hook on PIVOT AD to attach HOUSING ASSY-DEVE.
4. Attach GUIDE CRU ASSY AD. (p393)
5. Attach SENSOR TR-0. (p387)
6. Attach BCR CLN XERO ASSY. (p399)
7. Attach FRAME ASSY-PH. (p352)
8. Attach 2ND BTR ASSY. (p374)
9. Attach COVER ASSY TOP. (p308)
10. Attach COVER ASSY RH. (p326)
11. Attach the Toner Cartridge.
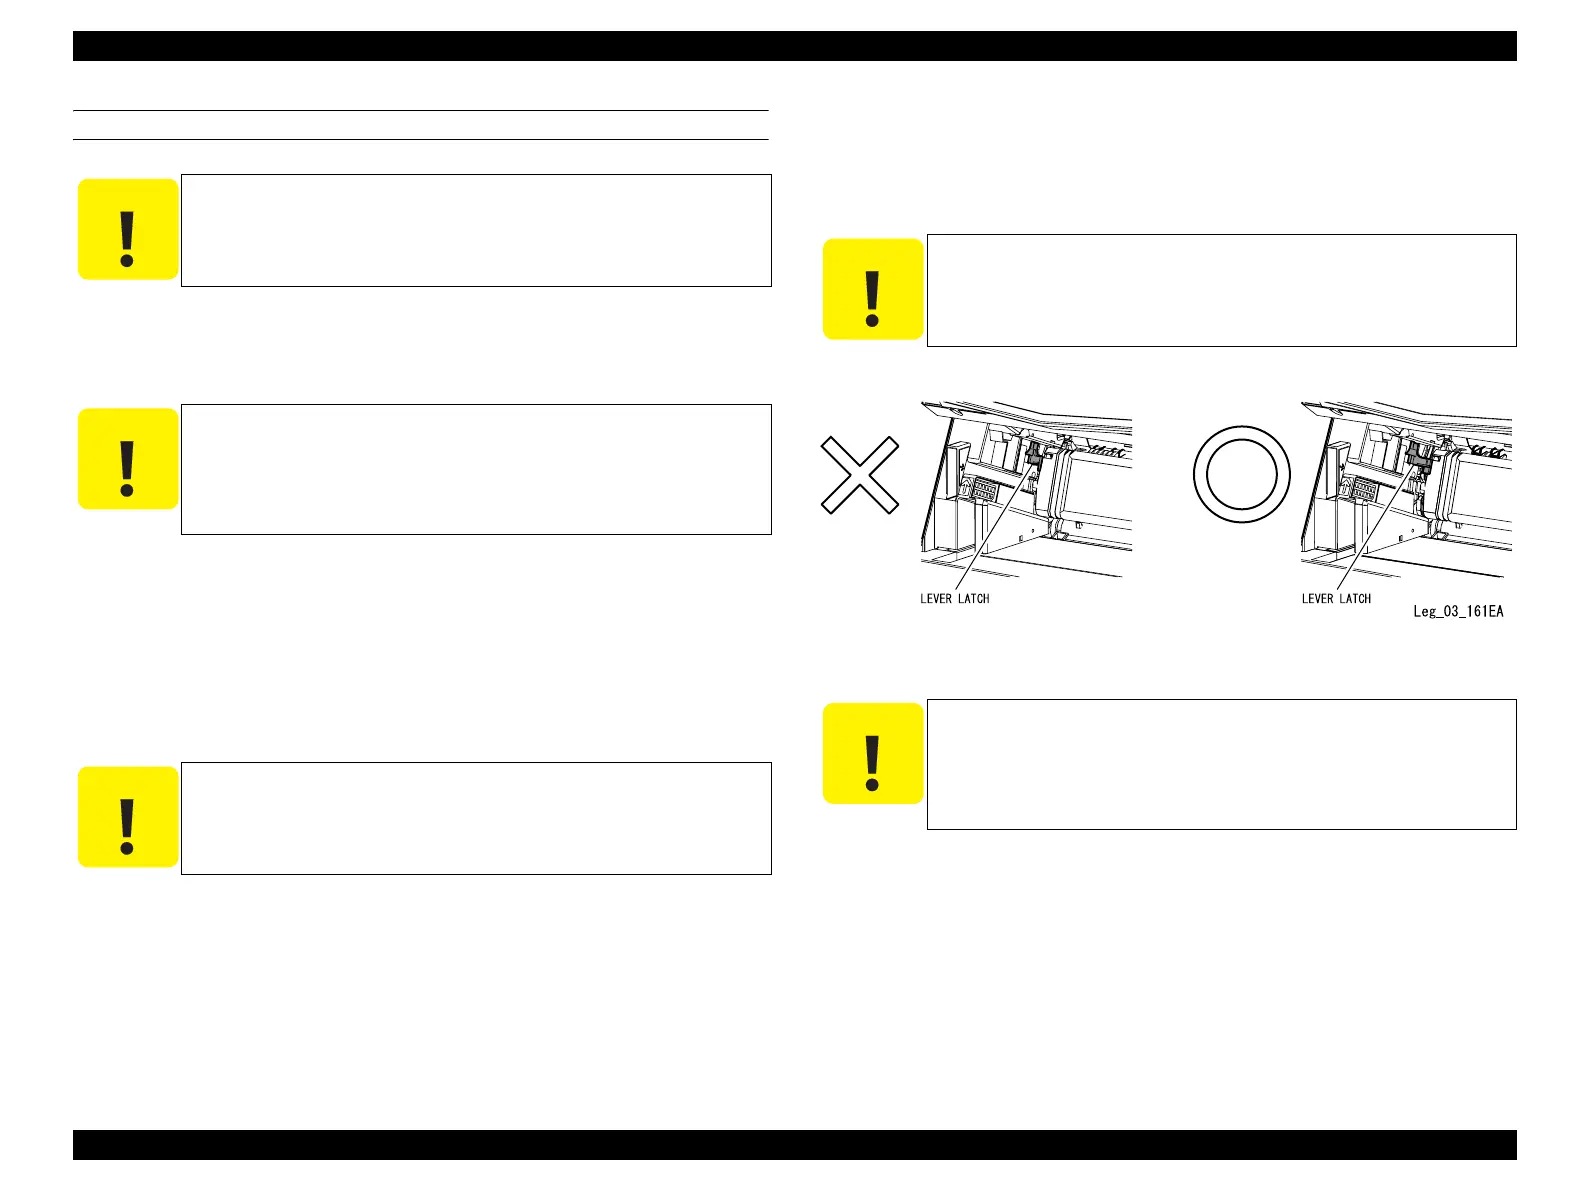
Figure 4-97. LEVER LATCH Position
C A U T I O N
Holes are provided in the protrusion portion on FRAME ASSY-
ROTARY for preventing mis-insertion of HOUSING ASSY-DEVE.
The attachment positions of each color of HOUSING ASSY-DEVE
is indicated as K, Y, M, and C on FRAME ASSY-ROTARY.
C A U T I O N
The spring under both sides of the bottom of HOUSING ASSY-
DEVE must be placed firmly on the spring receptacle of
FRAME ASSY-ROTARY.
A spring having a thick right side and a thin left side is used as
the spring under HOUSING ASSY-DEVE.
C A U T I O N
Removed PIVOT ADs should not be re-used; only new PIVOT ADs
in the KIT should be used.
C A U T I O N
When installing the ET Cartridge, be careful not to sandwich the
LEVER LATCH between the cartridge and the main unit as shown
in the left figure below. Install the ET cartridges correctly as shown
in the right figure below.
C A U T I O N
Be sure to clean the ROS ASSY window with the CLEANER
ASSY after installing the ET Cartridges.
Be sure to reset the life counter of the Housing ASSY-DEVE
after replacing it with a new one.
(See “6.4.1.1 Maintenance Menu Items” (p553))
manuals4you.commanuals4you.com
 Loading...


