EPSON AcuLaser CX11/CX11F Revision B
DISASSEMBLY AND ASSEMBLY Printer 408
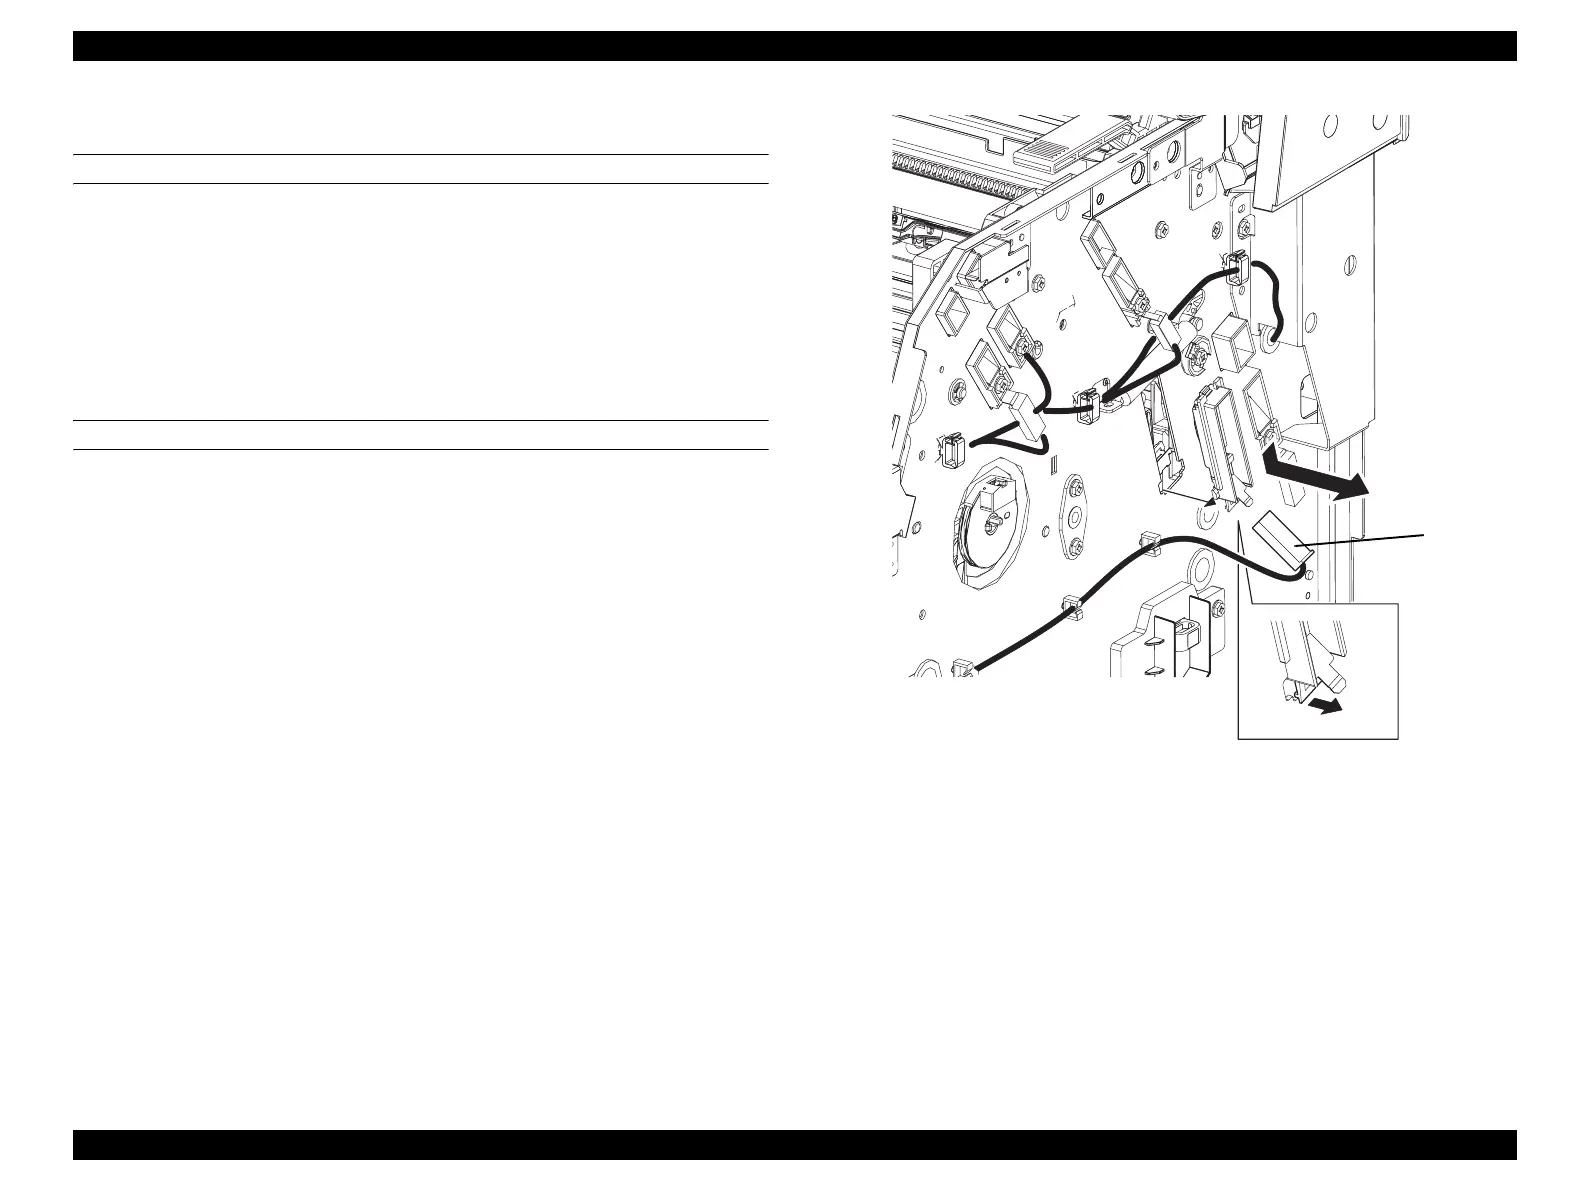
4.2.8.4 HOLDER ASSY-BIAS
REMOVAL
1. Remove COVER ASSY RH. (p326)
2. Remove WIRE ASSY DEVE connected to HOLDER ASSY-BIAS.
3. Unhook the hook on HOLDER ASSY-BIAS from the main unit, and slide down,
match the protrusion on HOLDER ASSY-BIAS with the notch on the main unit,
and remove HOLDER ASSY-BIAS.
REINSTALLATION
1. Match the protrusion on HOLDER ASSY-BIAS with the notch of the attachment
hole on the main unit, and attach, and slide HOLDER ASSY-BIAS upwards and
fasten with a hook.
2. Attach WIRE ASSY DEVE to HOLDER ASSY-BIAS.
3. Attach COVER ASSY RH. (p326)
Figure 4-93. Removal of HOLDER ASSY-BIAS
Leg_Sec03_092RA
3)-2
3)-1
2)
manuals4you.commanuals4you.com
 Loading...


