EPSON AcuLaser CX11/CX11F Revision B
TROUBLESHOOTING Printer 249
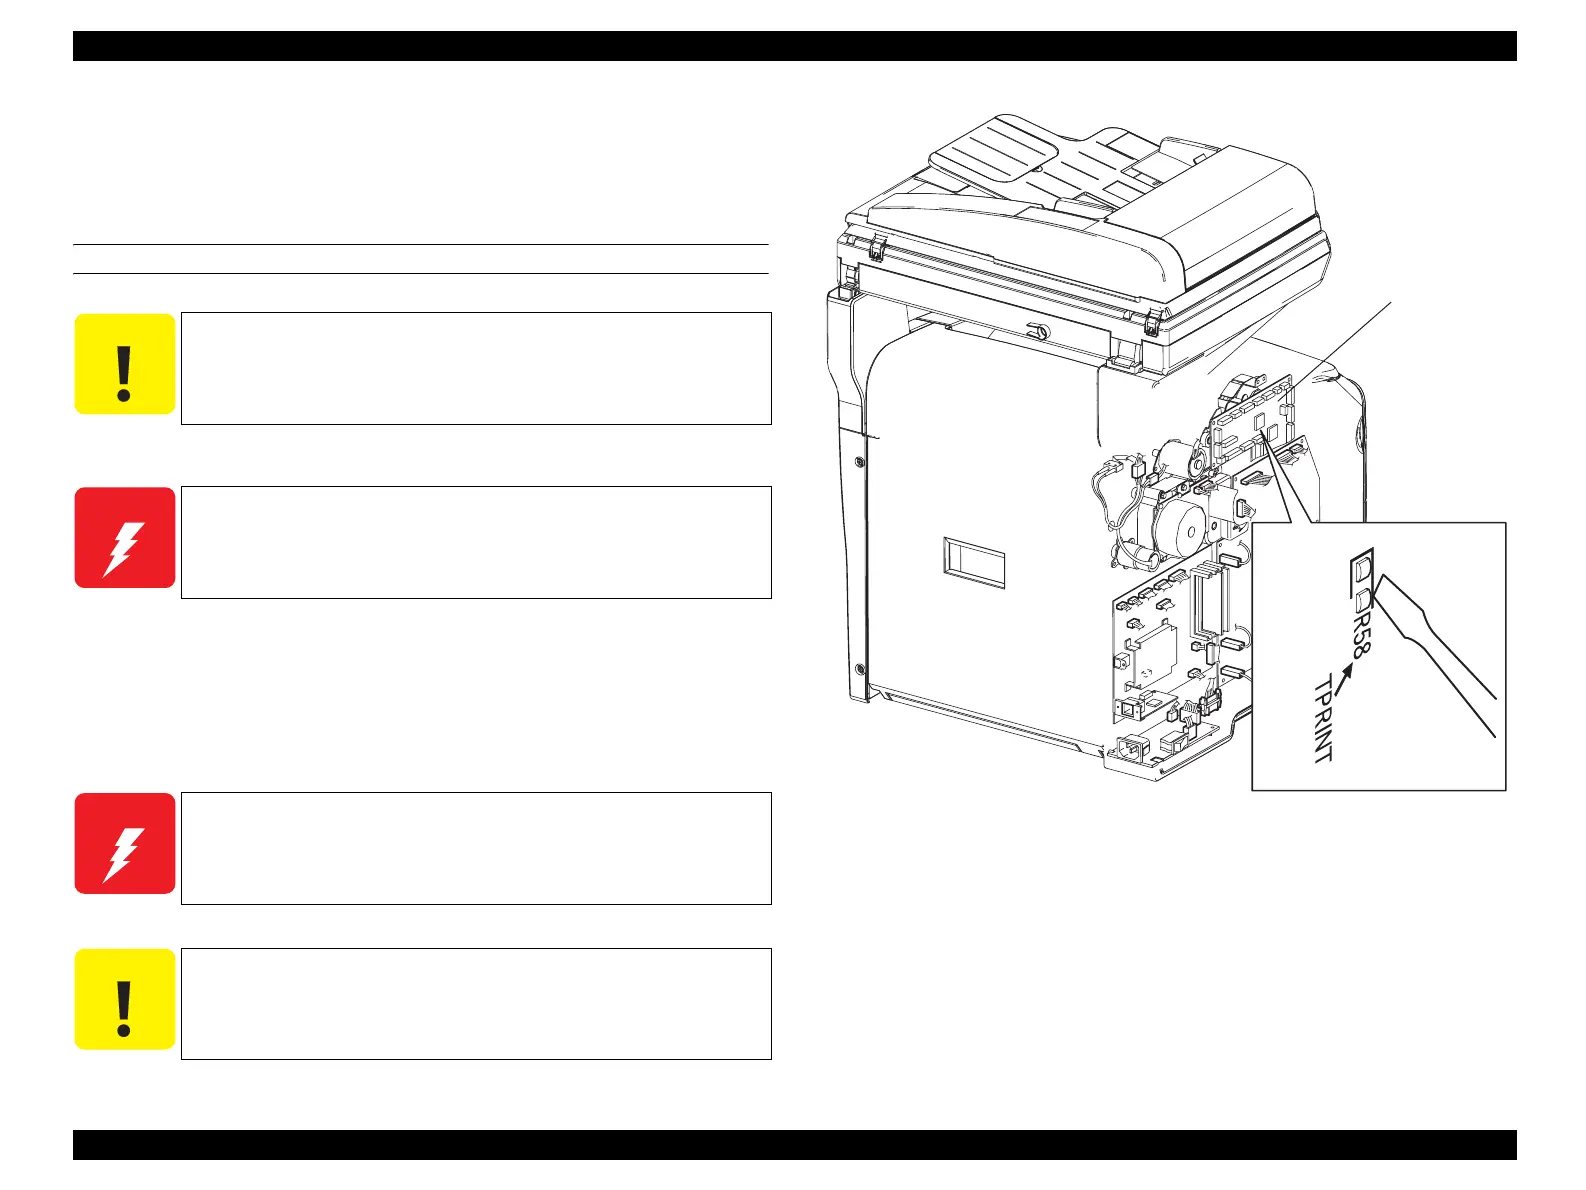
3.4.5.1 Engine Test Print
To check the IOT operation, it is possible to print PWBA MCU built-in sample
continuously without being routed through the controller. If the problem does not occur
on the PWBA MCU built-in sample, the cause of the problem may be controller.
PRINTING METHOD
1. Remove the COVER ASSY LH. (p.321)
2. Set paper into MSI and turn the power on.
3. In Ready mode, short-circuit the pad for test print on the PWBA MCU with
a small screwdriver or a similar tool. The pad is located at upper right of
the interface connector .
Figure 3-5. The Pad for Test Print
C A U T I O N
The test print cannot be made if an engine-related error has
occurred.
W A R N I N G
Never touch the energized or driving part when performing the
following procedure.
W A R N I N G
When short-circuiting the pad, be careful not to contact the other
elements by hand or tool.
C A U T I O N
1 sheet of test print is printed out by 1 time of short-circuiting.
As for Ready mode, refer to “2.2.7 Operating Modes” (p.122)
Leg_002_003RB
PWBA MCU
 Loading...


