EPSON AcuLaser CX11/CX11F Revision B
DISASSEMBLY AND ASSEMBLY Printer 361
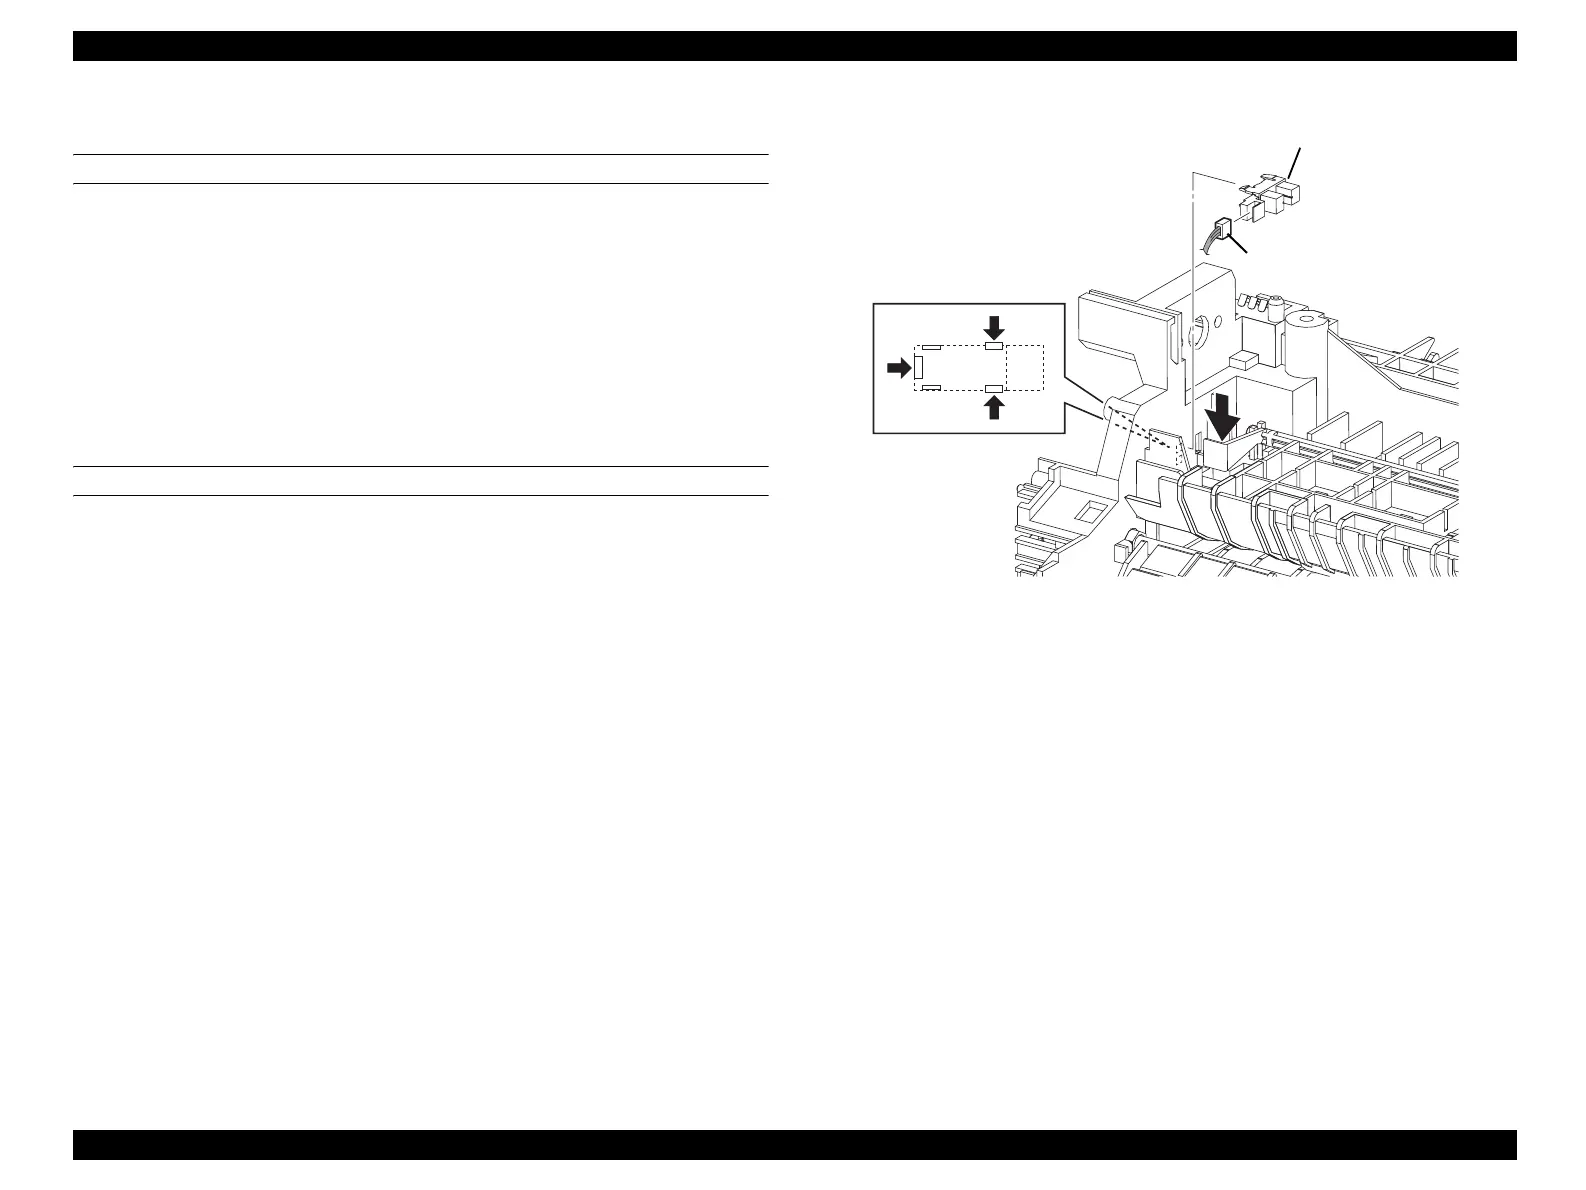
4.2.4.11 SENSOR REGI
REMOVAL
1. Remove FRAME ASSY-PH. (p352)
2. Remove MOTOR-PH. (p362)
3. Remove DRIVE ASSY-PH. (p365)
4. Unhook the three hooks fastening SENSOR REGI to FRAME ASSY-PH, down
ACTUATOR-REGI with your fingers press and remove SENSOR REGI.
5. Disconnect connector (P/J102) from SENSOR REGI.
REINSTALLATION
1. Connect connector (P/J102) to SENSOR REGI.
2. Press down ACTUATOR-REGI with your fingers, match the hooks on SENSOR
REGI with the attachment position, and attach to FRAME ASSY-PH.
3. Attach DRIVE ASSY-PH. (p365)
4. Attach MOTOR-PH. (p362)
5. Attach FRAME ASSY-PH. (p352)
Figure 4-53. Removal of SENSOR REGI
Leg_Sec03_065FB
4)-3
5)
4)-1
4)-2

 Loading...


