EPSON AcuLaser CX11/CX11F Revision B
DISASSEMBLY AND ASSEMBLY Printer 452
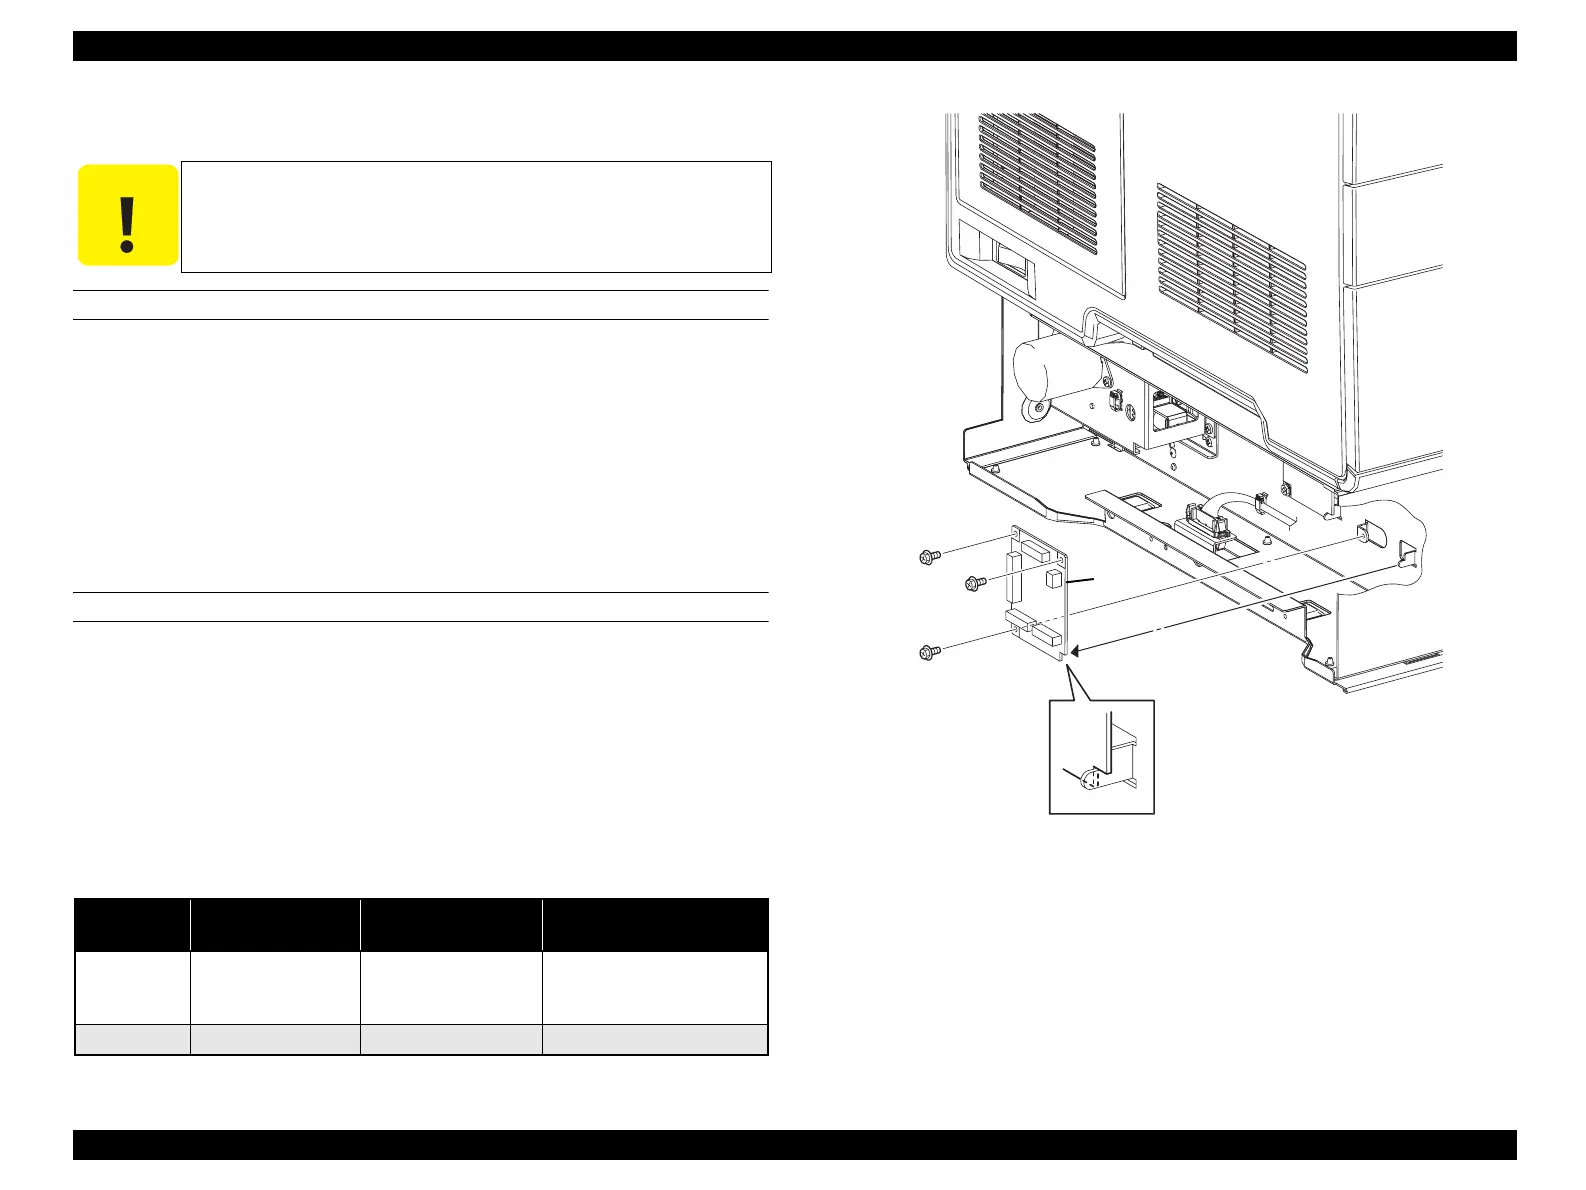
4.2.12.10 PWBA TRAY 500
REMOVAL
1. Remove COVER LEFT 500. (p449)
2. Disconnect connector (P/J435), connector (P/J436) and connector (P/J437) from
PWBA TRAY 500.
3. Remove the 3 screws (silver, with flange, 6 mm) fastening PWBA TRAY 500 to
500 PAPER FEEDER ASSY.
4. Remove PWBA TRAY 500 from 500 PAPER FEEDER ASSY.
REINSTALLATION
1. Match the notch at the bottom right of PWBA TRAY 500 with the protrusion on
500 PAPER FEEDER ASSY to attach.
2. Fasten PWBA TRAY 500 to 500 PAPER FEEDER ASSY with the 3 screws
(silver, with flange, 6 mm).
3. Connect connector (P/J435), connector (P/J436) and connector (P/J437) to PWBA
TRAY 500.
4. Attach COVER LEFT 500. (p449)
Figure 4-129. Removal of PWBA TRAY 500
C A U T I O N
Avoid staticky places such as on a carpet especially when removing
or inserting a Board. Before starting work with the Board, make
sure to touch metallic portion of the printer connected to the earth
to let your body come out free of static electricity.
Table 4-19. Symptoms when the connector is loose
Connector
No.
Panel Indication Symptom
Error Caused by Connector
Disconnection
P/J435 Ready
The main unit prints
normally. 500-sheet
Cassette is not recognized.
The 500-sheet Cassette
cannot be recognized.
P/J437 G Open Printing is not possible. ---
Leg_Sec03_030EA
3)
3)
3)
4)
manuals4you.commanuals4you.com
 Loading...


