EPSON AcuLaser CX11/CX11F Revision B
DISASSEMBLY AND ASSEMBLY Printer 384
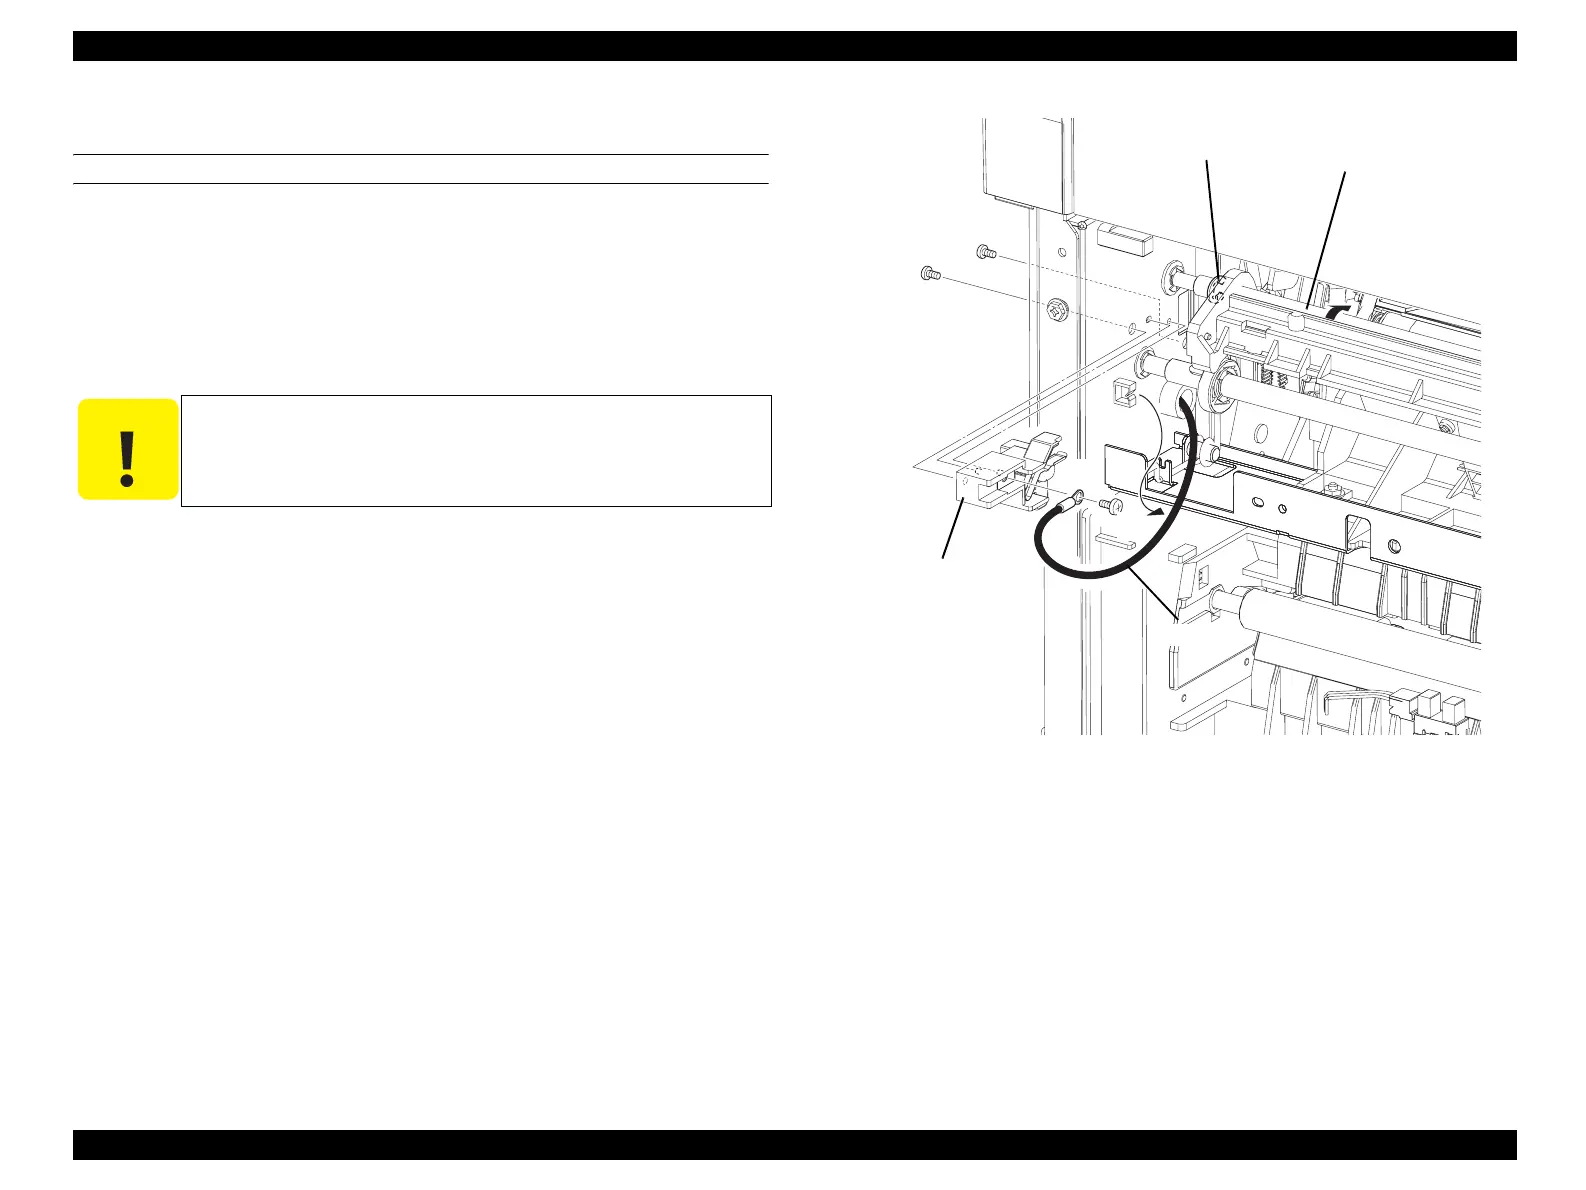
4.2.5.11 PLATE BIAS-2ND ASSY
REMOVAL
1. Remove COVER ASSY RH. (p326)
2. Remove CHUTE ASSY-FSR and COVER ASSY-RR 2ND. (p366)
3. Remove 2ND BTR ASSY. (p374)
4. Remove the 2 screws (silver, with flange, tapping, 6 mm) fastening PLATE BIAS-
2ND ASSY to the main unit.
5. Unclamp the clamp fastening WIRE ASSY 2BTR, and slightly release PLATE
BIAS-2ND ASSY from the main unit.
6. Remove the screw (silver, tapping, 6 mm) fastening the terminal of WIRE ASSY
2BTR to PLATE BIAS-2ND ASSY.
7. Remove WIRE ASSY 2BTR from PLATE BIAS-2ND ASSY, and remove
PLATE BIAS-2ND ASSY.
Figure 4-71. Removal of PLATE BIAS-2ND ASSY
C A U T I O N
When performing the following work, take care not to remove
PLATE BIAS-2ND ASSY too far as it is connected by WIRE ASSY
2BTR.
Le
Sec03
150RB
5)-2
4)
4)
E ring
SHAFT-CENT 2ND
7)
6)
5)-1
manuals4you.commanuals4you.com
 Loading...


