EPSON AcuLaser CX11/CX11F Revision B
DISASSEMBLY AND ASSEMBLY Printer 316
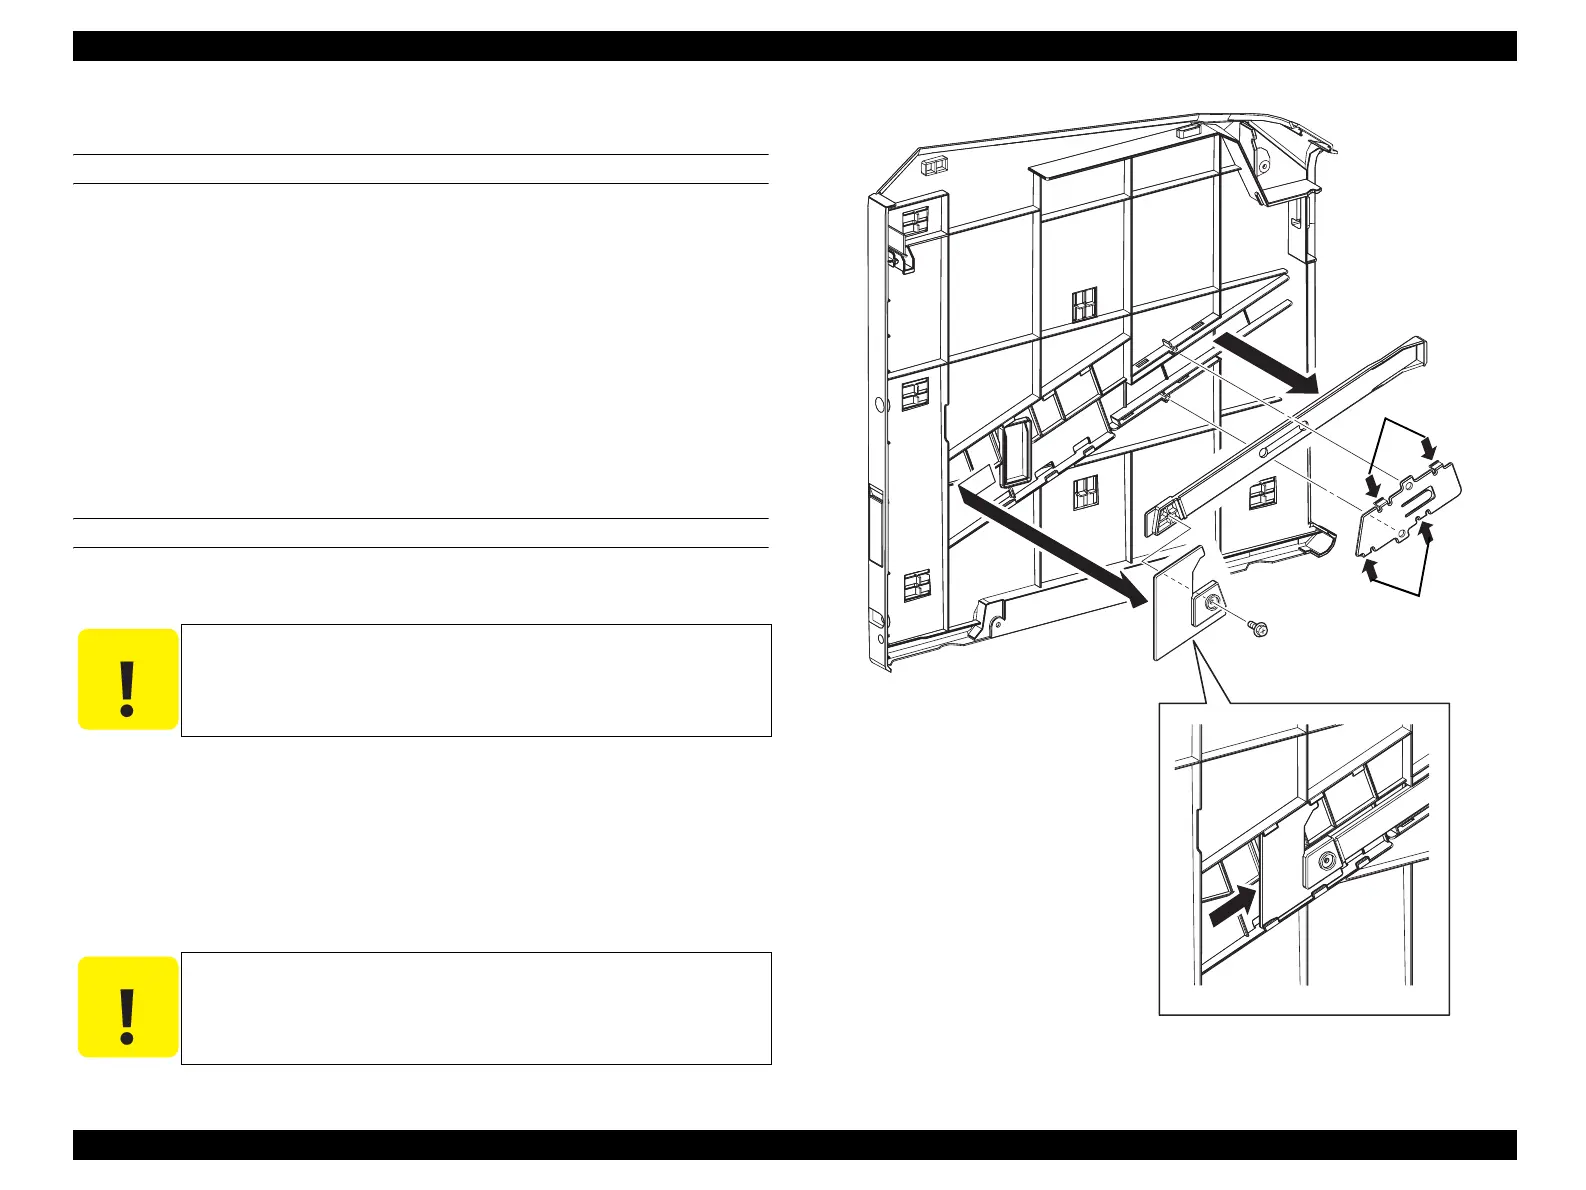
4.2.2.8 COVER RH, SLIDE BAR, COVER ROS WINDOW
REMOVAL
1. Remove COVER ASSY RH. (p326)
2. Unhook the four hooks fastening GUIDE BAR to COVER RH, and remove
GUIDE BAR.
3. Remove the screw (silver, with flange, tapping, 8 mm) fastening COVER ROS
WINDOW to SLIDE BAR.
4. Slide COVER ROS WINDOW along the rib of COVER RH, and remove COVER
ROS WINDOW from the protrusion on COVER RH.
5. Remove SLIDE BAR from COVER RH.
REINSTALLATION
1. Attach SLIDE BAR at the attachment position on the rear side of COVER RH.
2. Match COVER ROS WINDOW with the attachment position on the rear of
COVER RH, slide COVER ROS WINDOW along the ribs on COVER RH, and
attach COVER ROS WINDOW to SLIDE BAR.
3. Fasten COVER ROS WINDOW to SLIDE BAR with the screw (silver, with
flange, tapping, 8 mm).
4. Match the holes on GUIDE BAR with the boss of COVER RH, attach GUIDE
BAR, and fasten by the four hooks.
5. Attach COVER ASSY RH. (p326)
Figure 4-11. Removal of COVER RH, SLIDE BAR and COVER ROS WINDOW
C A U T I O N
When performing the following work, be sure to insert the top and
bottom of COVER ROS WINDOW inside the protrusions on
COVER RH.
C A U T I O N
After performing the above work, move SLIDE BAR to make sure
that COVER ROS WINDOW can be opened/closed smoothly.
Leg_Sec03_007EA
CAUTION
5)
4)
3)
2)
2)
manuals4you.commanuals4you.com
 Loading...


