EPSON AcuLaser CX11/CX11F Revision B
DISASSEMBLY AND ASSEMBLY Printer 356
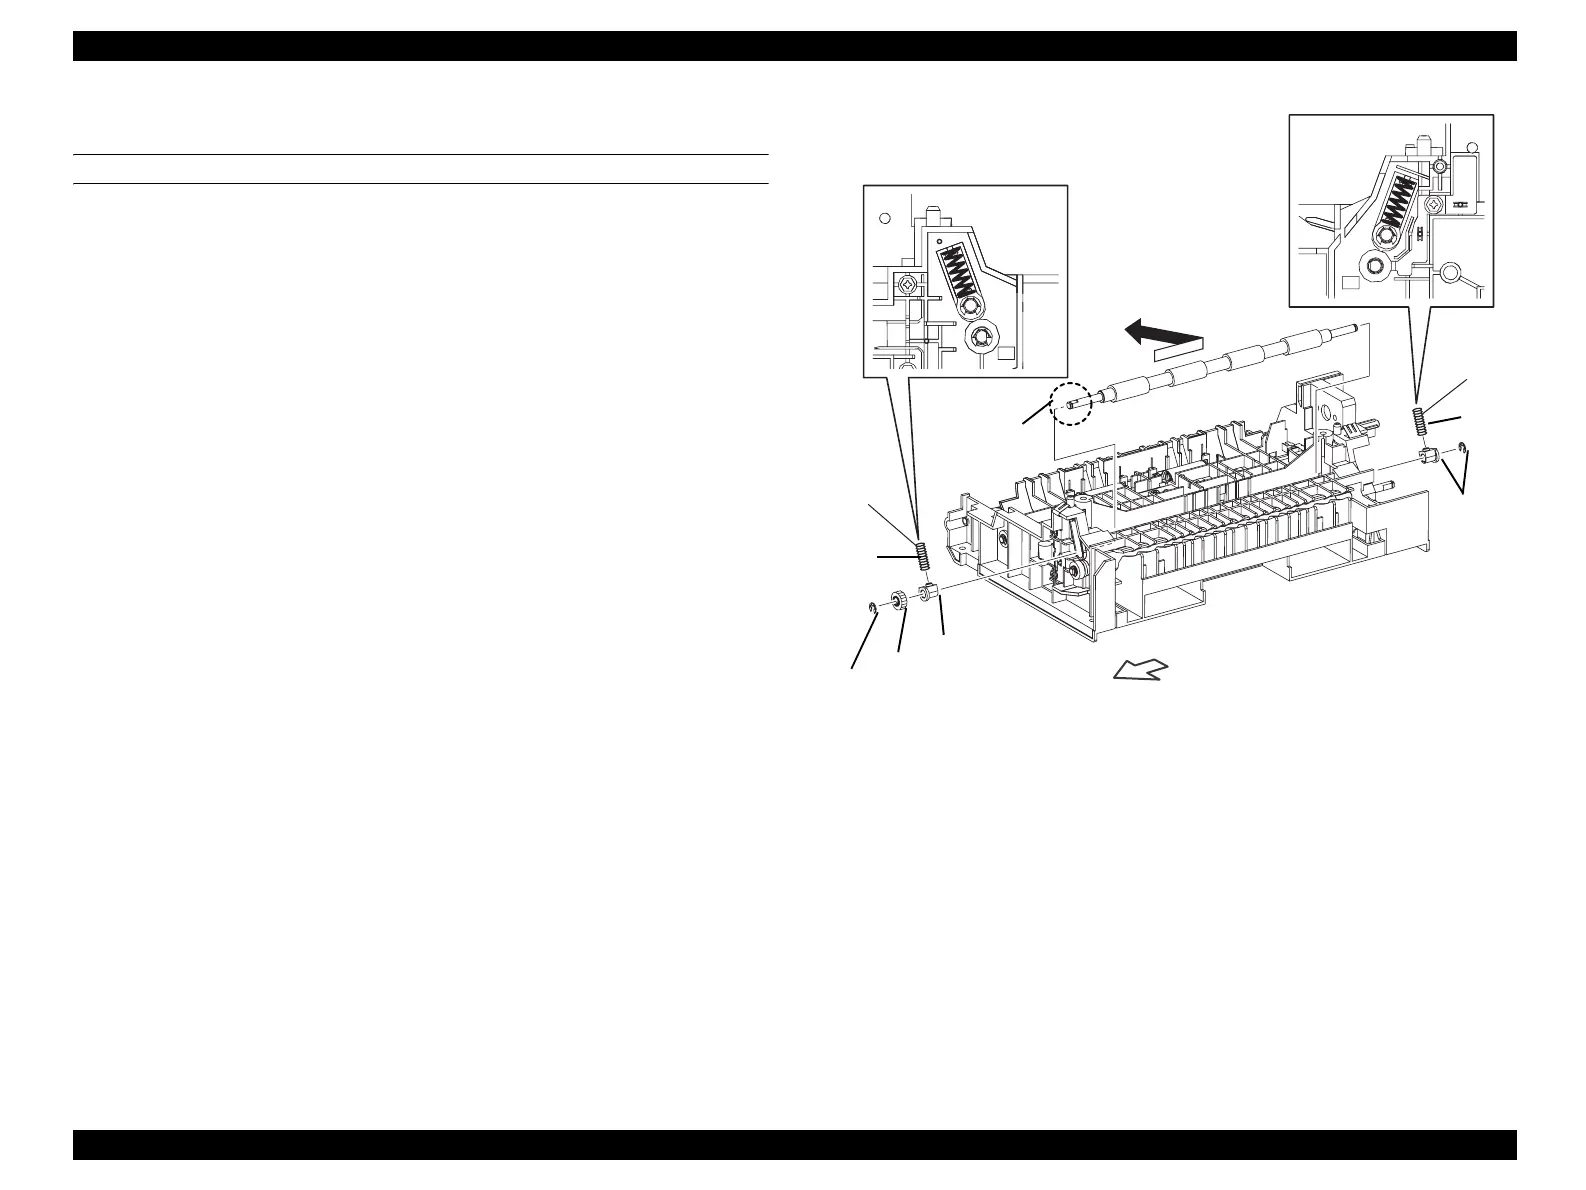
4.2.4.7 ROLL REGI RUBBER
REMOVAL
1. Remove FRAME ASSY-PH. (p352)
2. Remove MOTOR-PH. (p362)
3. Remove DRIVE ASSY-PH. (p365)
4. Remove CLUTCH ASSY REGI. (p354)
5. Remove the E-ring fastening GEAR-REGI on ROLL REGI RUBBER from
FRAME ASSY-PH, and remove GEAR-REGI.
6. Remove the right-side BEARING RUBBER and SPRING-REGI R (METAL)
fastening ROLL REGI RUBBER from FRAME ASSY-PH.
7. Remove the E-ring fastening ROLL REGI RUBBER from FRAME ASSY-PH,
and BEARING RUBBER and SPRING-REGI L (BLACK) on the left side.
8. Temporarily slide ROLL REGI RUBBER to the left, draw out the shaft on ROLL
REGI RUBBER from the right-side bearing on FRAME ASSY-PH, and remove
ROLL REGI RUBBER.
Figure 4-49. Removal of ROLL REGI RUBBER
Leg_Sec03_060FB
(BLACK)
(METAL)
8)
D cut surface
7)-2
7)-1
RIGHT
6)-1
5)-2
5)-1
6)-2
manuals4you.commanuals4you.com
 Loading...


