EPSON AcuLaser CX11/CX11F Revision B
DISASSEMBLY AND ASSEMBLY Printer 479
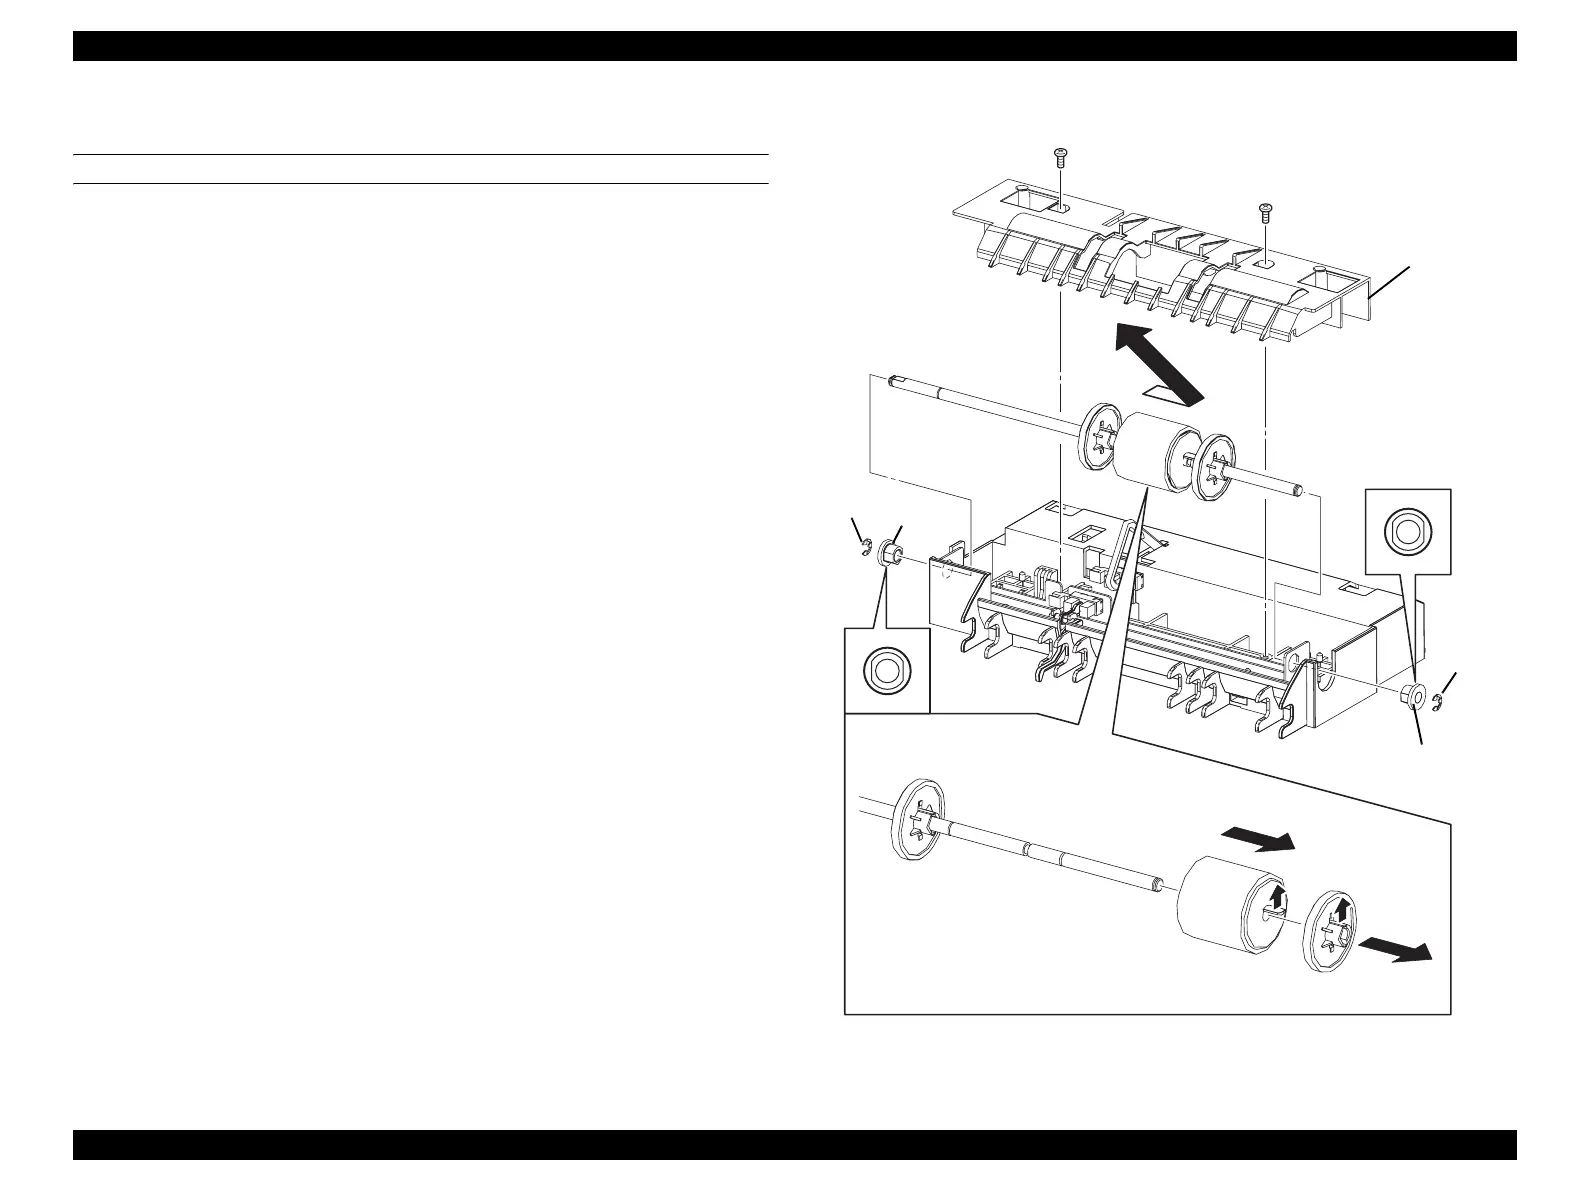
4.2.12.32 ROLL ASSY FEED 500
REMOVAL
1. Remove 500 PAPER CASSETTE ASSY. (p442)
2. Remove COVER LEFT 500. (p449)
3. Remove CLUTCH ASSY FEED. (p457)
4. Remove DRIVE ASSY FEED. (p454)
5. Remove HOUSING ASSY FEED. (p472)
6. Remove the 2 screws (silver, tapping, 8 mm) fastening COVER FEED to
HOUSING ASSY FEED.
7. Remove COVER FEED from HOUSING ASSY FEED.
8. Remove the E-rings fastening both sides of SHAFT FEED from HOUSING ASSY
FEED, and remove the left and right BEARING SLEEVEs.
9. Temporarily slide SHAFT FEED to the right, draw out SHAFT FEED from the
left-side bearing on HOUSING ASSY FEED, and remove together with ROLL
ASSY FEED 500 and ROLL SUPPORT 500.
10. Unhook the hook on ROLL SUPPORT 500 on the right side fastened to SHAFT
FEED, and remove ROLL SUPPORT 500.
11. Unhook the hook on ROLL ASSY FEED 500 fastened to SHAFT FEED, and
remove ROLL ASSY FEED 500.
Figure 4-153. Removal of ROLL ASSY FEED 500
Leg_Sec03_037FA
6)
8)-2
8)-1
8)-1
8)-2
11)-2
11)-1
10)-1
10)-2
6)
7)
9)
 Loading...


