EPSON AcuLaser CX11/CX11F Revision B
DISASSEMBLY AND ASSEMBLY Printer 478
4.2.12.31 SENSOR T/R
REMOVAL
1. Remove 500 PAPER CASSETTE ASSY. (p442)
2. Remove COVER LEFT 500. (p449)
3. Remove CLUTCH ASSY FEED. (p457)
4. Remove DRIVE ASSY FEED. (p454)
5. Remove HOUSING ASSY FEED. (p472)
6. Remove ROLL ASSY FEED 500. (p479)
7. Remove ACTUATOR T/R. (p477)
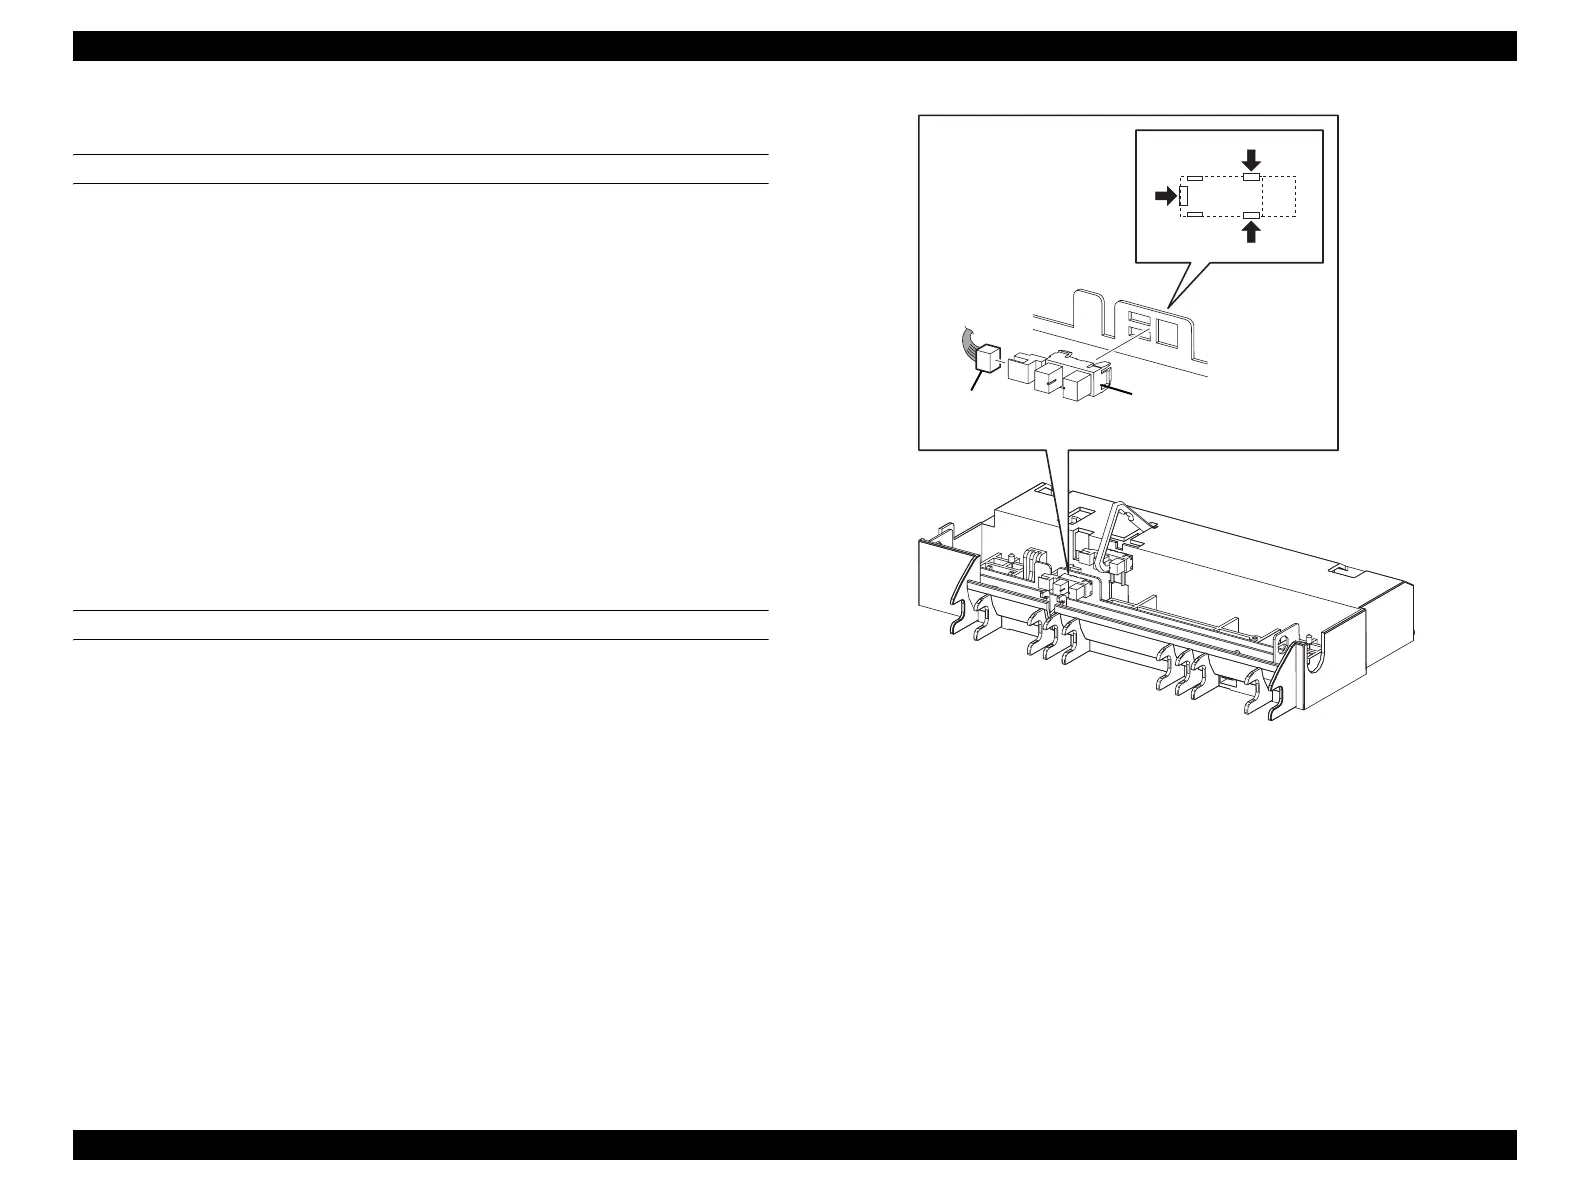
8. Disconnect connector (P/J120) from SENSOR T/R.
9. Unhook the three hooks fastening SENSOR T/R to HOUSING ASSY FEED, and
remove SENSOR T/R.
REINSTALLATION
1. Match the hooks on SENSOR T/R with the attachment positions, and attach to
HOUSING ASSY FEED.
2. Connect connector (P/J120) to SENSOR T/R.
3. Attach ACTUATOR T/R. (p477)
4. Attach ROLL ASSY FEED 500. (p479)
5. Attach HOUSING ASSY FEED. (p472)
6. Attach DRIVE ASSY FEED. (p454)
7. Attach CLUTCH ASSY FEED. (p457)
8. Attach COVER LEFT 500. (p449)
9. Attach 500 PAPER CASSETTE ASSY. (p442)
Figure 4-152. Removal of SENSOR T/R
Leg_Sec03_036FA
8)
9)-2
9)-1
manuals4you.commanuals4you.com
 Loading...


