EPSON AcuLaser CX11/CX11F Revision B
DISASSEMBLY AND ASSEMBLY Scanner Section 481
4.3 Scanner Section
4.3.1 ADF Unit
REMOVAL
1. Remove the Scanner. (p306)
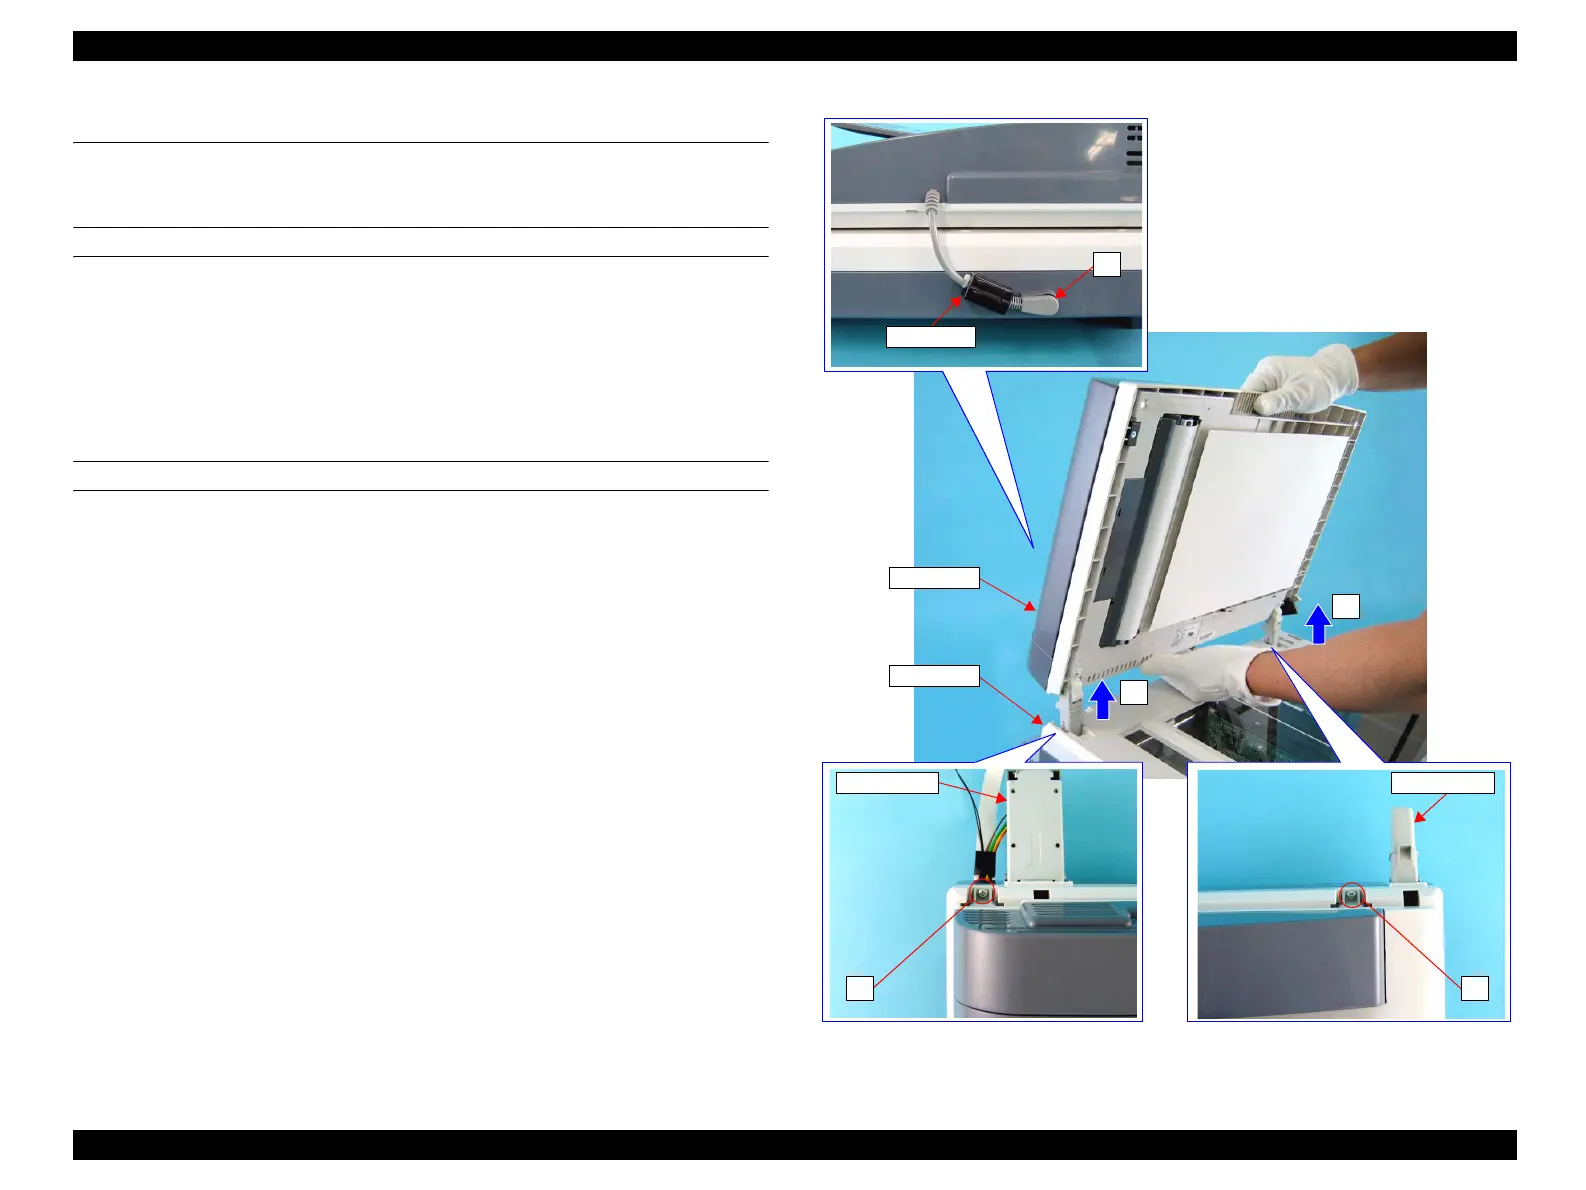
2. Disconnect the cable of the ADF Unit from the IR A Assy.
3. Remove the two screws (M3 x 12 mm, P-type, P-head) that secure the ADF Unit
to the IR A Assy.
4. Open the ADF Unit and remove it toward upward.
REINSTALLATION
1. Insert the ADF HINGE of the ADF Unit into the hole on the IR A Assy, and close
the ADF Unit.
2. Secure the ADF Unit to the IR A Assy with the two screws (M3 x 12 mm, P-type,
P-head).
3. Connect the cable of the ADF Unit to the IR A Assy.
4. Install the Scanner. (p306)
Figure 4-154. Removal of ADF Unit
CABLE
IR A ASSY
3) 3)
4)
4)
2)
ADF HINGE
ADF Unit
ADF HINGE
 Loading...


