EPSON AcuLaser CX11/CX11F Revision B
DISASSEMBLY AND ASSEMBLY Printer 451
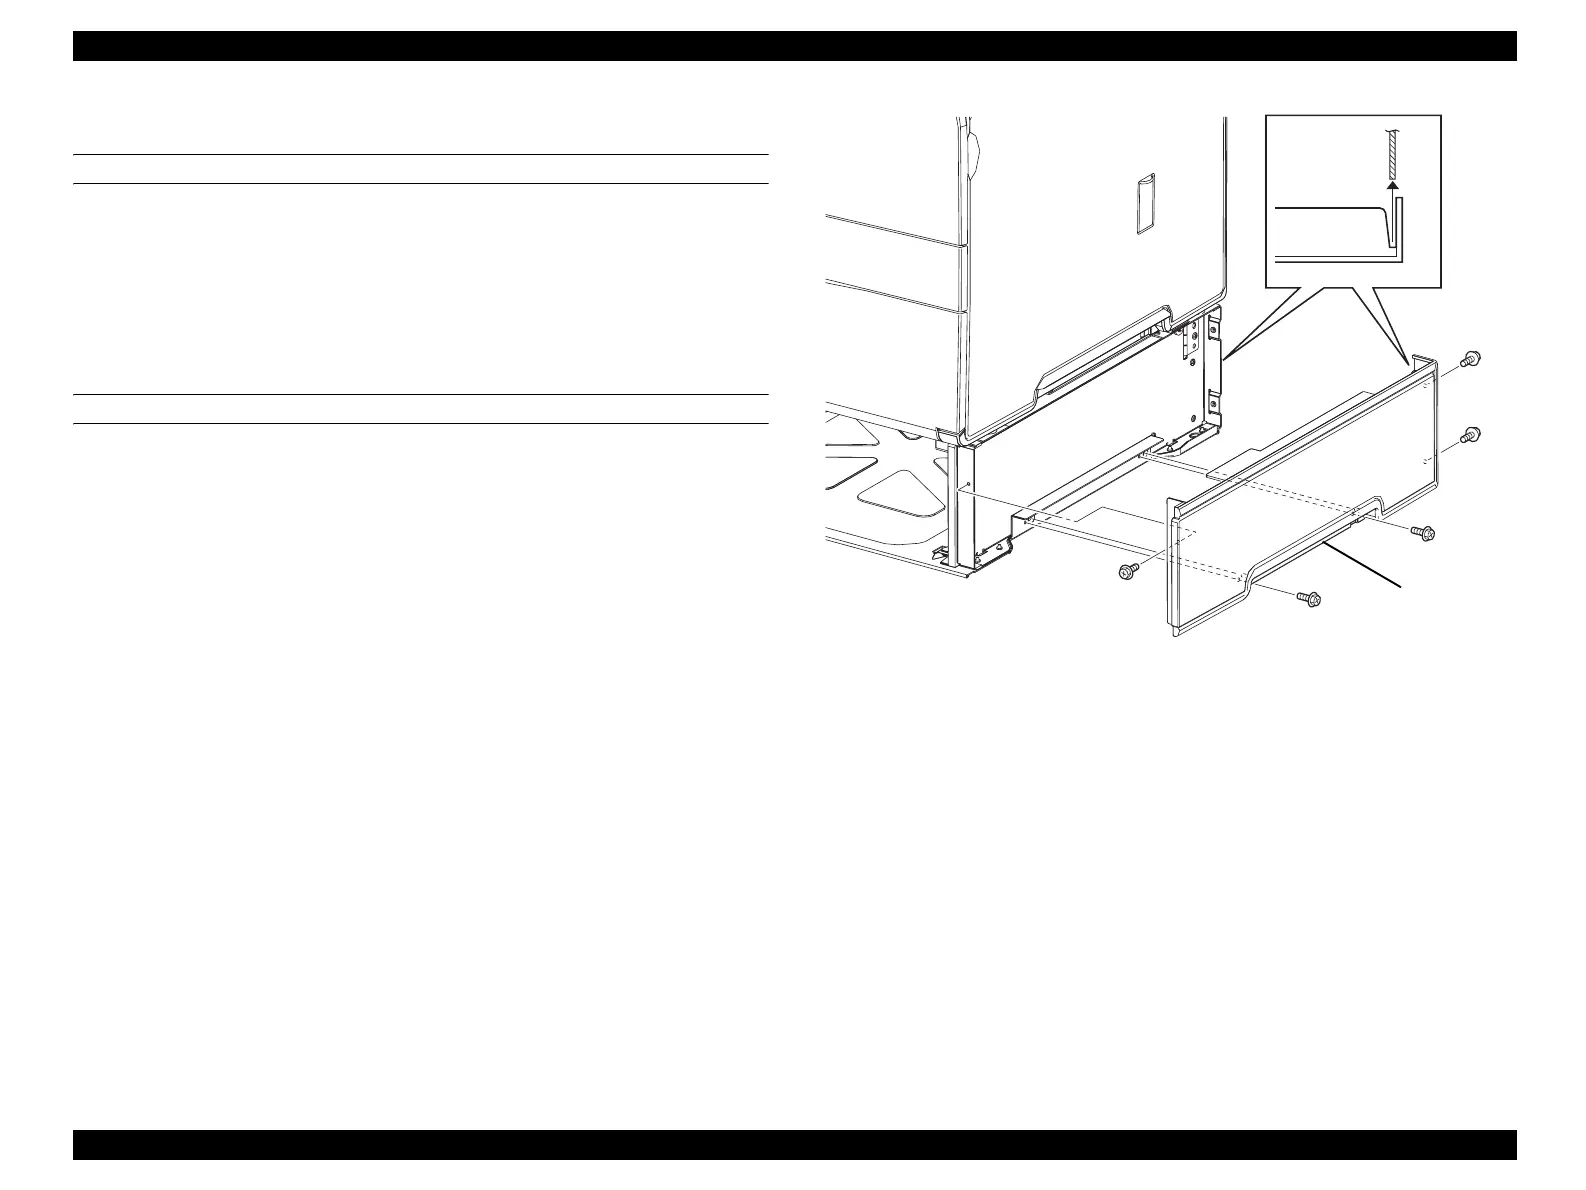
4.2.12.9 COVER RIGHT 500
REMOVAL
1. Remove 500 PAPER CASSETTE ASSY. (p442)
2. Remove the 5 screws (silver, with flange, 8 mm) fastening COVER RIGHT 500 to
500 PAPER FEEDER ASSY.
3. Remove COVER RIGHT 500 from 500 PAPER FEEDER ASSY.
REINSTALLATION
1. Match the boss on COVER RIGHT 500 with the hole on 500 PAPER FEEDER
ASSY while inserting the metal plate section of the frame at the front and rear of
500 PAPER FEEDER ASSY into the clearance between the rib sections on the
front and rear of COVER RIGHT 500, and attach COVER RIGHT 500.
2. Fasten COVER RIGHT 500 to 500 PAPER FEEDER ASSY with the 5 screws
(silver, with flange, 8 mm).
3. Attach 500 PAPER FEEDER ASSY. (p442)
Figure 4-128. Removal of COVER RIGHT 500
Leg_Sec03_022EA
2)
2)
2)
2)
2)
3)
 Loading...


