EPSON AcuLaser CX11/CX11F Revision B
DISASSEMBLY AND ASSEMBLY Printer 333
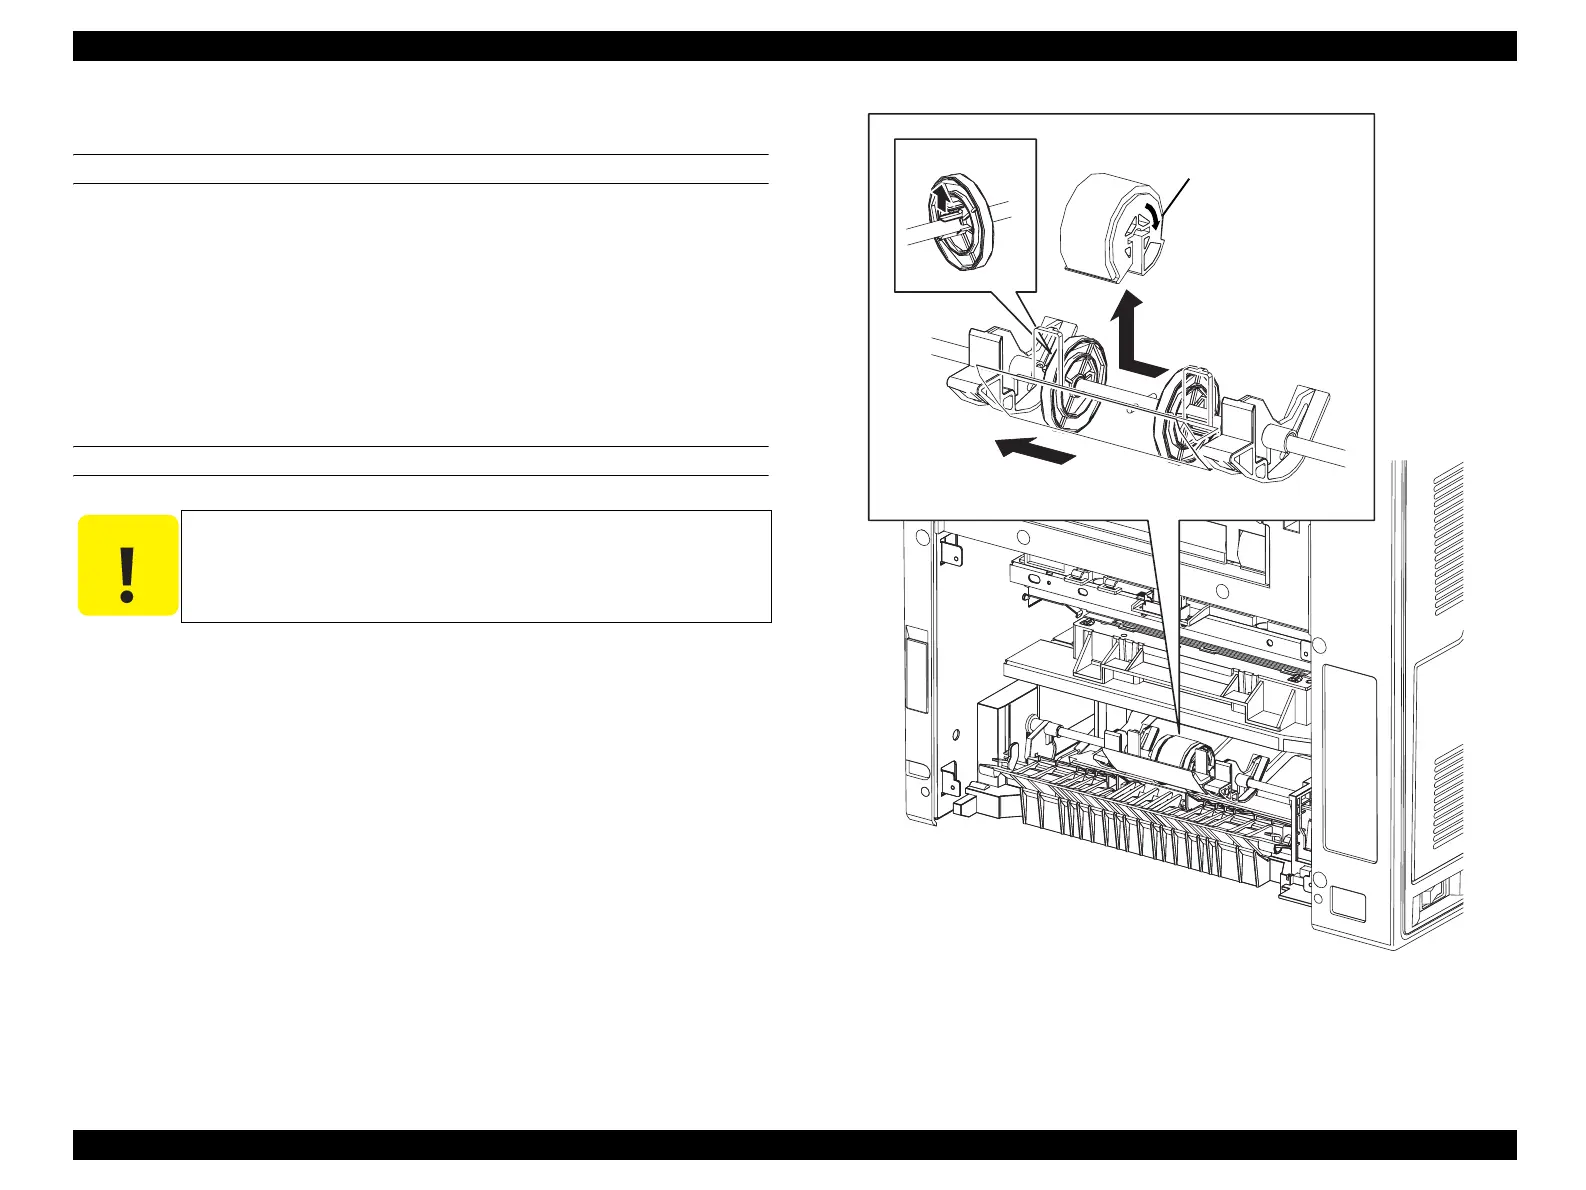
4.2.3.3 ROLL MSI
REMOVAL
1. Remove FRAME ASSY-PH. (p352)
2. Unhook the hook on the right-side CORE fastening SHAFT ASSY MSI, and slide
to the right.
3. Slide ROLL MSI to the right, and draw out the attachment groove of ROLL MSI
from the pin of SHAFT ASSY MSI to remove ROLL MSI from SHAFT ASSY
MSI.
REINSTALLATION
1. Place the U cut section of ROLL MSI on SHAFT ASSY MSI and slide to the left,
and insert the positioning pin of SHAFT ASSY MSI into the notch of ROLL
ASSY to attach ROLL ASSY to SHAFT ASSY MSI.
2. Slide the right-side CORE to the left, and fasten the CORE hook to the groove on
SHAFT ASSY MSI.
3. Attach FRAME ASSY-PH. (p352)
Figure 4-27. Removal of ROLL MSI
C A U T I O N
Pay attention to the attachment orientation of ROLL MSI. (Attach
with the direction of the arrows indicated on ROLL MSI aligned
with the directions in the illustration.)
Leg_Sec03_043EA
3)
Arrow
2)-2
2)-1
 Loading...


