EPSON AcuLaser CX11/CX11F Revision B
TROUBLESHOOTING Printer 244
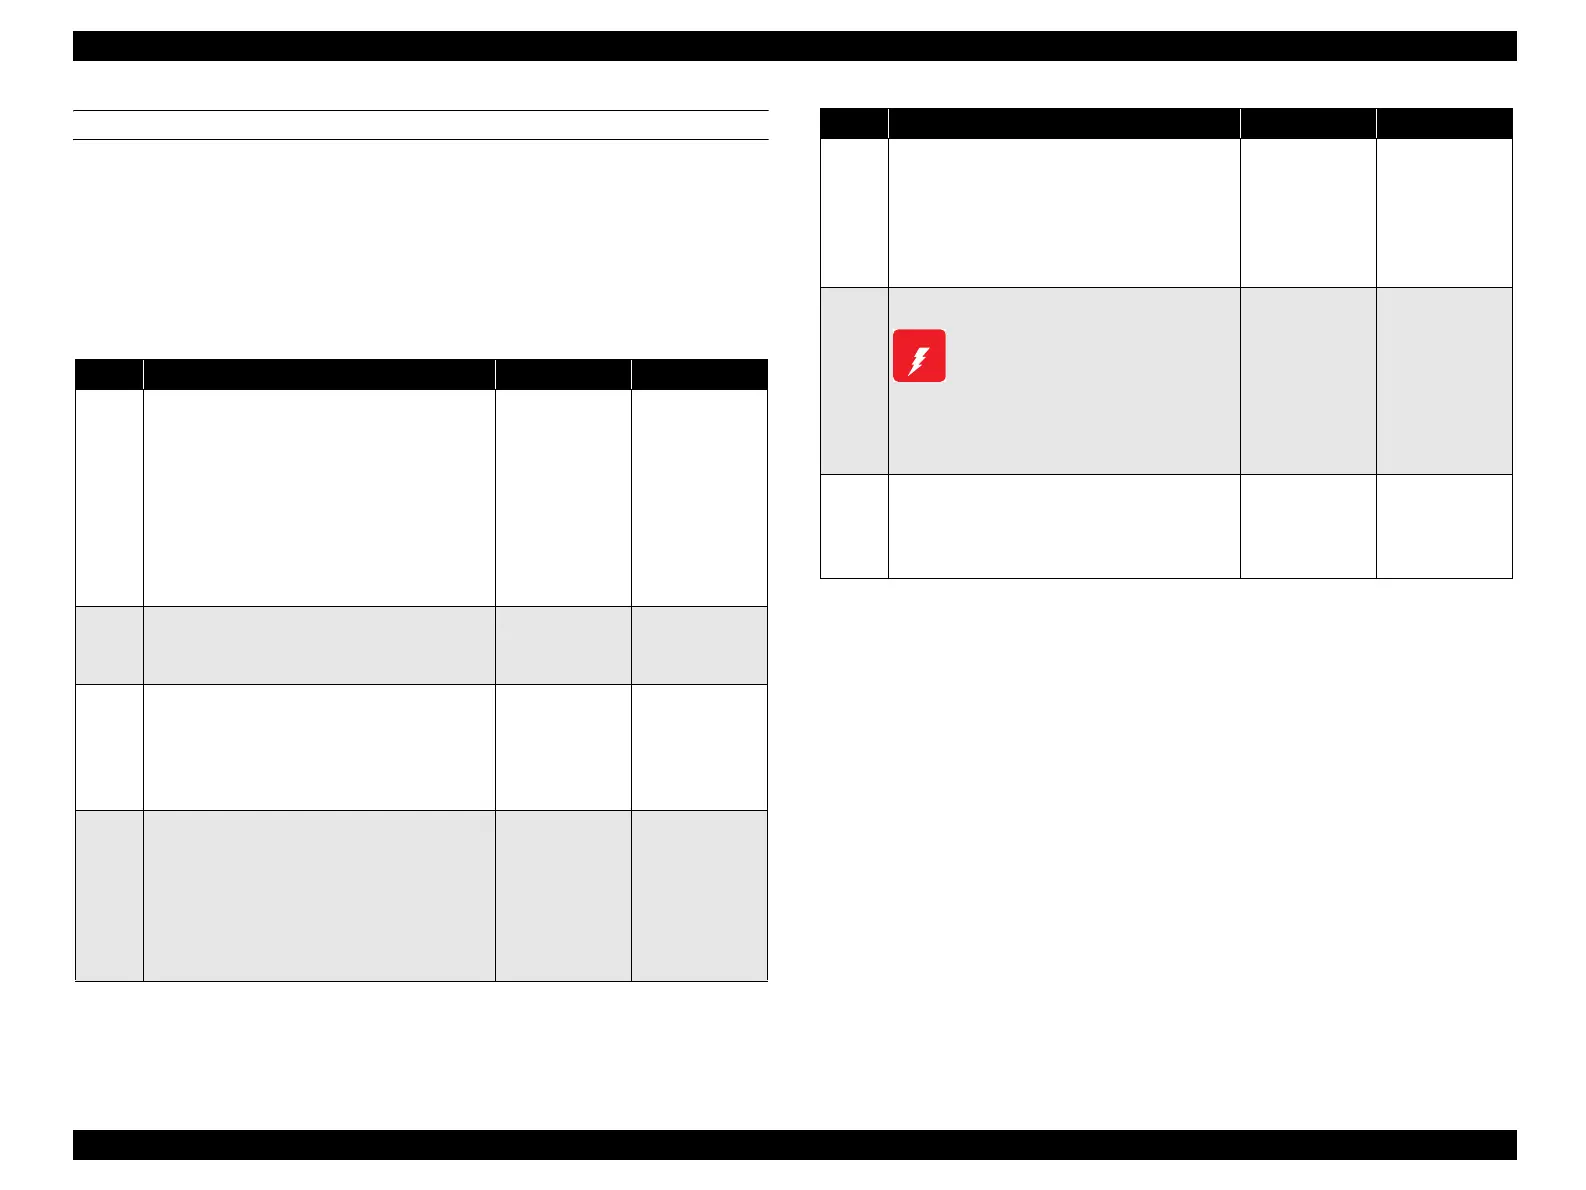
FIP-71 ELECTRICAL NOISE
Possible parts that caused the error
Troubleshooting
Photoconductor Unit HOUSING ASSY-GUIDE AD
FUSER ASSY PWBA MCU
LV/HVPS
Step Check Yes No
1
Check of external noise
Are there any other electrical apparatus (e. g.
generators, wireless transmitters, or equipment
that use motors) within 3 m of the printer?
Either turn the other electrical apparatus OFF,
or reposition the printer at least 6 m away from
other electrical apparatus.
Does the electrical noise problem still
continue?
Go to Step [2]. End of procedure
2
Check of AC ground
Is the AC power outlet wired and grounded
correctly?
Go to Step [3]. Ask the customer
to repair the AC
power outlet.
3
Check after replacement of Photoconductor
Unit
Replace DRU ASSY.
Does the electrical noise problem still continue
after replacement?
Go to Step [4]. End of procedure
4
Check of contact between Photoconductor
Unit and HOUSING ASSY-GUIDE AD
Remove Photoconductor Unit.
Is the contact surface of Photoconductor Unit
and CONDUCTOR attached to HOUSING
ASSY-GUIDE AD deformed or are there
foreign objects on the surface?
Go to Step [5]. Replace
HOUSING
ASSY-GUIDE
AD.
5
Check of grounding of boards
Are all screws fastening PWBA MCU and LV/
HVPS to the frame tightened firmly?
Also, are all screws fastening the PWBA
TRAY 500 of Feeder to the frame tightened
firmly?
Go to Step [6]. Tighten the
screws.
6
Check after replacement of FUSER ASSY
Allow FUSER ASSY to cool down
before performing work.
Replace FUSER. (p.415)
Does the electrical noise problem still continue
after replacement?
Go to Step [7]. End of procedure
7
Check after replacement of PWBA MCU
Replace PWBA MCU. (p.435)
Does the electrical noise problem still continue
after replacement?
Replace all
related parts.
End of procedure
Step Check Yes No
W A R N I N G
manuals4you.commanuals4you.com
 Loading...


