EPSON AcuLaser CX11/CX11F Revision B
TROUBLESHOOTING Printer 202
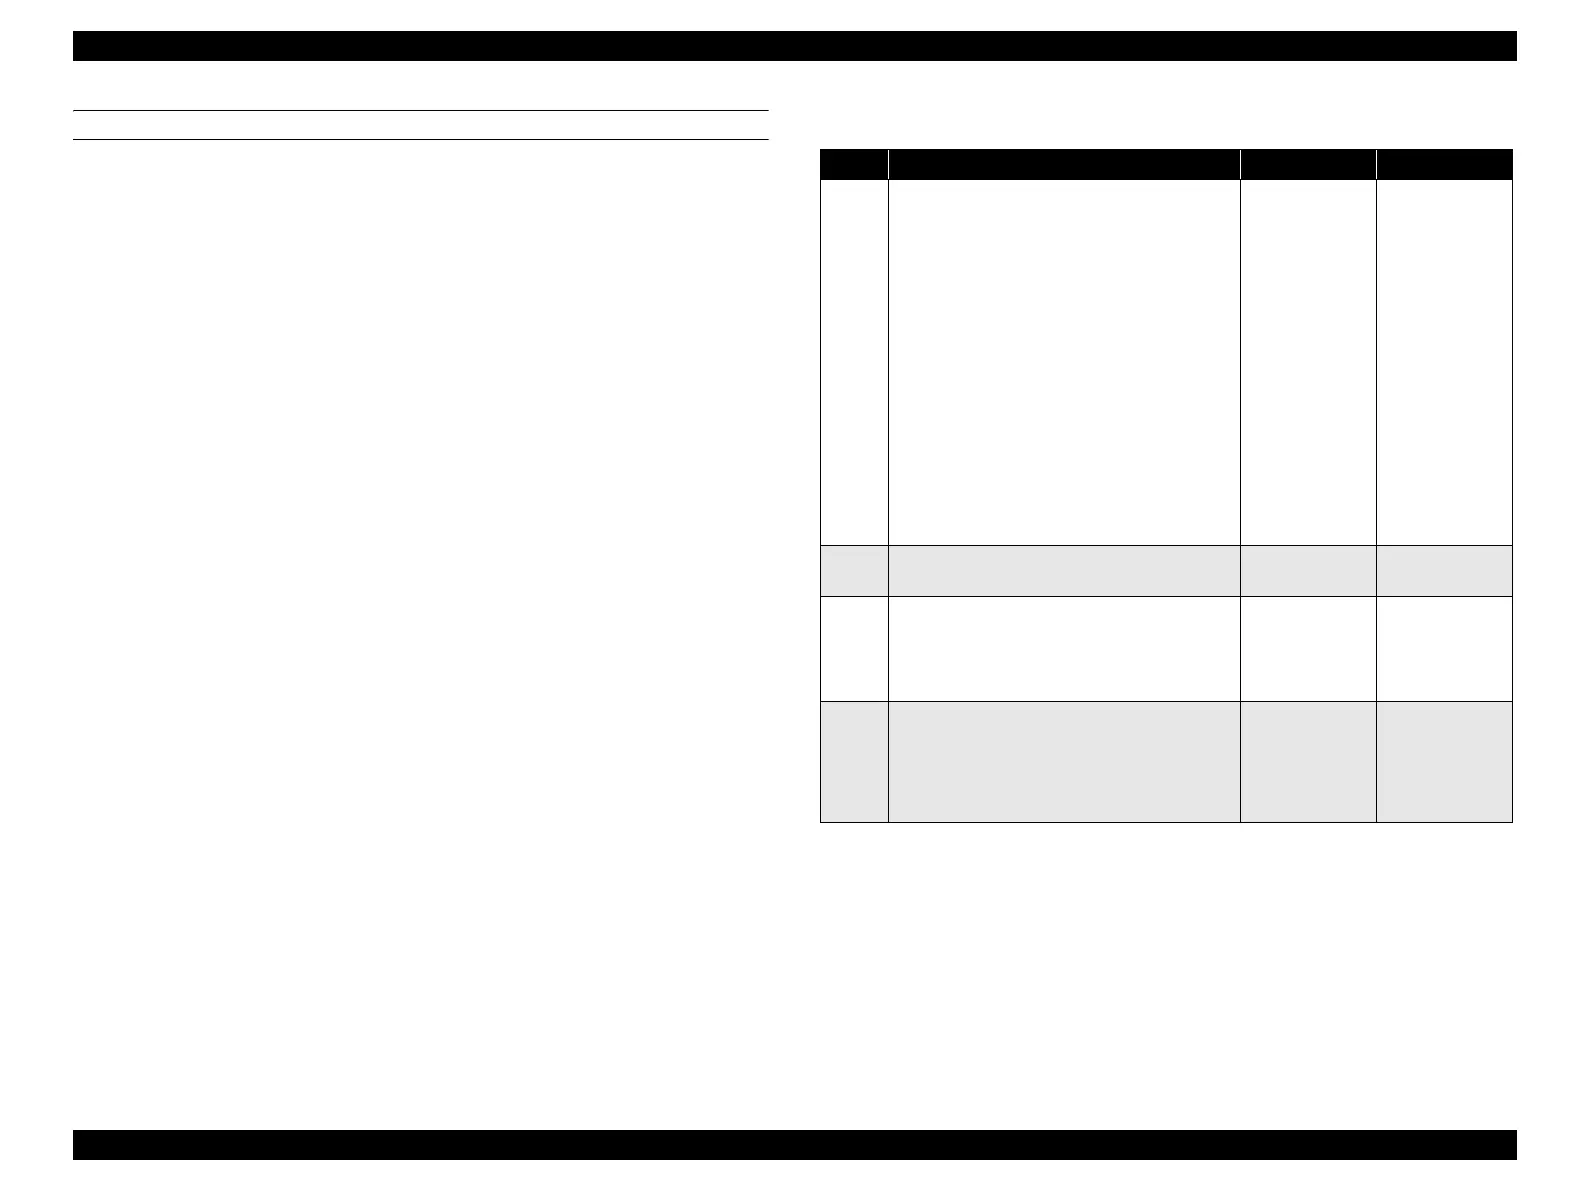
FIP-35
Panel Message
Jam C
Jam LC, G
Jam E
Jam C, E, F
Possible parts that caused the error
Troubleshooting
SENSOR T/R SENSOR OHP
SENSOR REGI SENSOR FUSER IN
EXIT SENSOR (Sensor in Fuser)
Step Check Yes No
1
Check of error/status code
Specify the problem Sensor by the error/status
code:
Jam LC, G:
SENSOR T/R
Jam E:
SENSOR OHP
Jam E:
REGI
Jam C, E, F:
SENSOR FUSER IN
Jam C:
EXIT SENSOR (Sensor in Fuser)
Is there paper remaining on the problem
Sensor?
Remove the
remaining paper
and proceed to
Step [2].
Go to Step [3].
2
Does the error recur when a test print is
made?
Go to Step [3]. End of procedure
3
Operation check (1) of problem Sensor
Does the ACTUATOR move smoothly without
any damage?
Or, is the light emitter of the Sensor clean?
Go to Step [4]. Re-attach or
replace the
actuator, or clean
the light emitter.
4
Operation check (2) of problem Sensor
The voltage of the common line and signal line
to each Sensor on PWBA MCU is 0 VDC in a
sensor detecting state, or is 5 VDC in a sensor
non-sensing state?
Replace PWBA
MCU. (p.432)
Replace the
problem Sensor.
manuals4you.commanuals4you.com
 Loading...


