EPSON AcuLaser CX11/CX11F Revision B
DISASSEMBLY AND ASSEMBLY ADF Section 523
4.4.3.8 CONNECTOR UNIT ACEMU
REMOVAL
1. Remove the Scanner. (p306)
2. Remove the ADF Unit. (p481)
3. Remove the ADF COVER R. (p492)
4. Remove the PAPER GUIDE ASSY. (p526)
5. Remove the ADF COVER C. (p496)
6. Remove the ADF BASE ASSY. (p498)
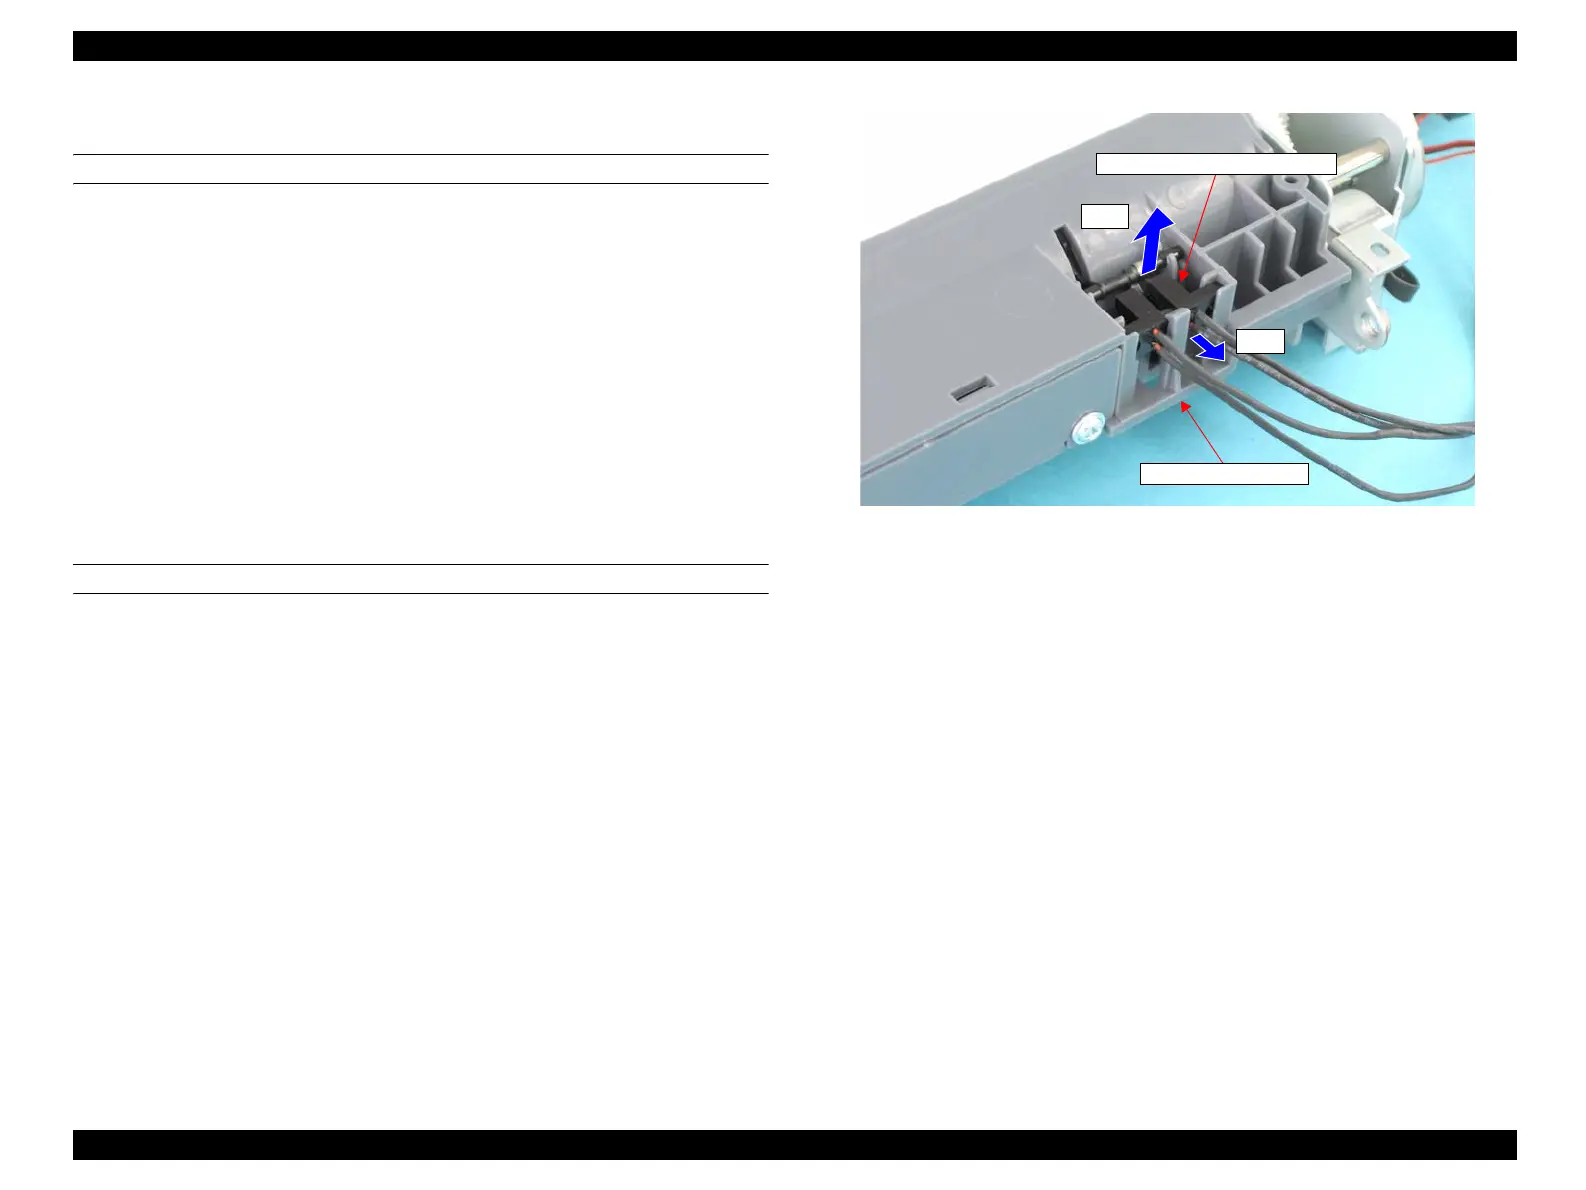
7. Turn the ADF FRAME ASSY over, release the CONNECTOR UNIT ACEMU
from the tab of the ADF FRAME ASSY to remove the CONNECTOR UNIT
ACEMU.
REINSTALLATION
1. Insert the CONNECTOR UNIT ACEMU into the place on the ADF FRAME
ASSY and secure the CONNECTOR UNIT ACEMU with the hook of the ADF
FRAME ASSY.
2. Attach the ADF BASE ASSY. (p498)
3. Attach the ADF COVER C. (p496)
4. Attach the PAPER GUIDE ASSY. (p526)
5. Attach the ADF COVER R. (p492)
6. Attach the ADF Unit. (p481)
7. Install the Scanner. (p306)
Figure 4-215. Removal of CONNECTOR UNIT ACEMU
7)-2
7)-1
CONNECTOR UNIT ACEMU
ADF FRAME ASSY
 Loading...


