EPSON AcuLaser CX11/CX11F Revision B
DISASSEMBLY AND ASSEMBLY Printer 344
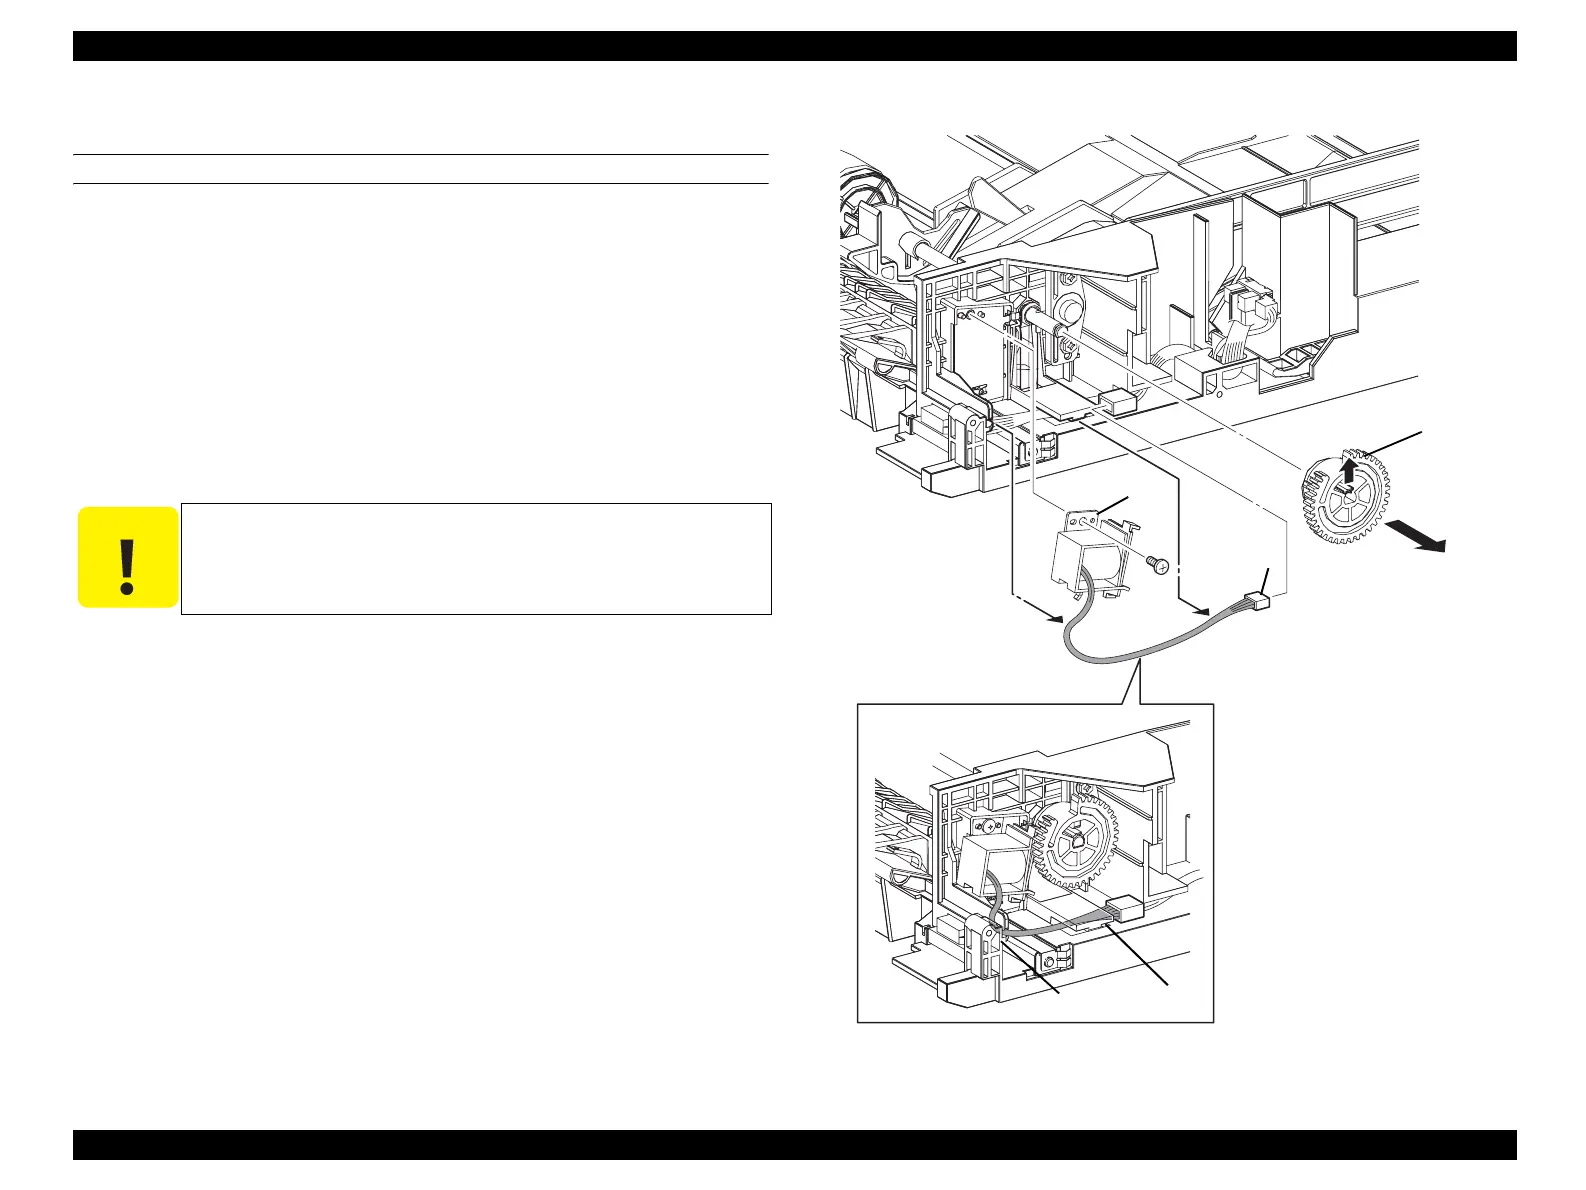
4.2.3.10 SOLENOID PICK UP
REMOVAL
1. Remove COVER ASSY RH. (p326)
2. Remove COVER ASSY LH. (p321)
3. Remove COVER MSI. (p317)
4. Remove COVER FRONT L and COVER FRONT ASSY U. (p318)
5. Remove FRAME ASSY-PH. (p352)
6. Remove MSI ASSY. (p329)
7. Unhook the hook on GEAR PICK UP fastened to SHAFT ASSY MSI from MSI
ASSY, and remove GEAR PICK UP.
8. Disconnect connector (P/J605) from SOLENOID PICK UP, and remove the
harness from the groove on MSI ASSY.
9. Remove the screw (silver, tapping, 8mm) fastening SOLENOID PICK UP to MSI
ASSY.
10. Remove SOLENOID PICK UP from MSI ASSY.
Figure 4-37. SRemoval of SOLENOID PICK UP
C A U T I O N
When performing the following work, leave the intermediate
connector on the harness side.
Leg_Sec03_050FA
9)
8)
7)-2
7)-1
10)
[3)]
Groove
Notch
manuals4you.commanuals4you.com
 Loading...


