EPSON AcuLaser CX11/CX11F Revision B
DISASSEMBLY AND ASSEMBLY Printer 330
REINSTALLATION
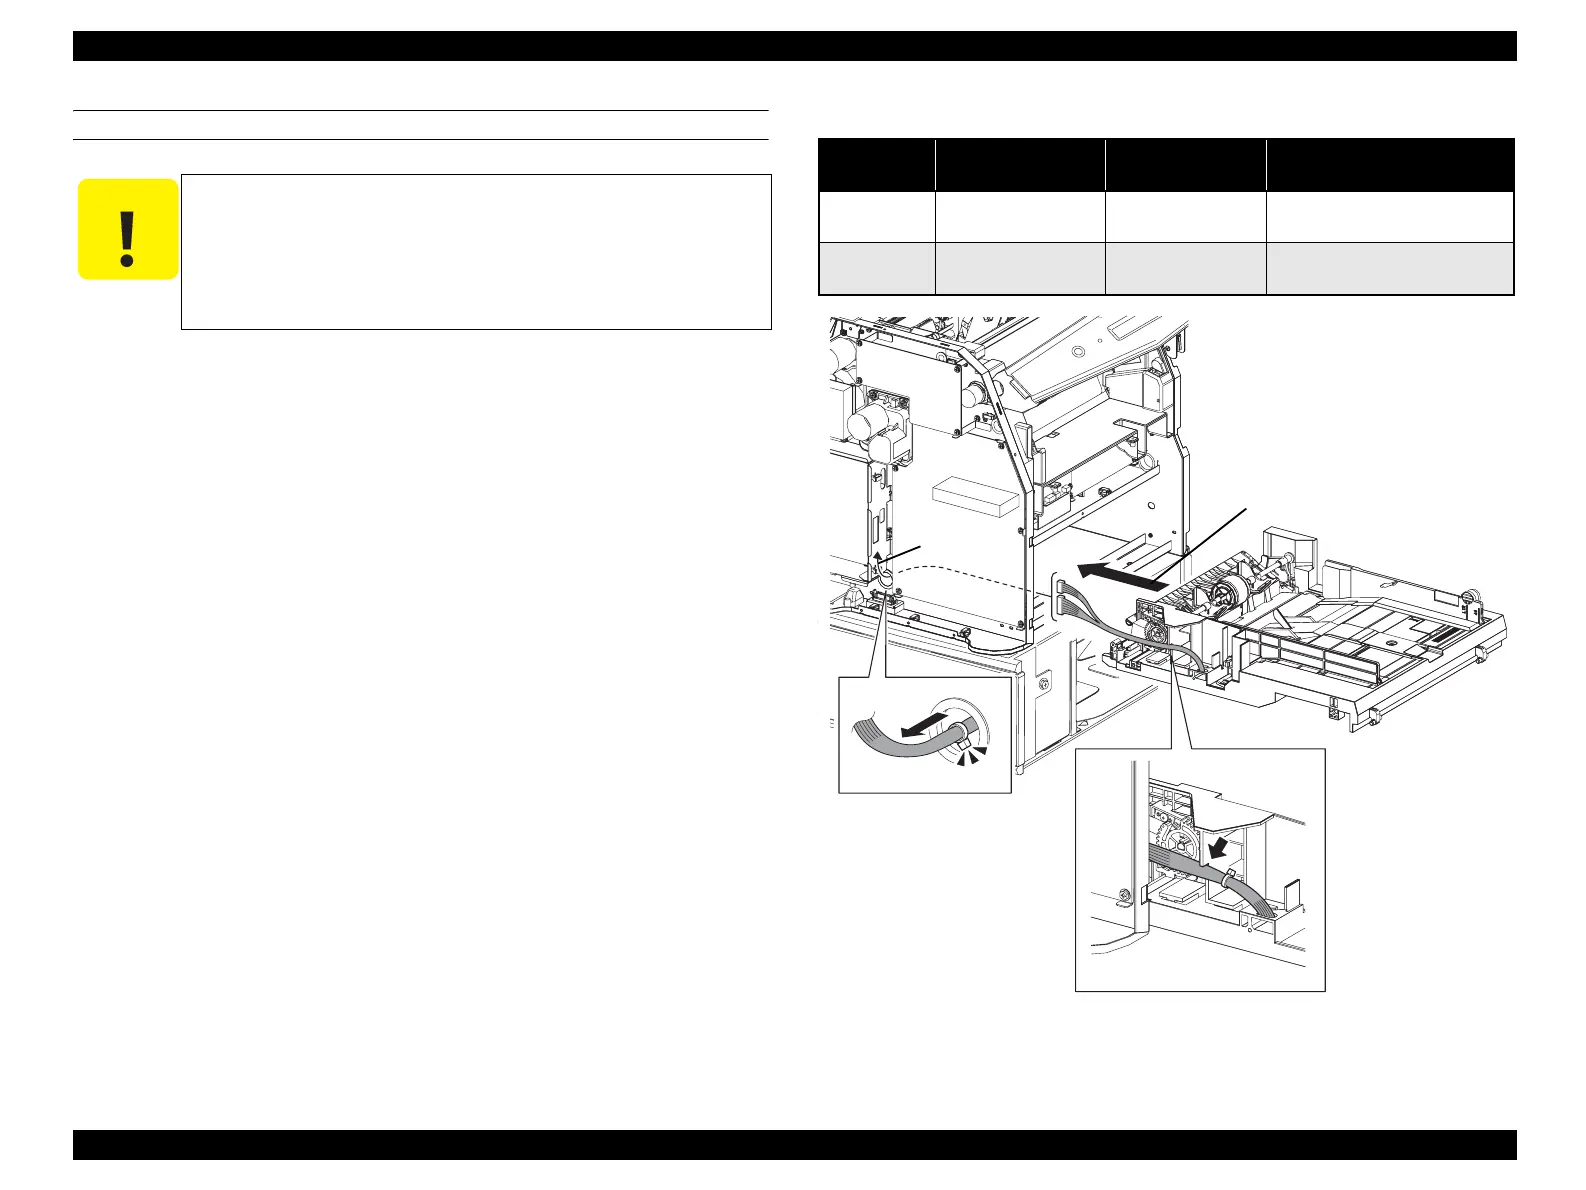
1. Gently insert HARNESS-ASSY P/H 1 along the left side of MSI ASSY together
with MSI ASSY from the front of the main unit.
2. Insert MSI ASSY about halfway with the front of MSI ASSY lifted slightly to
avoid TIE PLATE under the main unit, and then bring out the connector of
HARNESS-ASSY P/H 1 from the hole on the main unit.
3. After matching MSI ASSY to the main unit attachment position, gently pull
HARNESS-ASSY P/H 1 from the outside to take up any slack inside the main
unit.
4. Fasten MSI ASSY to the main unit with the 6 screws (silver, with flange, tapping,
8 mm).
5. When a 500-sheet Cassette Unit is installed, turn the LOCK MC TO FDR 90
degrees to the opposite side of the arrow shown in Figure 4-24 to secure the 500-
sheet Cassette Unit to the main unit.
6. Connect connector (P/J408) and connector (P/J409) to PWBA MCU.
7. Fasten the harness of HARNESS-ASSY P/H 1 with the two clamps on CHASSIS
ESS.
8. Attach FRAME ASSY-PH. (p352)
9. Attach COVER FRONT L and COVER FRONT ASSY U. (p318)
10. Attach COVER MSI. (p317)
11. Attach COVER ASSY LH. (p321)
12. Attach COVER ASSY RH. (p326)
Figure 4-25. Reinstallation of MSI ASSY
C A U T I O N
When performing the following work, take care to prevent the
cable tie that bundles the harness of HARNESS-ASSY P/H 1
from being caught on the holes, etc. on the main unit.
When performing the following work, take care to prevent the
HARNESS-ASSY P/H 1 from being sandwiched between the
main unit and MSI ASSY.
Table 4-6. Symptoms when the connector is loose
Connector No. Panel Indication Symptom
Error Caused by Connector
Disconnection
P/J408 E Open
Printing is not
possible.
---
P/J409 Service Req E547
Printing is not
possible.
Feeder Moter error
Leg_Sec03_507EC
CAUTION
[2)-1]
[2)-2]
[3)]
[1)]
manuals4you.commanuals4you.com

 Loading...


