EasyManuals Logo

Epson AcuLaser CX11 Service Manual

Epson AcuLaser CX11
668 pages
To Next Page IconTo Next Page
To Previous Page IconTo Previous Page
Page #404 background imageLoading...
Page #404 background image
EPSON AcuLaser CX11/CX11F Revision B
DISASSEMBLY AND ASSEMBLY Printer 406
7. Attach the ET Cartridges.
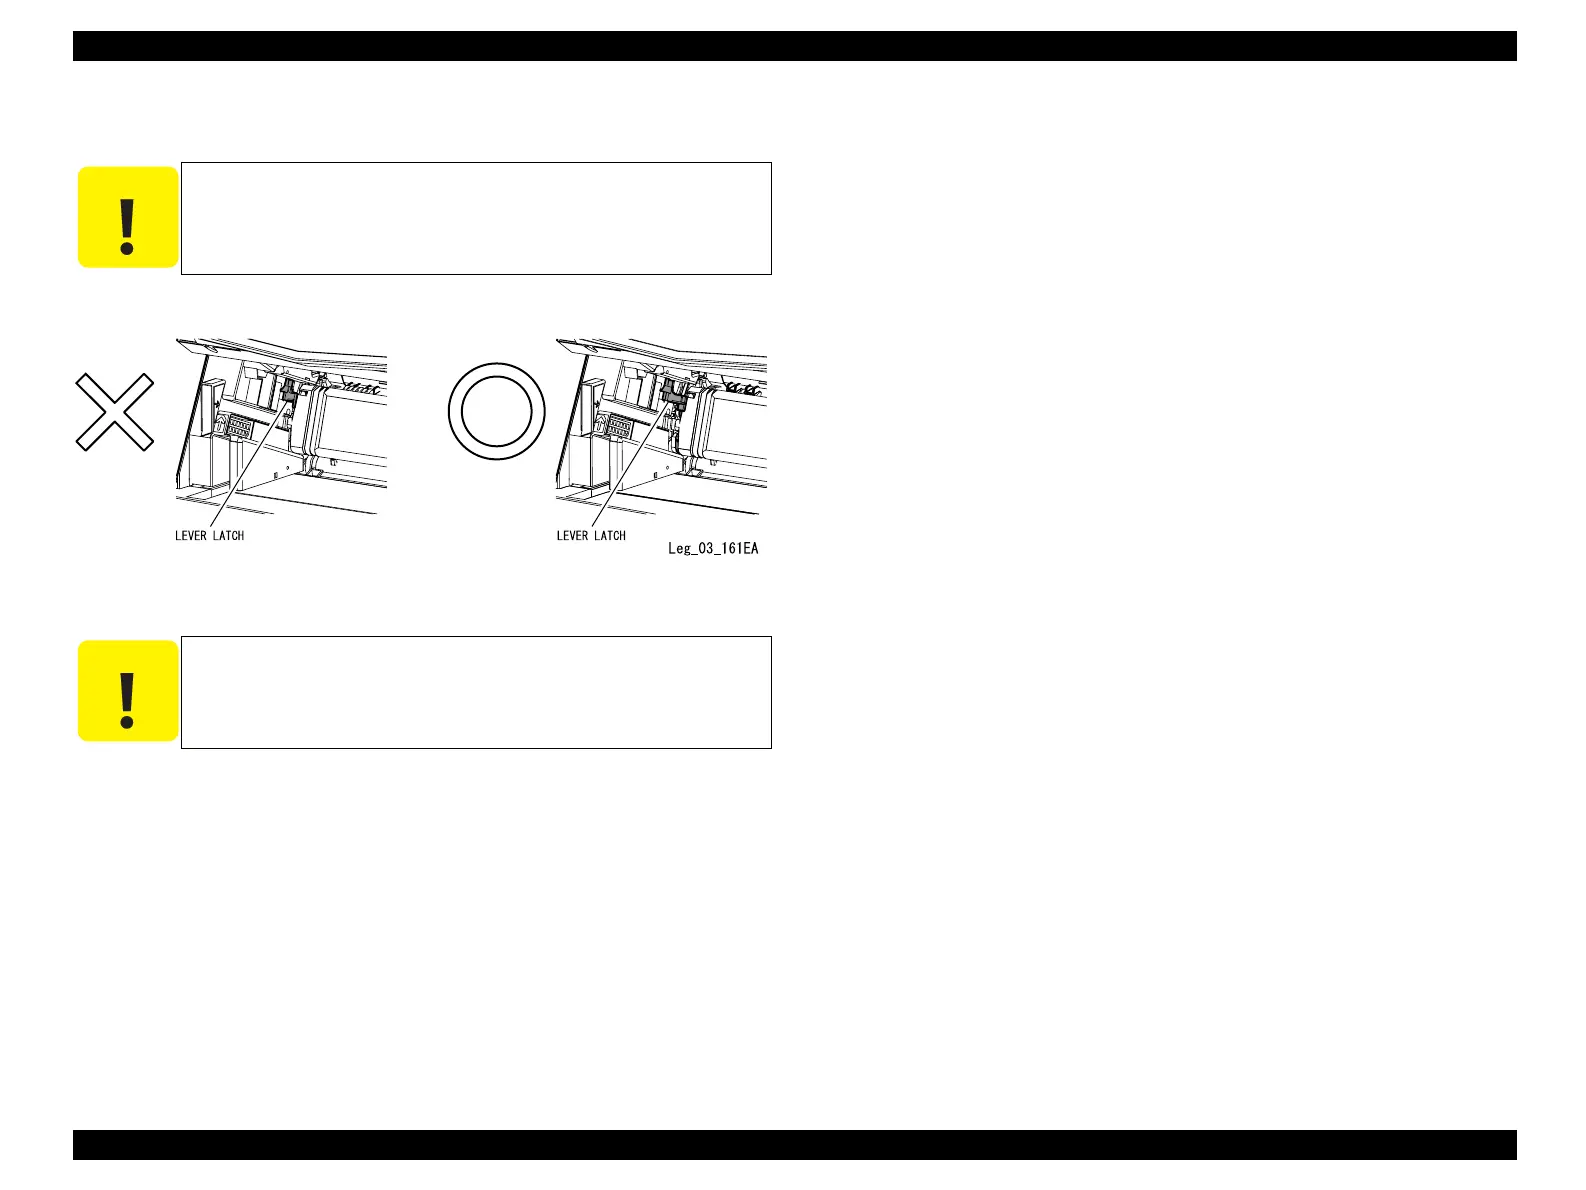
Figure 4-91. LEVER LATCH Position
C A U T I O N
When installing the ET Cartridge, be careful not to sandwich the
LEVER LATCH between the cartridge and the main unit as shown
in the left figure below. Install the ET cartridges correctly as shown
in the right figure below.
C A U T I O N
Be sure to clean the ROS ASSY window with the CLEANER ASSY
after installing the ET Cartridges.
manuals4you.commanuals4you.com

Table of Contents

Other manuals for Epson AcuLaser CX11

Questions and Answers:

Question and Answer IconNeed help?

Do you have a question about the Epson AcuLaser CX11 and is the answer not in the manual?

Epson AcuLaser CX11 Specifications

General IconGeneral
BrandEpson
ModelAcuLaser CX11
CategoryAll in One Printer
LanguageEnglish

Related product manuals