EPSON AcuLaser CX11/CX11F Revision B
DISASSEMBLY AND ASSEMBLY ADF Section 528
REINSTALLATION
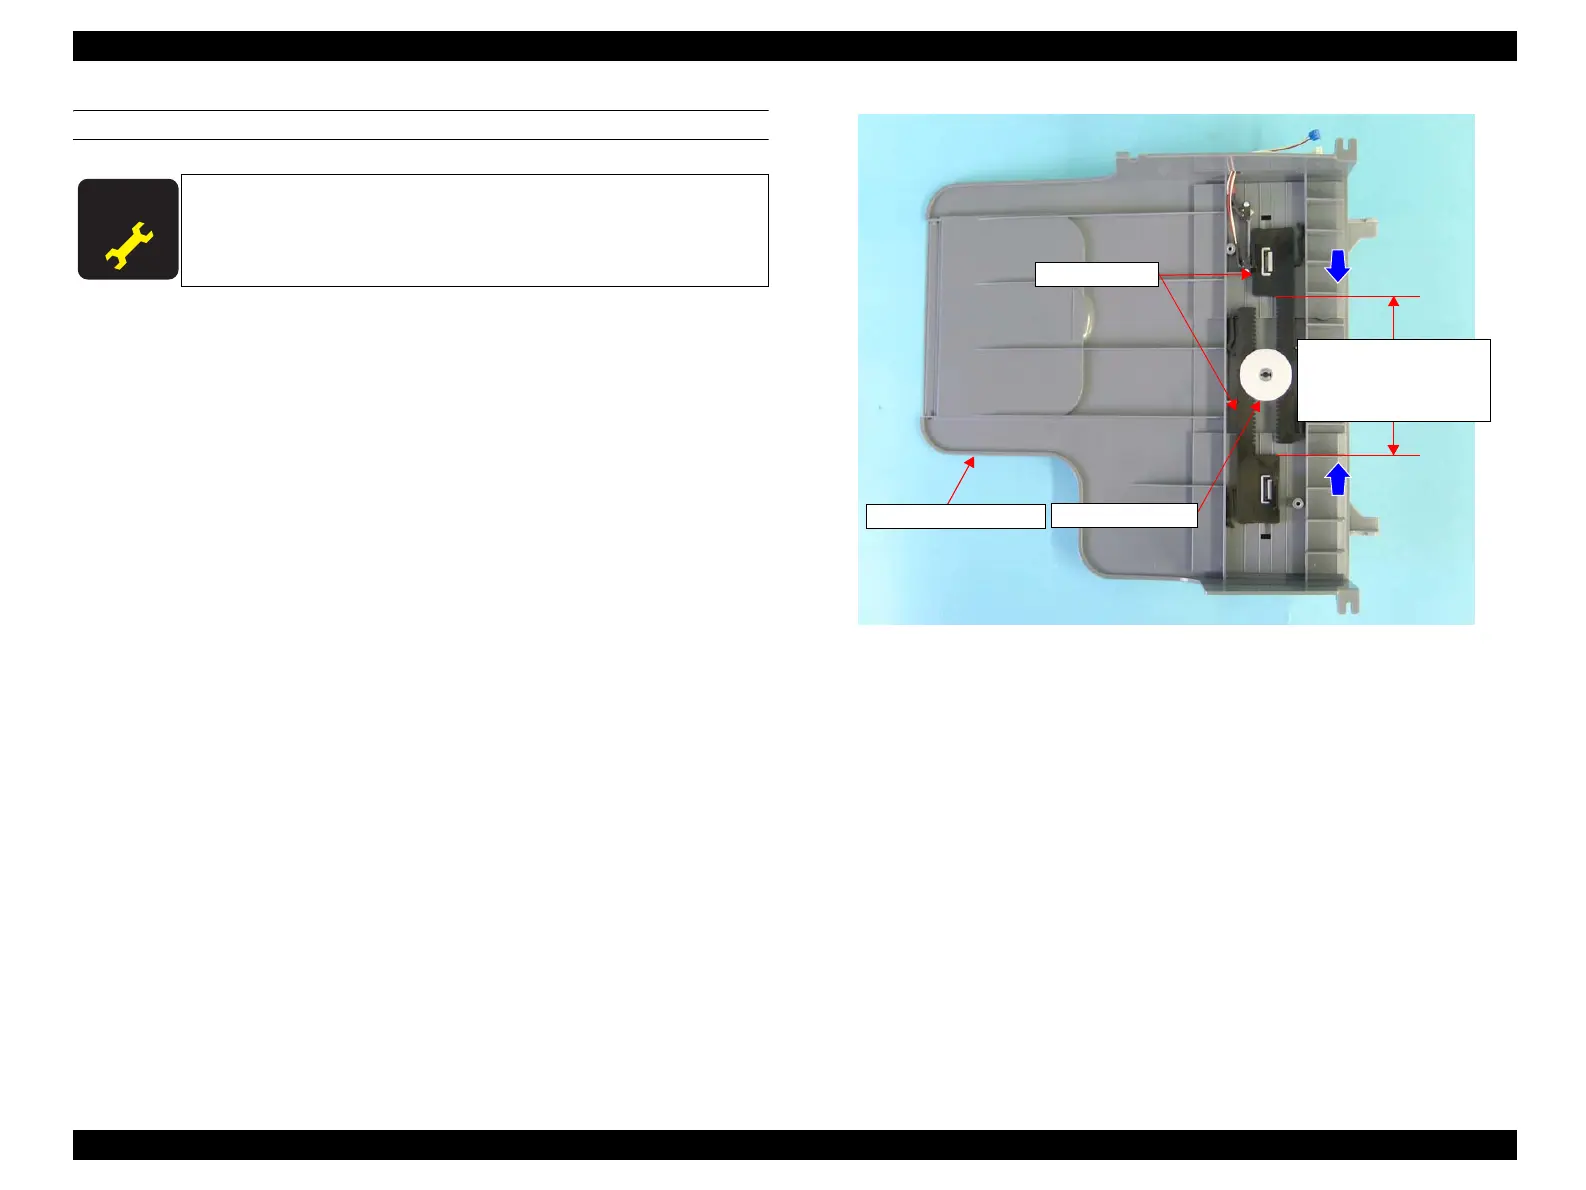
1. Put the DOC. ADJUST L through the hole of the DOC. PAPER GUIDE and attach
the DOC. ADJUST L to the groove on the GEAR PLATE.
2. Put the DOC. ADJUST R through the hole of the DOC. PAPER GUIDE and
attach the DOC. ADJUST R to the groove on the GEAR PLATE.
3. Move the two GEAR PLATEs so that the gap between them becomes smallest,
and attach TRAY GEAR 24T to the DOC. PAPER GUIDE.
4. Secure the TRAY COVER to the DOC. PAPER GUIDE with the two screws (M3
x 8 mm, P-type, A-head).
5. Attach the PAPER GUIDE ASSY. (p526)
6. Attach the ADF COVER R. (p492)
7. Attach the ADF Unit. (p481)
8. Install the Scanner. (p306)
Figure 4-223. Reinstallation of GEAR PLATE, TRAY GEAR 24T, DOC.ADJUST L/R
A D J U S T M E N T
R E Q U I R E D
Be sure to lubricate the specified locations after reinstalling the
DOC.ADJUST L/R and TRAY GEAR 24T, or replacing them with
new ones.
Refer to Section “6.3.2.2 Lublication” (p551).
Attach TRAY GEAR 24T
with the smallest gap
between two GUIDE
PLATEs.
GEAR PLATE
TRAY GEAR 24T
DOC. PAPER GUIDE
manuals4you.commanuals4you.com
 Loading...


