EPSON AcuLaser CX11/CX11F Revision B
DISASSEMBLY AND ASSEMBLY ADF Section 502
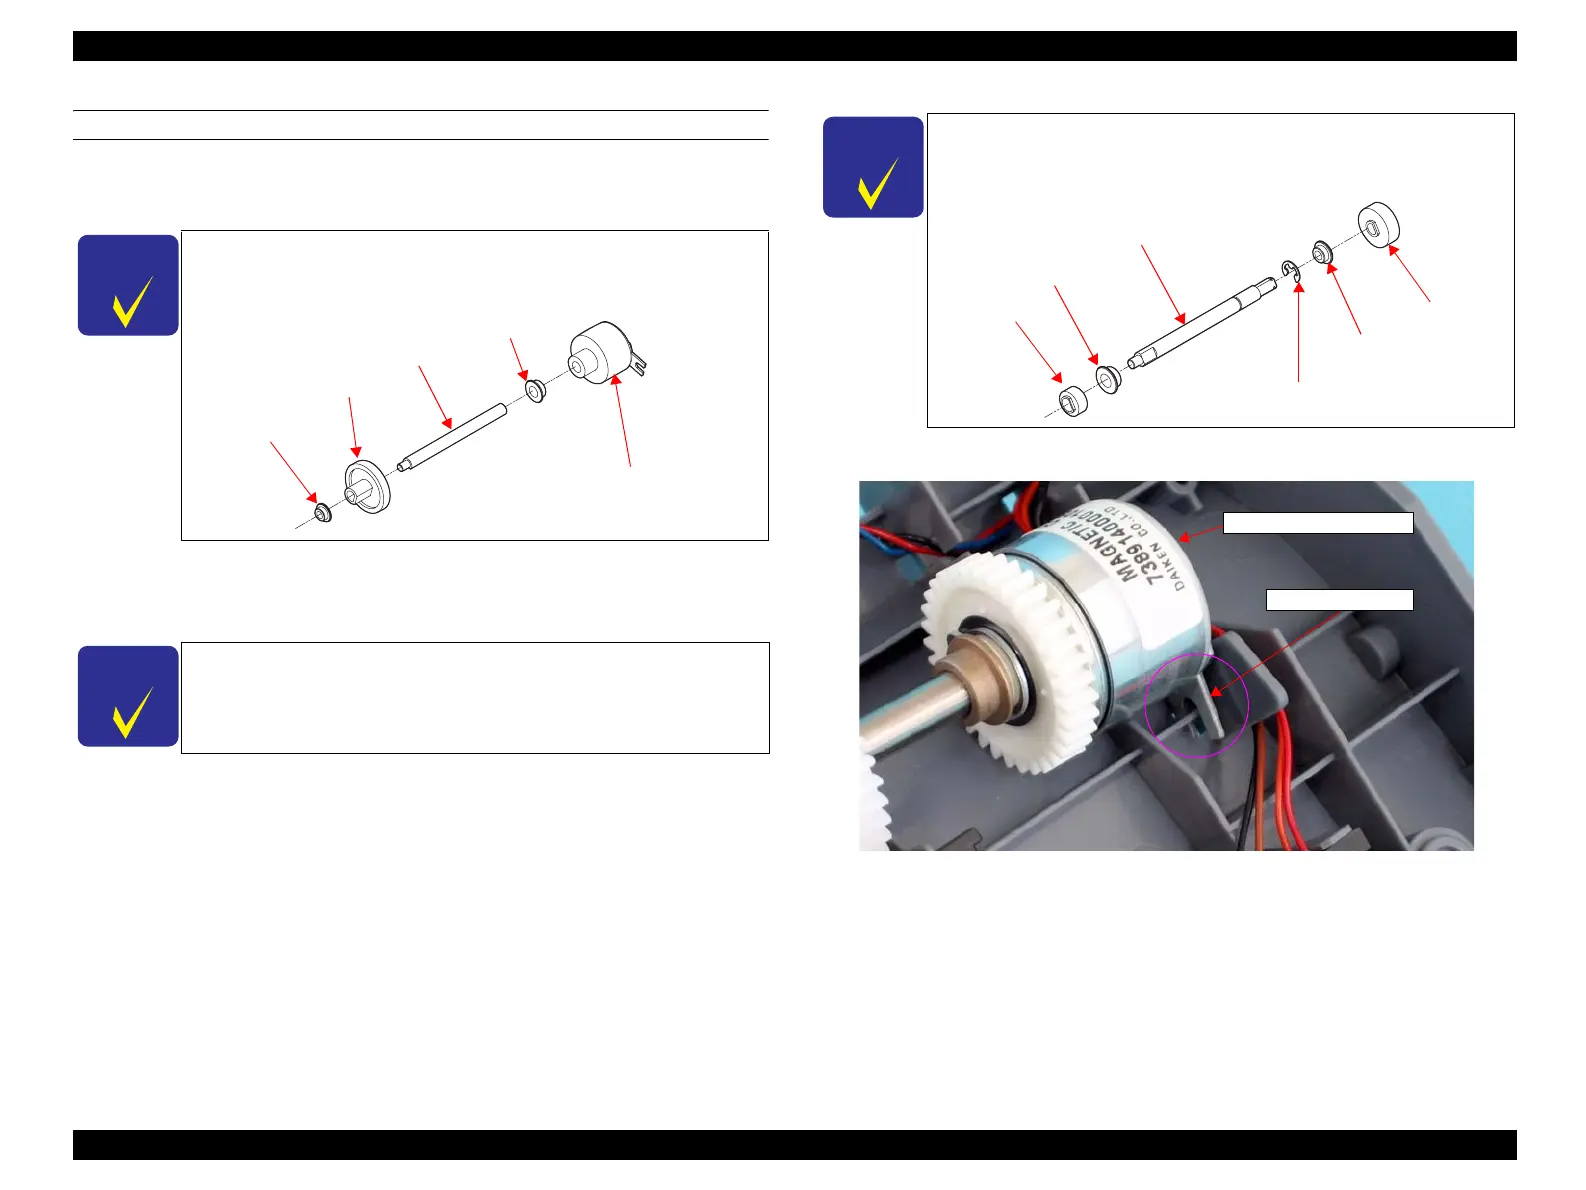
REINSTALLATION
1. Attach the CLUTCH SHAFT to the bearing of the CLUTCH FIX PLATE, and
insert the CLUTCH SHAFT to the MAGNETIC CLUTCH.
2. Insert the antirotation tab of the MAGNETIC CLUTCH into the hole of the ADF
BASE, and secure the MAGNETIC CLUTCH to the ADF BASE. See Figure
4-187.
3. Attach the TRANSFER SHAFT to the bearing of the CLUTCH FIX PLATE, and
put the TRANSFER SHAFT through the hole of the ADF BASE.
Figure 4-187. Reinstallation of E CLUTCH UNIT
C H E C K
P O I N T
Attach BUSH D4, GEAR 33T M0.8, and BUSH D6 to the CLUTCH
SHAFT before attaching the CLUTCH SHAFT to the bearing of
the CLUTCH FIX PLATE.
C H E C K
P O I N T
After securing the MAGNETIC CLUTCH, make sure that the
antirotation tab is properly inserted into the hole of the ADF BASE.
MAGNETIC CLUTCH
BUSH D6
CLUTCH SHAFT
GEAR 33T M0.8
BUSH D4
C H E C K
P O I N T
Attach BUSH D4, GEAR 12T, E RETAINING RING, and BUSH
D6 to the TRANSFER SHAFT before attaching the shaft to the
bearing of the CLUTCH FIX PLATE.
GEAR 12T
BUSH D4
TRANSFER SHAFT
E RETAINING RING
BUSH D6
GEAR 20T
MAGNETIC CLUTCH
Antirotation Tab
manuals4you.commanuals4you.com
 Loading...


