Parts Editing
A3-14
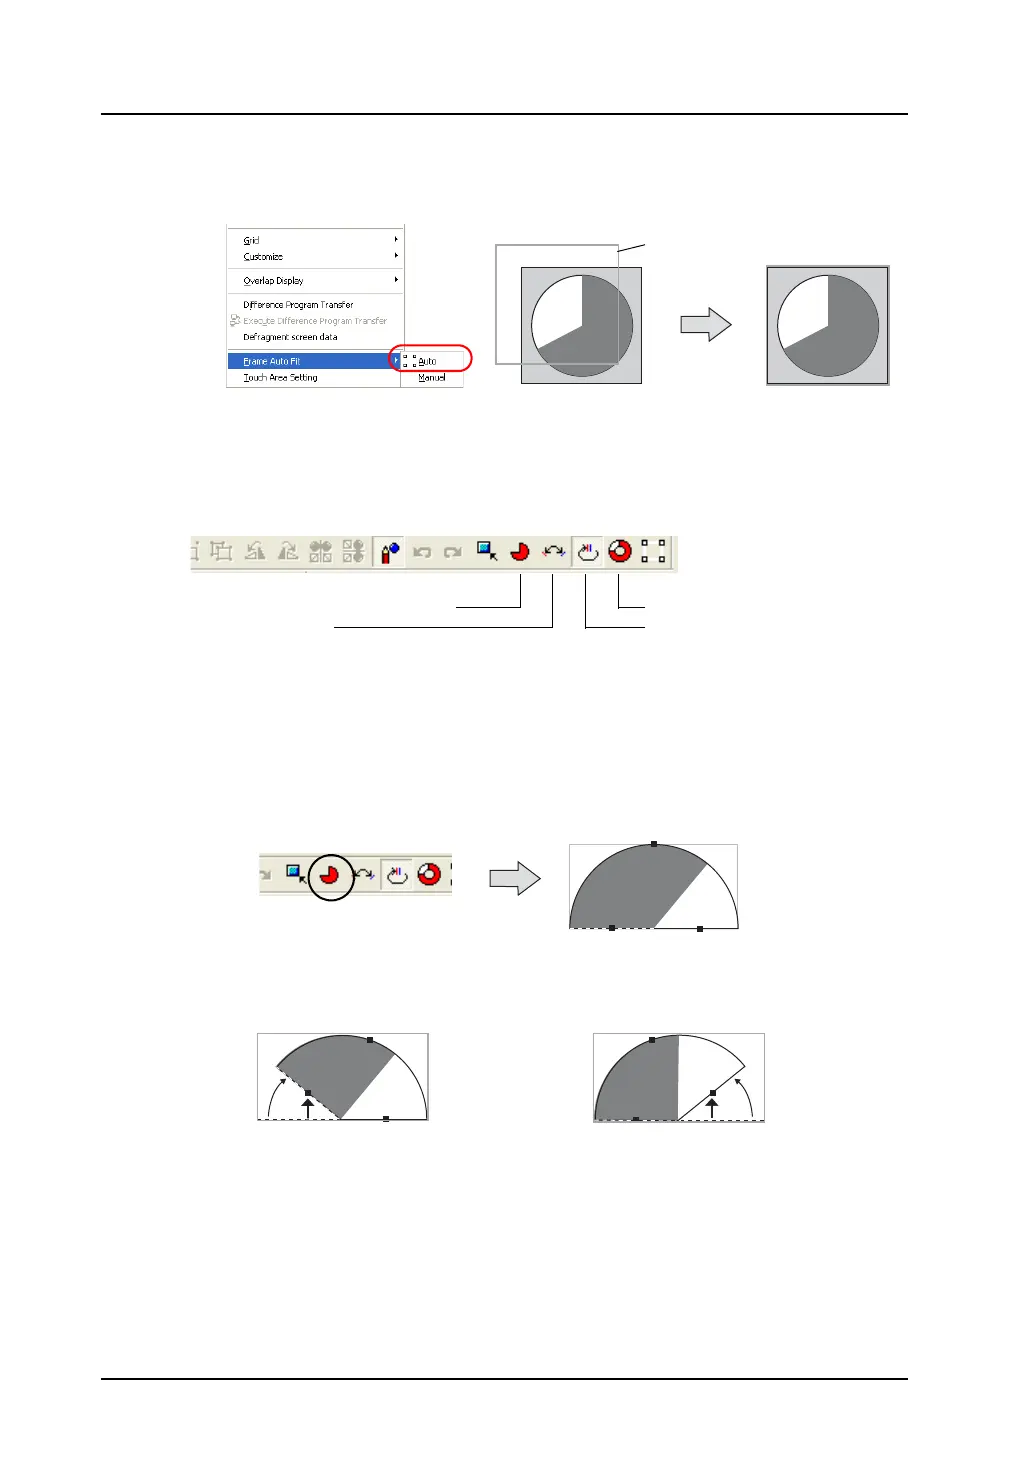
3. On completion of editing, click [Frame Auto Fit] in the right-click menu.
For more information on the frame and its setting method, refer to “Re-setting the frame” (page
A3-9).
4. Go back to the base screen.
Icons dedicated to pie graph editing
Some icons become active only for editing pie graph parts. Those icons do not appear for the other
graph parts. The contents are shown below:
A. [Different Start and End Angles]
Only pie graph parts in any form, such as a sector form, other than circle have start and end
angles.
These angles are changeable in the course of part editing.
(Procedure)
1. Click the [Different Start and End Angles] icon.
When you click the pie graph part next, handles appear around the part.
2. Drag the handle for either the start or end angle. The start and end angles can be
changed separately.
Frame
A. [Different Start and End Angles]
B. [Symmetrical]
D. [With Internal Circle]
C. [Same Start and End Angles]
Clicking the part
shows the
handles.
Click this icon.
Dragging the handle for the start
angle changes the start angle only.
Dragging the handle for the end
angle changes the end angle only.