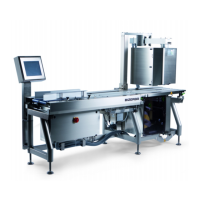
Instruction manual GLM-I Operation
38.019.129.001 en 335
24
24.3 Preparatory work
Before starting labeling the following preparatory works needs to be done:
– Setting labeler, see page 45
– Changing label roll, see page 58
– Setting alignment rails, see page 421
Depending on the accessories inserted, further preparatory works might
be necessary. Please read the documentation of the respective acces-
sories.
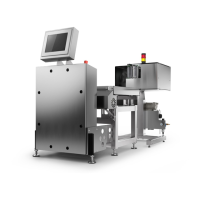
24.4 Conditions for package infeed
Adjust package infeed to avoid package jam on the automatic labeler belts.
In automatic weighing instruments
, a zero point adjustment of the scales is required after a
specific period of time or number of packages. For this reason, labeling is interrupted for a
short time. Make sure that there will not be any package jam not even in this case.
Singling packages automatically
If packages are fed at irregular intervals, they can be automatically pre-singled between
feed belt and singling belt and completely singled between singling belt and weighing belt.
For this, adjust the speed ratio between the feed belt and the singling belt so that the sin-
gling belt stops only for a very short time when packages approach the feed belt one after
the other at very short distance, see page 263.
Observing the minimum distance between packages
If packages are manually fed, the weighing belt length is considered the minimum distance
between the packages to be kept.
The package distance is the distance between two similar package edges, e.g. between
the leading edge of package 1 and the leading edge of package 2.
Choosing the correct labeling belt speed
The belt speed depends on the label printing time and label size. If belt speed is too high,
the "Label too slow" message is displayed. Reduce belt speed in this case, see page 263.
24.5 Call up article
The article to be labeled must be stored in the system under a PLU number (article num-
ber) with the necessary data
, see page 136. Depending on the configuration of your device
or database the article is called up in different ways.
– manually via PLU number, see page 142
– manually via PLU and customer number, see page 142
– manually via quick keyboard, see page 119
– automatically via EDP or scanner