6
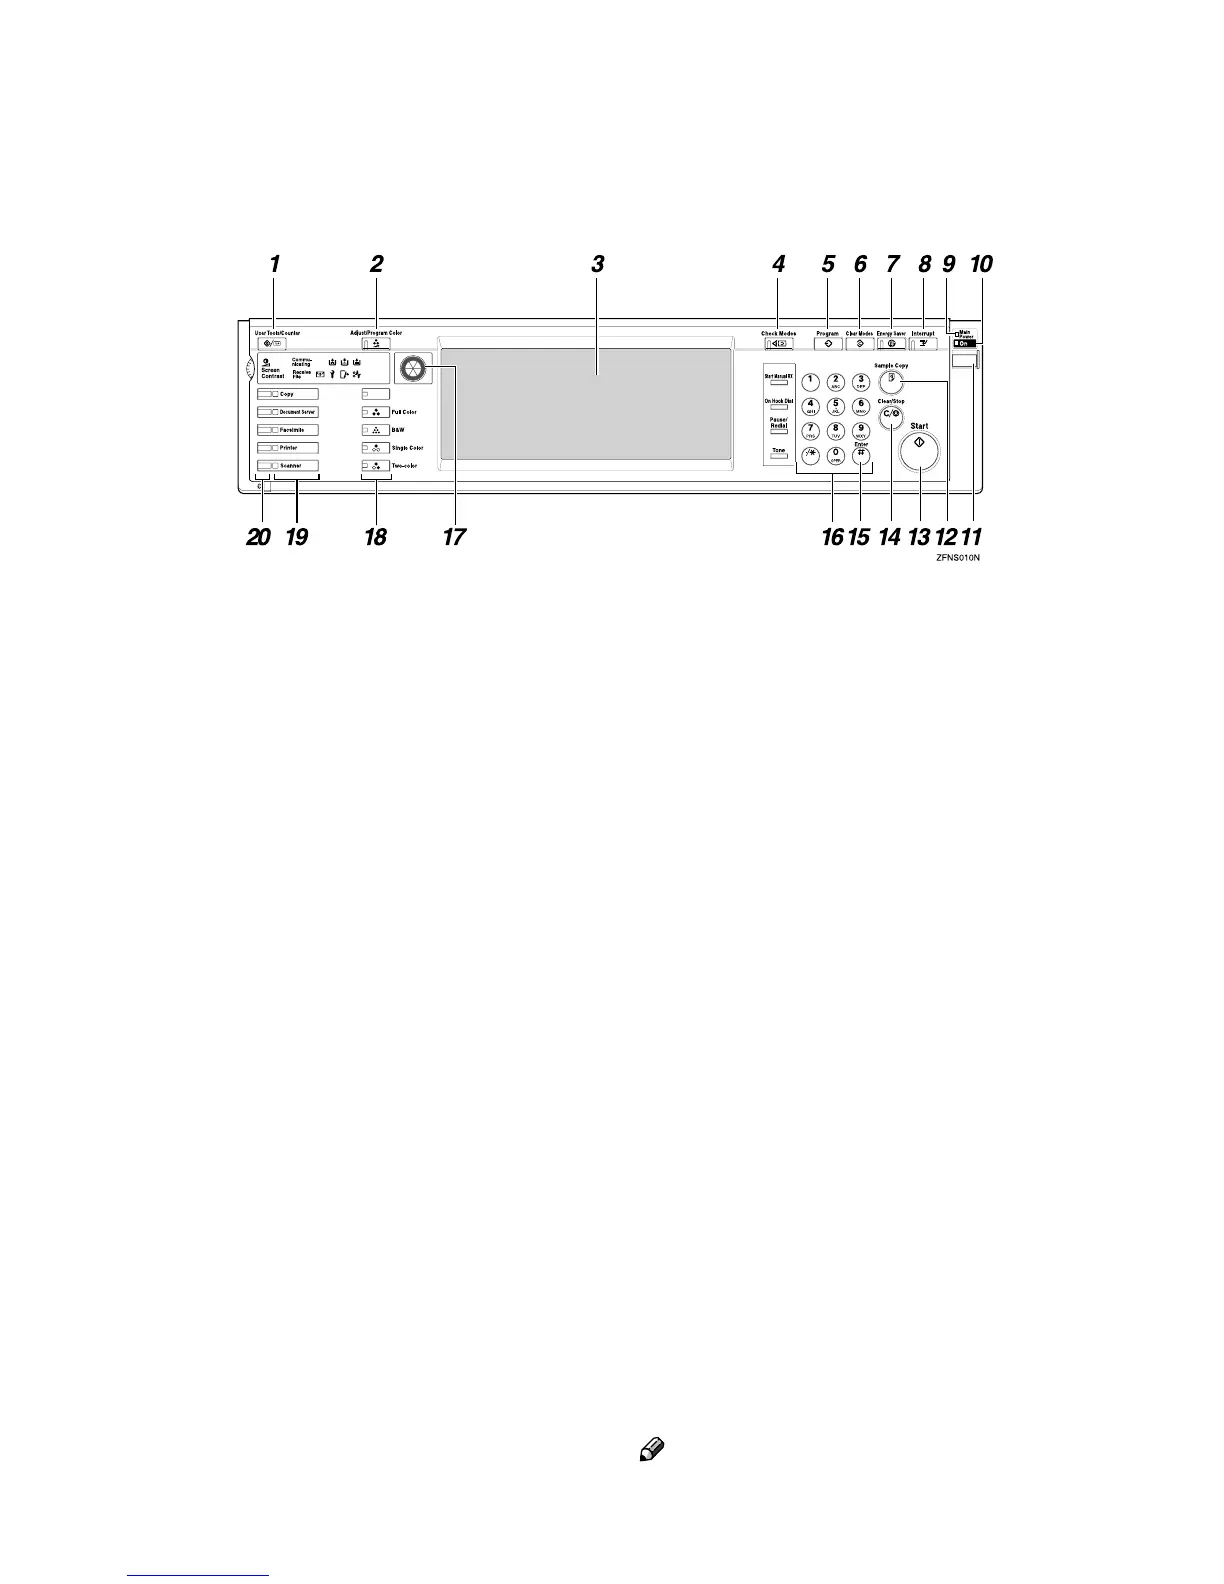
Control Panel
The illustration of the control panel will differ depending on the installed op-
tional unit. The following illustration has all the options installed.
1. {
{{
{User Tools/Counter}
}}
} key
• User Tools
Press to change the default settings
and conditions to meet your require-
ments.
⇒ “User Tools”, Advanced Features
manual
• Counter
Press to check or print the total num-
ber of copies made.
2. {
{{
{Adjust/Program Color}
}}
} key
Use this key to register or adjust a col-
or.⇒ “Adjust Color”, “Color Balance”,
“Copy Quality”, “User Color”, Advanced
Features manual
3. Display Panel
Shows the operation status, error mes-
sages, and function menus. ⇒ p.8 “Dis-
play Panel”
4. {
{{
{Check Modes}
}}
} key
Press to check the entered copy job set-
tings.
5. {
{{
{Program}
}}
} key
Press to select the Program mode. ⇒
“Program”, Advanced Features manual
6. {
{{
{Clear Modes}
}}
} key
Press to clear the previously entered copy
job settings.
7. {
{{
{Energy Saver}
}}
} key
Press to switch to and from the Energy
Saver mode. ⇒ “Energy Saver Mode”,
Advanced Features manual
8. {
{{
{Interrupt}
}}
} key
Press to interrupt a long copy job to make
copies. ⇒ “Interrupt Copy”, Advanced
Features manual
9. Main Power indicator
This indicator lights up when the main
power switch is turned on.
10. On indicator
This indicator lights up when the opera-
tion switch is turned on.
11. Operation Switch
Press this switch to turn the power on
(the On indicator lights up). To turn the
power off, press this switch again (the On
indicator goes off).
12. {
{{
{Sample Copy}
}}
} key
Use this key to make a single sample copy
before starting a long copy run. By check-
ing the sample copy and making any nec-
essary changes to the image quality
settings before you make multiple copies,
you can save time and paper.
⇒
“Sample
Copy”, Advanced Features manual
Note
❒ The optional hard disk unit (40 GB) is
required to use this function.