Copying from the Bypass Tray
35
1
C
CC
C
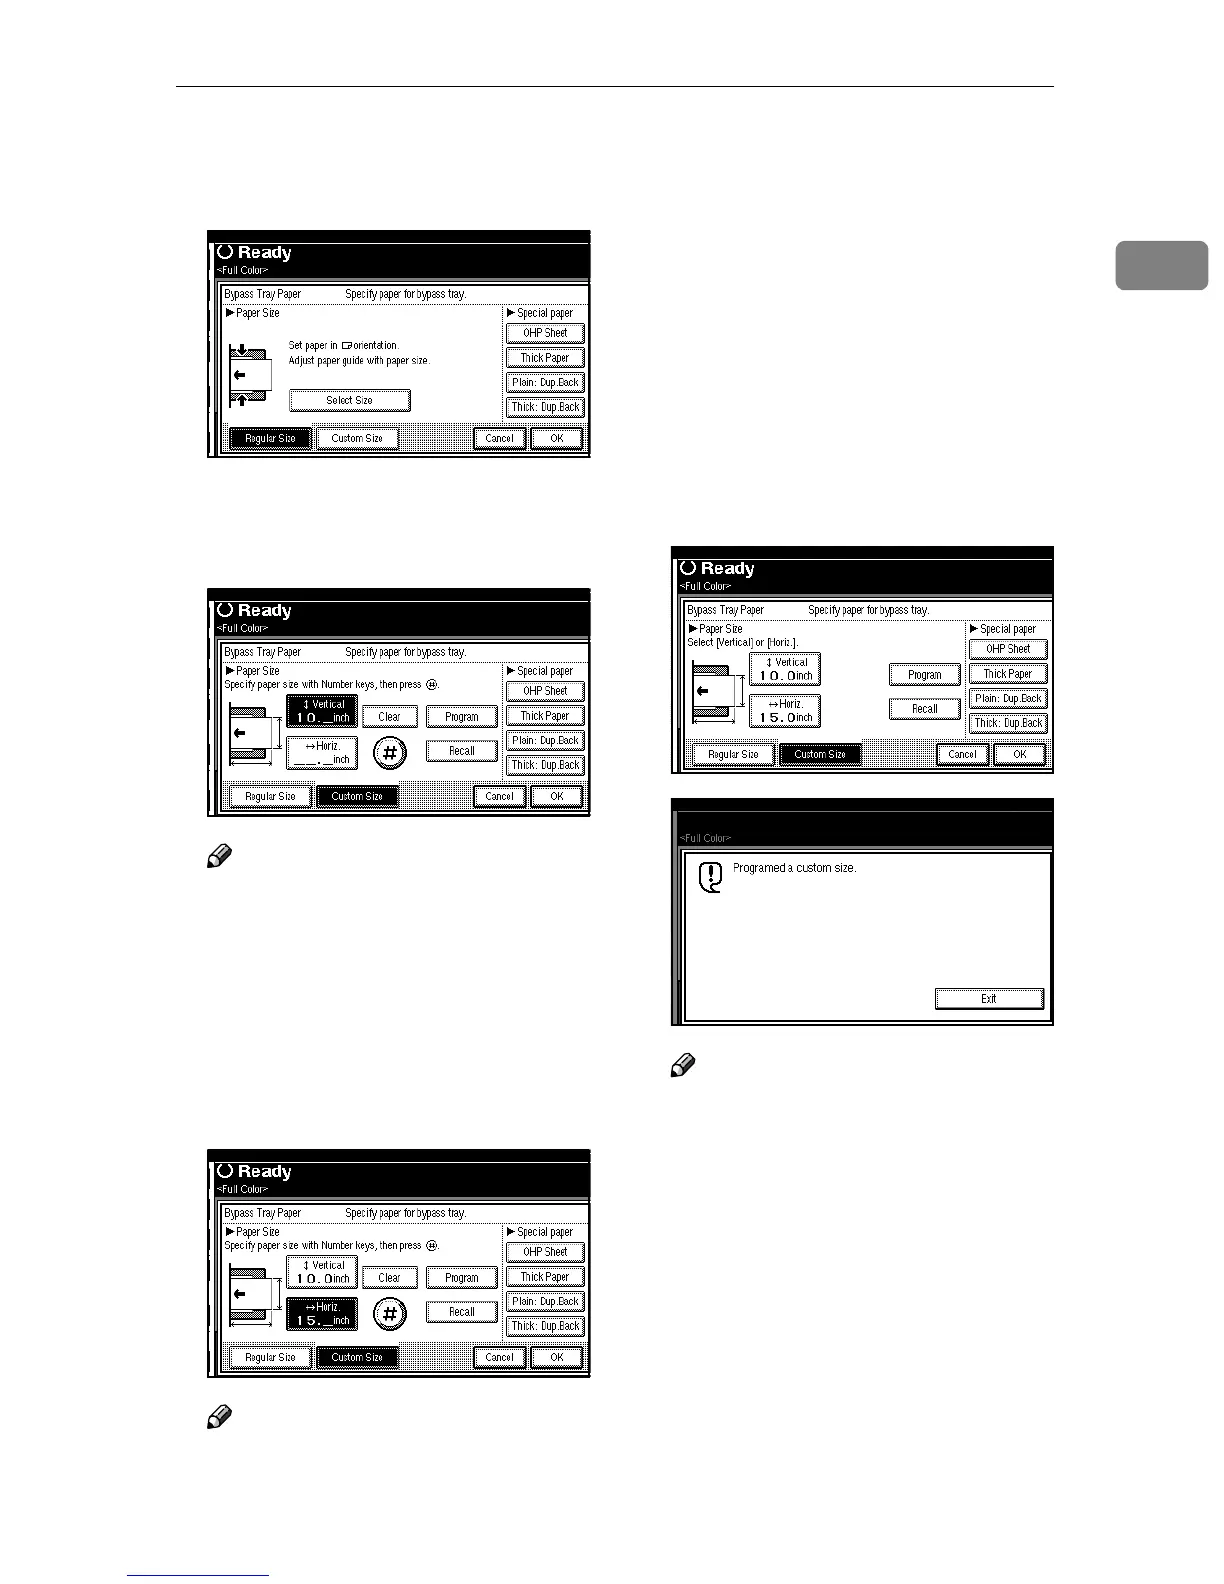
Press the {
{{
{#}
}}
} key.
D
DD
D
Press [Custom Size].
E
EE
E
Enter the vertical size of the paper
with the number keys, and then
press [#].
Note
❒ The size that you can enter is be-
tween 90 (3.5”) to 305mm (12”).
❒ To change the number entered,
press [Clear] or the {
{{
{Clear/Stop}
}}
}
key and enter the new number.
F
FF
F
Enter the horizontal size of the
paper with the number keys, and
then press [#].
Note
❒ The size that you can enter is be-
tween 148 (5.8”) to 458mm (18”).
❒ If [Horiz. mm] is not highlighted,
press [Horiz. mm].
❒ To change the number entered,
press [Clear] or the {
{{
{Clear/Stop}
}}
}
key, and then enter the new
number.
❒ When entering a size over
305mm (12”), the image will be
moved to the center of paper
and copied.
G
GG
G
To register the custom size en-
tered, press [Program] and then
press [Exit].
Note
❒ If you do not register the cus-
tom size, go to step
H
.
❒ Only one custom size can be
stored.
❒ To recall the custom size stored,
press [Recall].
❒ If you do not register the cus-
tom size, the size you set is de-
leted when modes are cleared.
H
HH
H
Press [OK].
I
II
I
Place your originals, and then
press the {
{{
{Start}
}}
} key.