Replacing Consumables and Maintenance Kit
20
1
G
GG
G
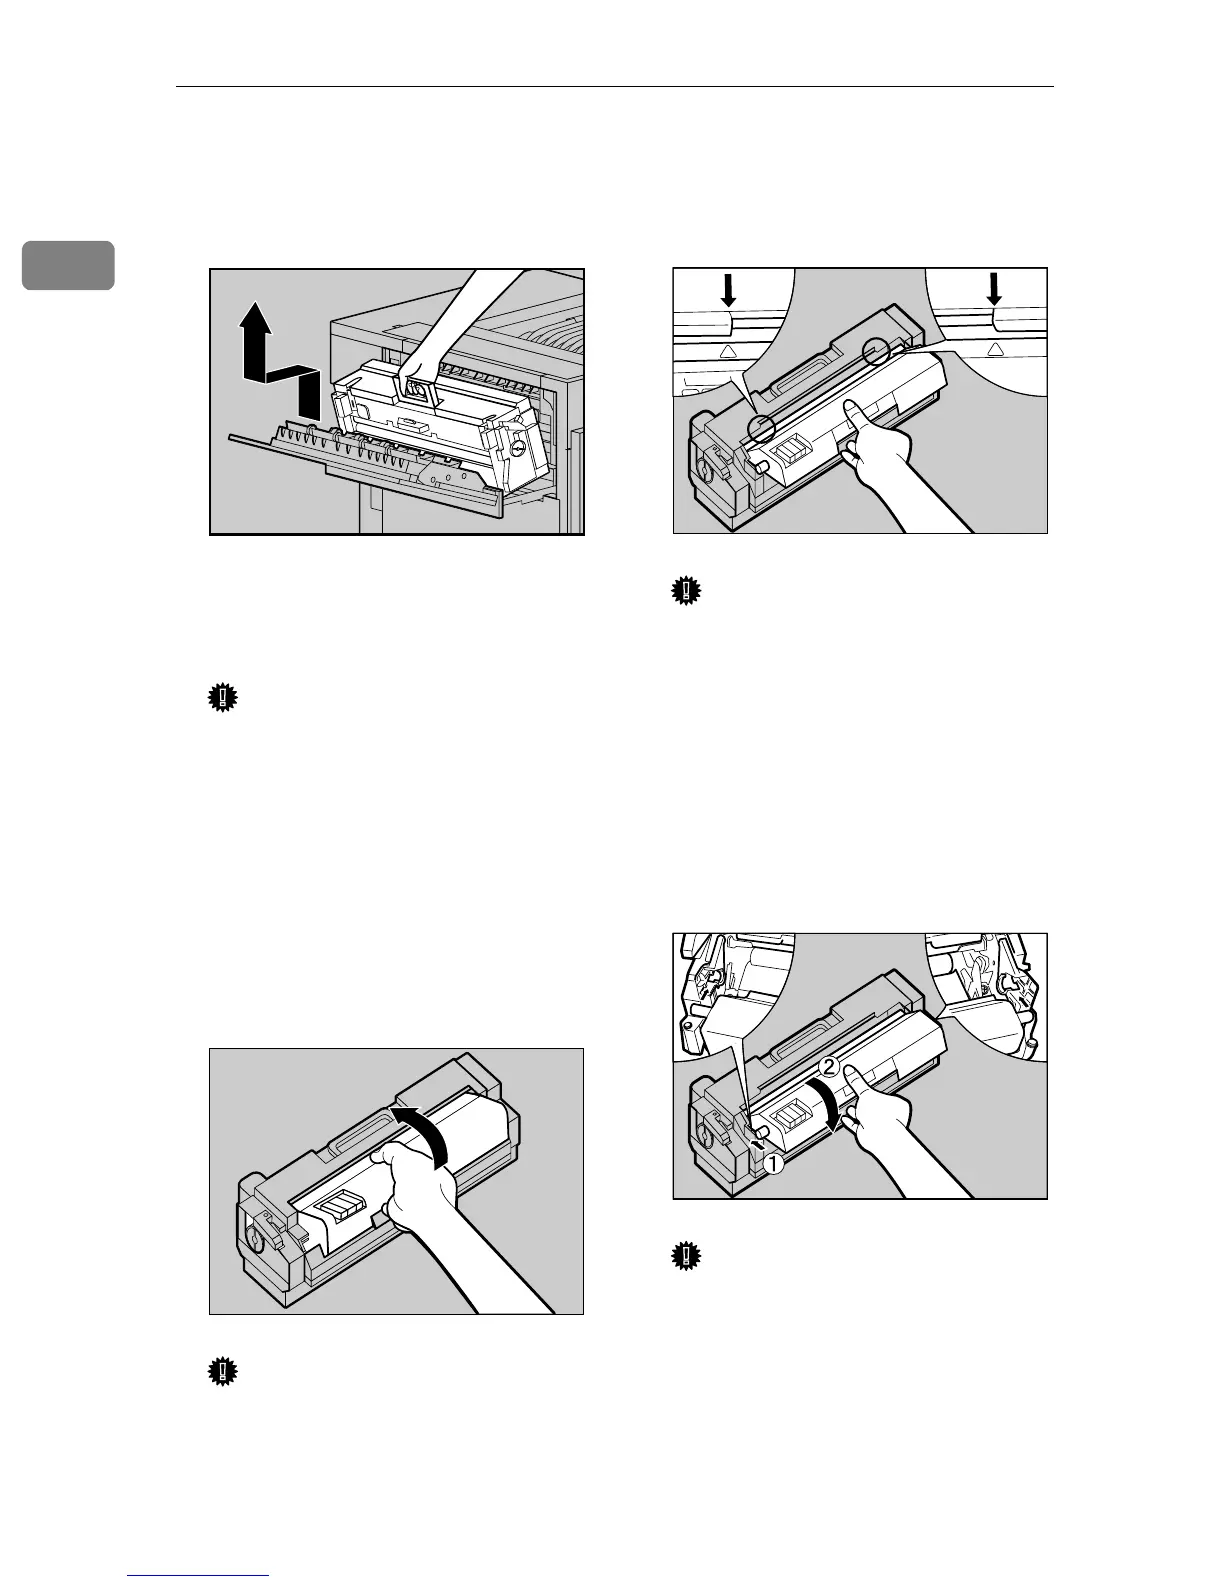
Holding the green handle, pull
up the Fusing Unit slowly in the
direction of the arrow, and then
put it in a stable and level place.
H
HH
H
Take out the new Fusing Unit
from the bag and put it in a stable
and level place.
Important
❒ The A3 paper which comes with
the new Fusing Unit will be
used in a later step
T
, so be care-
ful not to lose it.
❒ Do not turn the blue dial at the
side of the new fusing unit
when replacing it or before
turning on the power switch.
I
II
I
Remove the Fusing Oil Unit in
the direction of the arrow.
Important
❒ Do not touch the inside of the
Fusing Unit.
❒ Be careful not to touch the oil.
J
JJ
J
Match (U
UU
U) on the front of the Fus-
er Oil Unit and the arrow on the
Fusing Unit as shown in the illus-
tration.
Important
❒ Be careful not to get oil on the
metal part of the left side of the
Fuser Oil Unit.
K
KK
K
Insert the left and right protru-
sions of the Fuser Oil Unit into
the white holders of the Fusing
Unit (A
AA
A), and then move the Fus-
er Oil Unit in the direction shown
by the arrow (B
BB
B) to attach the Fus-
er Oil Unit to the Fusing Unit.
Important
❒ Be careful not to get oil on the
metal part of the left side of the
Fusing Oil Unit
L
LL
L
Put the removed Fusing Oil Unit
in the bag that enclosed the new
Fusing Unit, and then seal it.
ZDJH208J
ZDJH052E
ZDJH055J
ZDJH054J