Replacing the Fusing Unit
21
1
M
MM
M
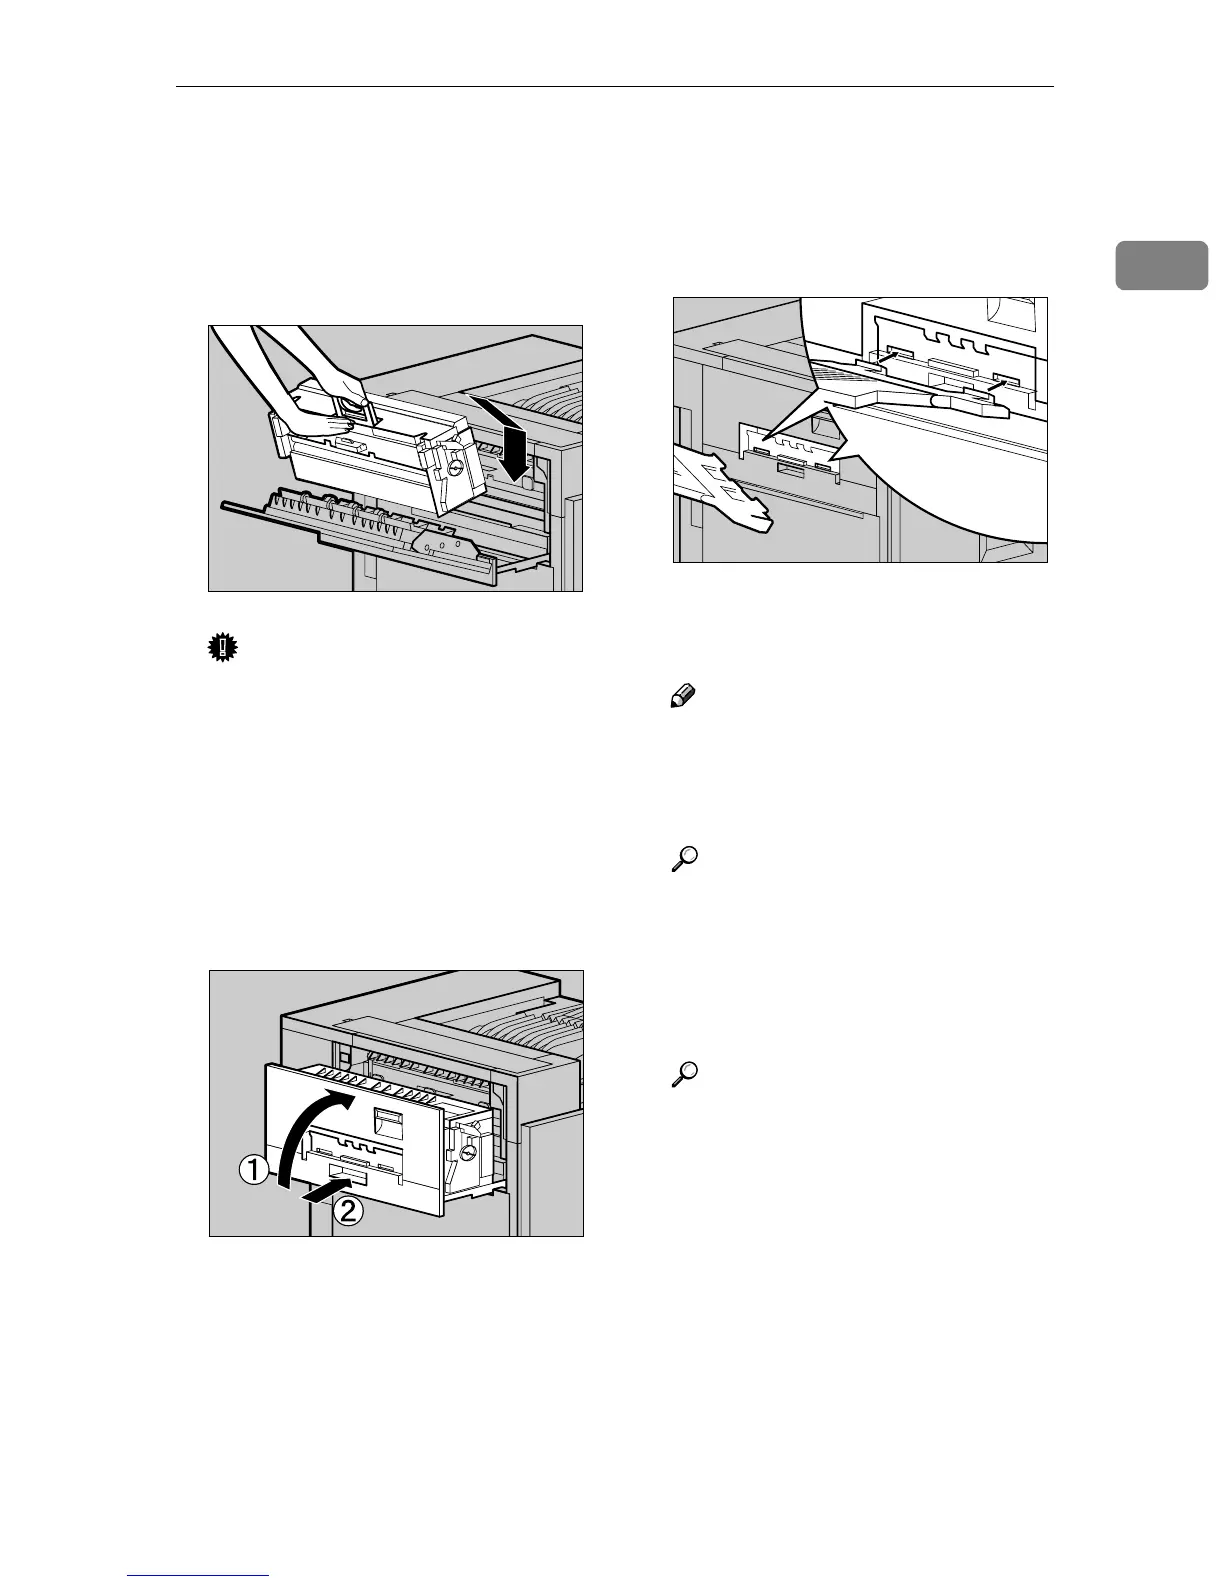
Holding the green handle of the
new Fusing Unit, use your other
hand to push the area right in
front of the handle to create a
slight slant, and then push the
Fusing Unit slowly to the back.
Important
❒ Confirm that the Fusing Oil
Unit is facing the inside of the
printer.
❒ Confirm that the Fusing Unit is
properly positioned in the ma-
chine.
N
NN
N
Close the upper left cover (A
AA
A) and
push the handle (B
BB
B) slowly to the
back until it clicks into place.
O
OO
O
If you removed the External Tray
in step
D
DD
D
, reattach it to the printer.
Insert the hooks of the External
Tray into the printer slits, and
lower it toward you.
P
PP
P
If the Duplex Unit is installed,
close the Duplex Reversal Unit.
Note
❒ If the PT460 (Multi-bin) is at-
tached to the Duplex Reversal
Unit, detach it before opening
the Duplex Reversal Unit.
Reference
See p.3 “Opening and Closing
the Duplex Reversal Unit”.
Q
QQ
Q
If the 2 Tray Finisher was in-
stalled, reattach the 2 Tray Finish-
er to the printer.
Reference
See p.1 “Detaching the SR770 (2
Tray Finisher)”.
R
RR
R
Plug in the power cable, and then
turn on the power switch.
S
SS
S
After you replace the Fuser Unit,
the message "After replacing Fus-
er Unit, Fuser Adjustment needs
to be performed. Press [OK] to be-
gin the adjustment" appears. You
must now carry out the Fuser Ad-
justment procedure.
ZDJH050E
ZDJH051J
ZDJH010J