1. Enter SP2-109-003.
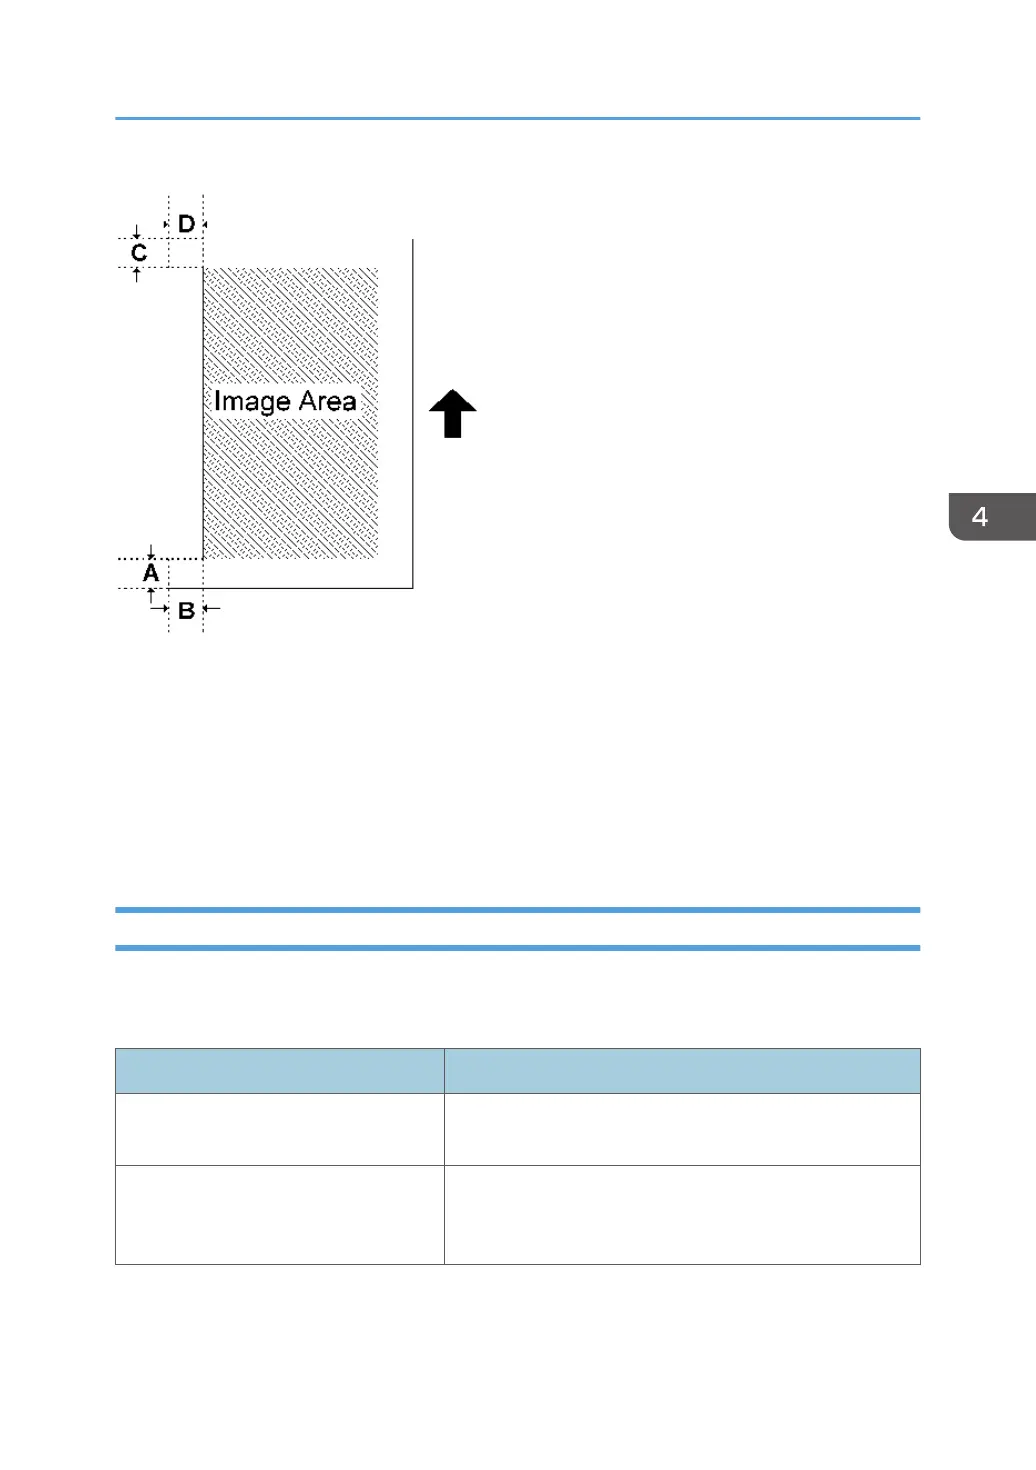
2. Print out the test pattern (14: Trimmed area) with SP2-109-003.
3. Check the erase margin A and B. Adjust them with SP2-103-001 to -015 if necessary.
• Leading edge: 0.0 to 9.0 mm (default: 4.2 mm)
• Side-to-side: 0.0 to 9.0 mm (default: 2.0 mm)
• Trailing edge: 0.0 to 9.0 mm (default: 4.2 mm)
Adjusting the Tone of the Printed Image
If a customer wishes to have the tone of the printed image corrected, you can adjust it as follows.
For details about the adjustment procedures, see the corresponding sections.
Adjustment Method Outline
Adjustment by Changing the Printer
Driver Setting (page 640)
Perform this to adjust the tone for each print job. This can
be adjusted by the user.
Adjustment by Changing the Machine’s
Profile Setting (page 648)
Perform this to make the tone similar to that of another
model. Doing this changes the tone of all images printed
by the machine’s printer function.
Image Adjustment
639