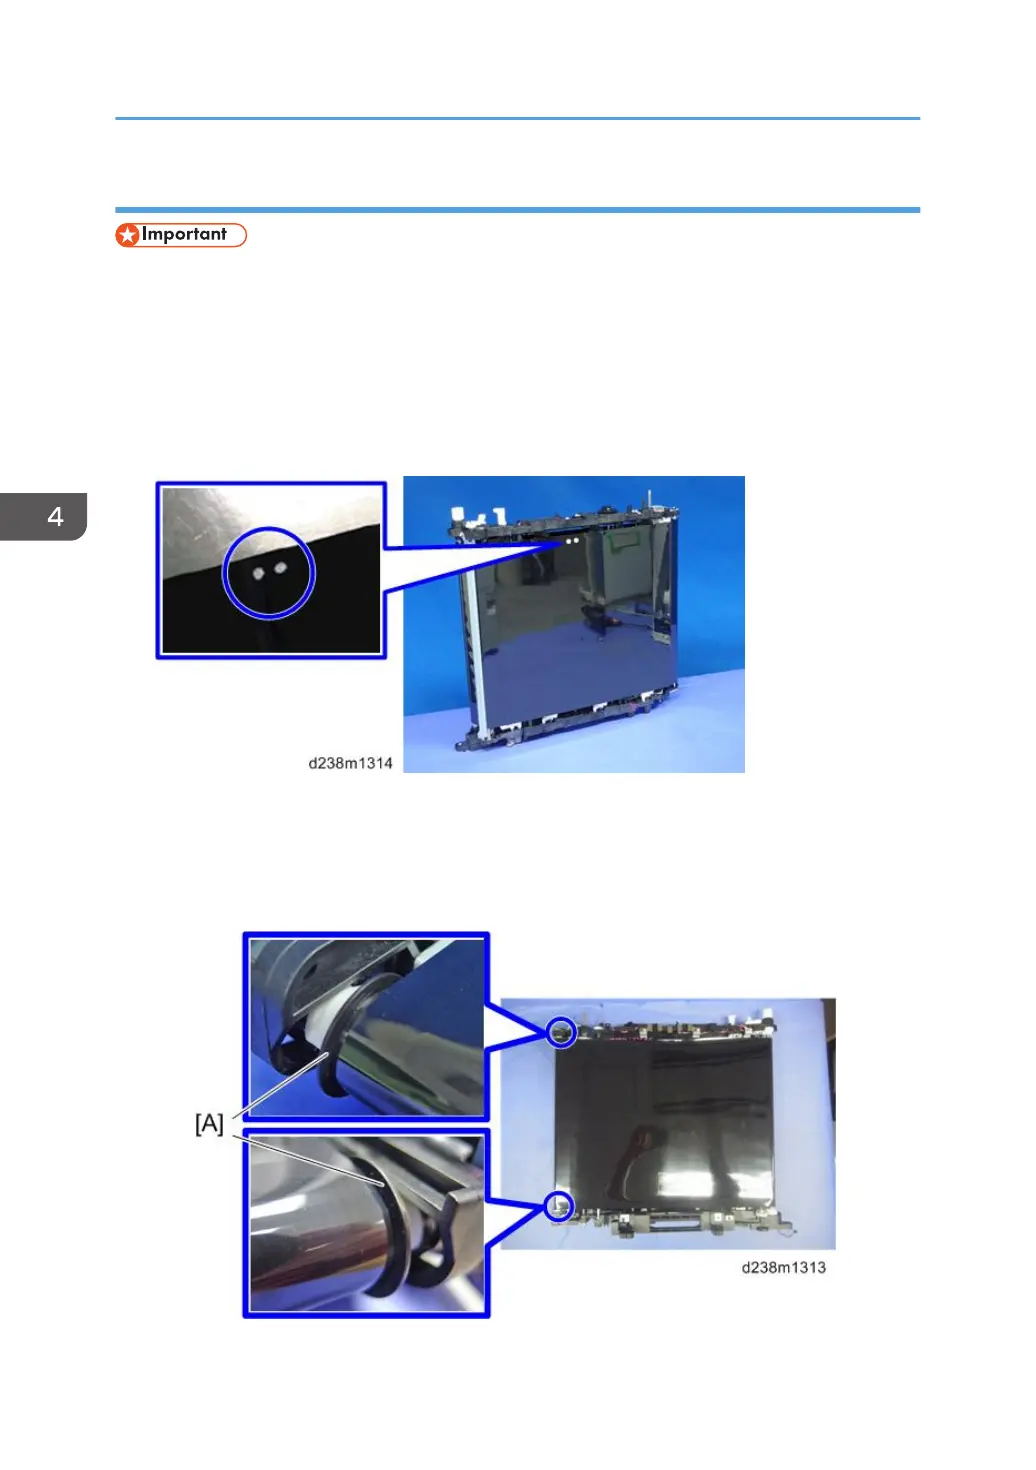
Attaching the Belt
• When attaching the belt, make sure that there is no foreign material on it.
• Make sure to attach the belt with the edge with markings (2 white dots) at the unit’s rear.
• Be careful not to bend or scratch the belt.
1. Place the image transfer unit upright with its front face down, and then attach the belt
from the top.
Make sure to have the belt’s edge with markings (2 white dots) positioned at the top (unit’s rear).
2. Holding the resin parts on the top and bottom, place the unit on its side.
3. Adjust the belt position according to the following two points:
• The belt must be attached between the flanges [A] at both ends of the tension roller.
• The belt’s edge must be between the two lines [B] on the frame.
4. Replacement and Adjustment
486