Replacing the Fusing Oil Unit
9
1
K
KK
K
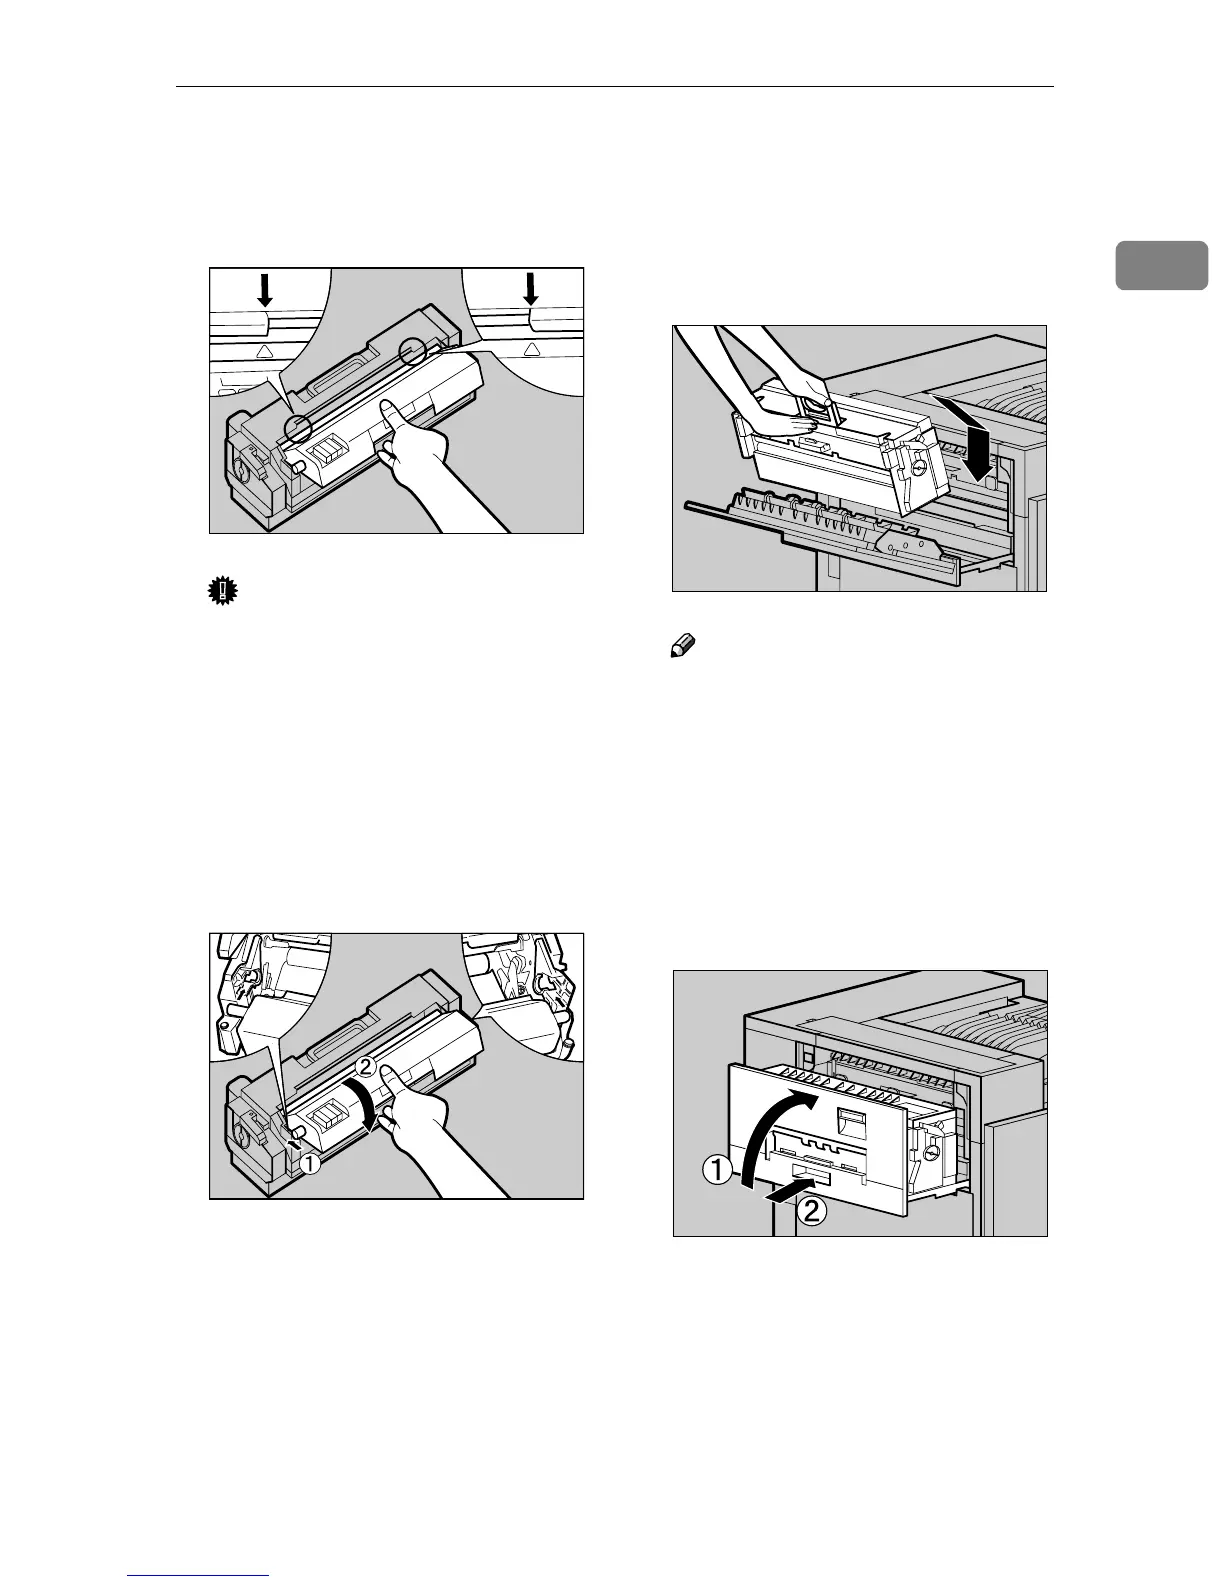
Match (U
UU
U) on the front of the Fus-
er Oil Unit and the arrow on the
Fusing Unit as shown in the illus-
tration.
Important
❒ Be careful not to get oil on the
metal part of the left side of the
Fuser Oil Unit.
L
LL
L
Insert the left and right protru-
sions of the Fuser Oil Unit into
the white holders of the Fusing
Unit (A
AA
A), and then move the Fus-
er Oil Unit in the direction shown
by the arrow (B
BB
B) to attach the Fus-
er Oil Unit to the Fusing Unit.
M
MM
M
Holding the green handle with
one hand, use your other hand to
push the front area of the handle
to create a slight slant, and push
the Fusing Unit slowly to the
back.
Note
❒ Confirm that the Fusing Oil
Unit is facing the inside of the
printer.
At this point, make sure the Fusing
Unit is on the stand properly.
N
NN
N
Close the upper left cover (A
AA
A),
and then push the handle slowly
(B
BB
B) to the back until it clicks into
place.
O
OO
O
Place the old Fusing Oil Unit into
the bag which contained the new
Fusing Oil Unit, and seal the bag.
ZDJH055J
ZDJH054J
ZDJH050E
ZDJH051J