EasyManuals Logo

Ricoh MP C2504 User Manual

Ricoh MP C2504
1923 pages
To Next Page IconTo Next Page
To Previous Page IconTo Previous Page
Page #156 background imageLoading...
Page #156 background image
Do not turn the power on until you perform "adjustment after installation," or it may not start
normally.
1. Remove all the tapes and shipping retainers.
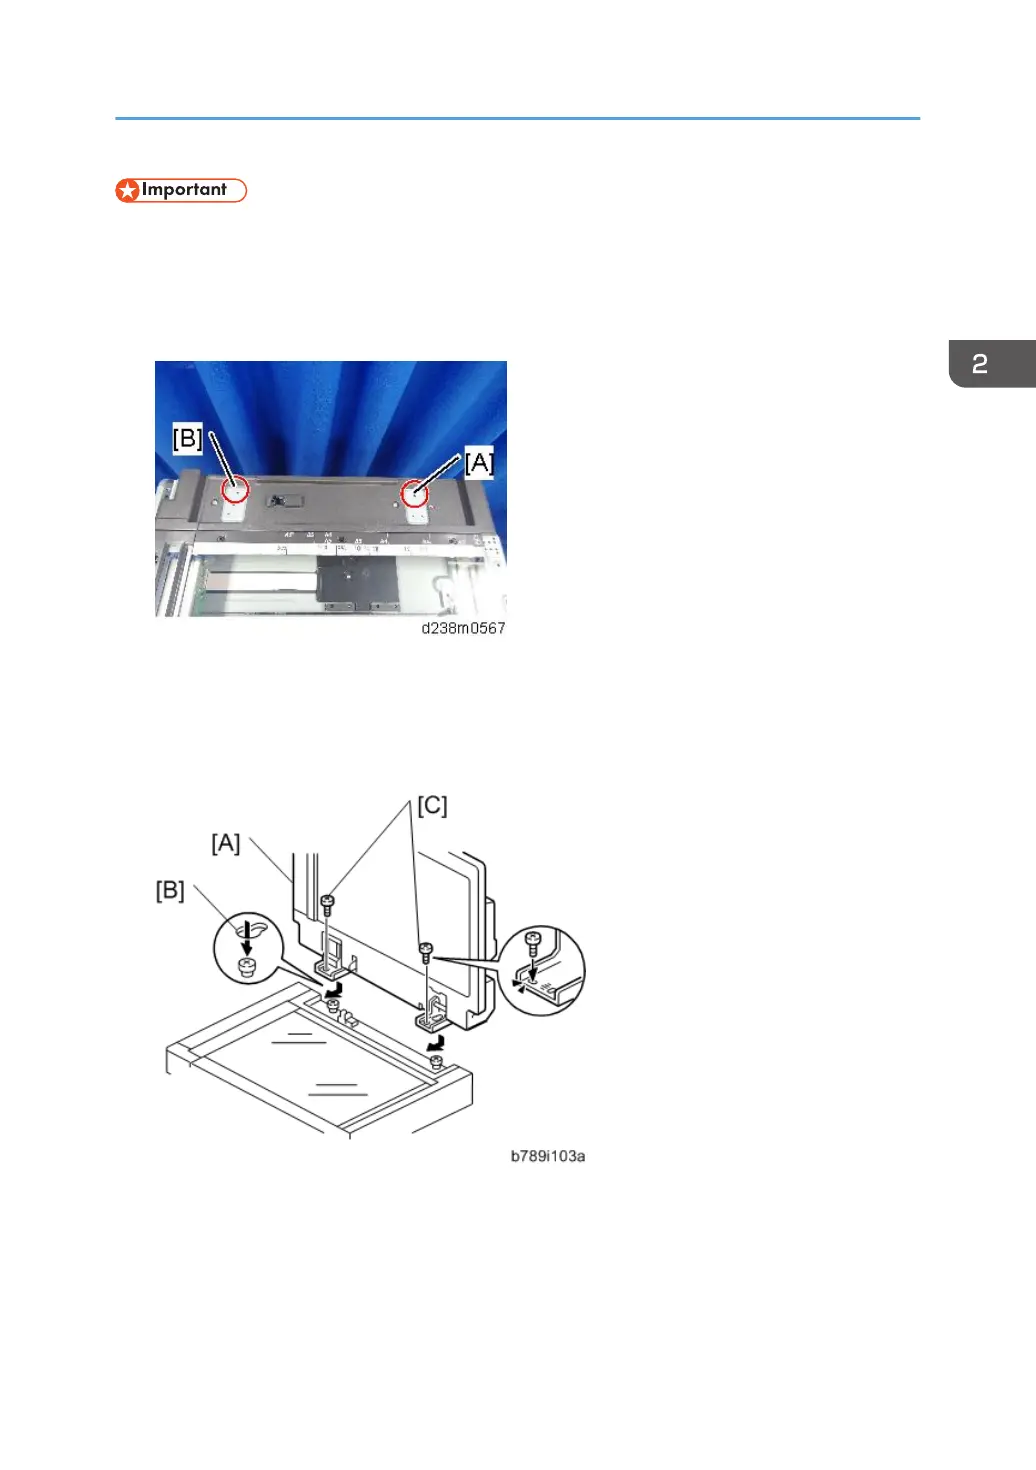
2. Insert the two stud screws ([A] is the larger stud, [B] is the smaller stud).
3. Mount the ARDF [A] by aligning the screw keyholes [B] of the ARDF support plate over
the stud screws.
4. Slide the ARDF toward the front of the machine.
5. Secure the ARDF with the two knob screws [C].
6. Align the rear left corner of the platen sheet [A] with the corner [B] on the exposure glass.
7. Close the ARDF.
ARDF DF3090 (D779)
147

Table of Contents

Questions and Answers:

Question and Answer IconNeed help?

Do you have a question about the Ricoh MP C2504 and is the answer not in the manual?

Ricoh MP C2504 Specifications

General IconGeneral
Print TechnologyLaser
FunctionsPrint, Copy, Scan, Fax
Print Resolution1200 x 1200 dpi
Scan TypeFlatbed, ADF
Max Scan Resolution600 x 600 dpi
Copy Resolution600 x 600 dpi
Max Paper SizeA3
Duplex PrintingYes
Memory (RAM)2 GB
Print Speed25 ppm (A4)
Copy Speed25 cpm (A4)
Fax Resolution200 x 200 dpi
Paper Capacity1200 sheets
ConnectivityUSB, Ethernet, Wi-Fi
Dimensions587 x 685 x 913 mm
Control Panel9-inch Smart Operation Panel

Related product manuals