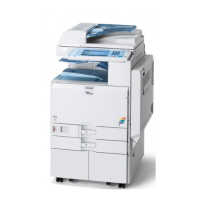
6. Remove the driven roller [B] at the machine’s exit tray and attach the supplied driven
roller [A].
• Insert a flathead screwdriver into the depression in the center, and then, lifting the driven
roller, unlock the part indicated by the red arrow.
• When attaching the driven roller, push its center all the way in until it clicks.
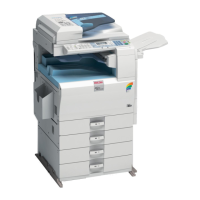
[A]: The supplied driven roller has flat rollers.
[B]: The machine’s standard driven roller has drum-type rollers (as indicated by red frames).
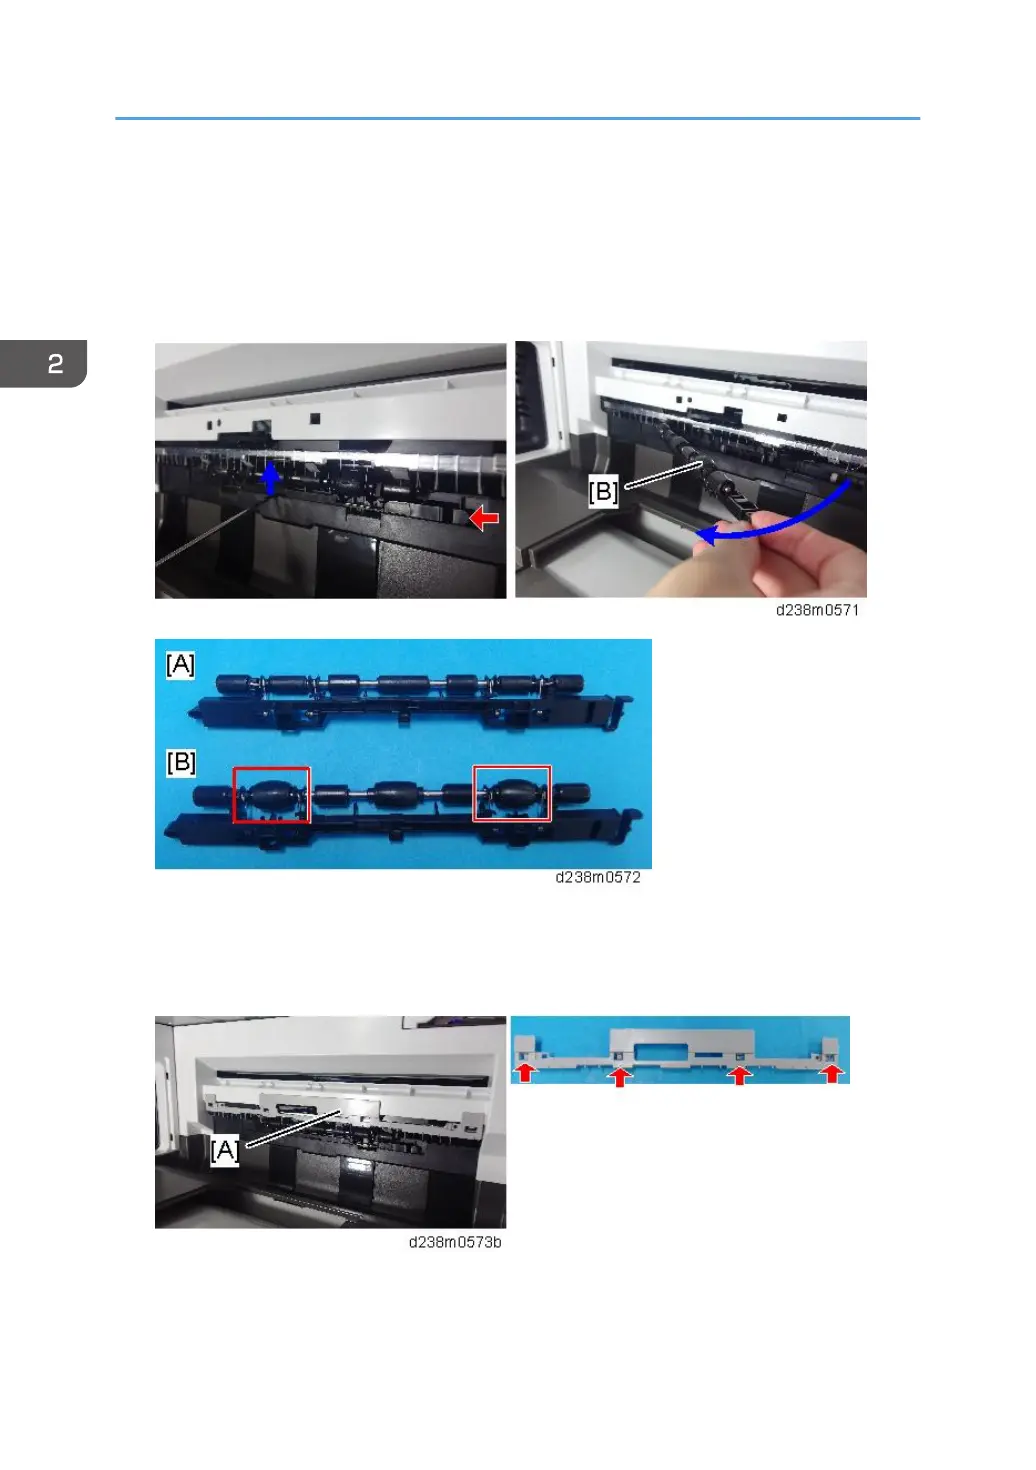
7. Attach the paper support guide [A] (Tab x4 ).
8. Open the front cover.
2. Installation
190
 Loading...