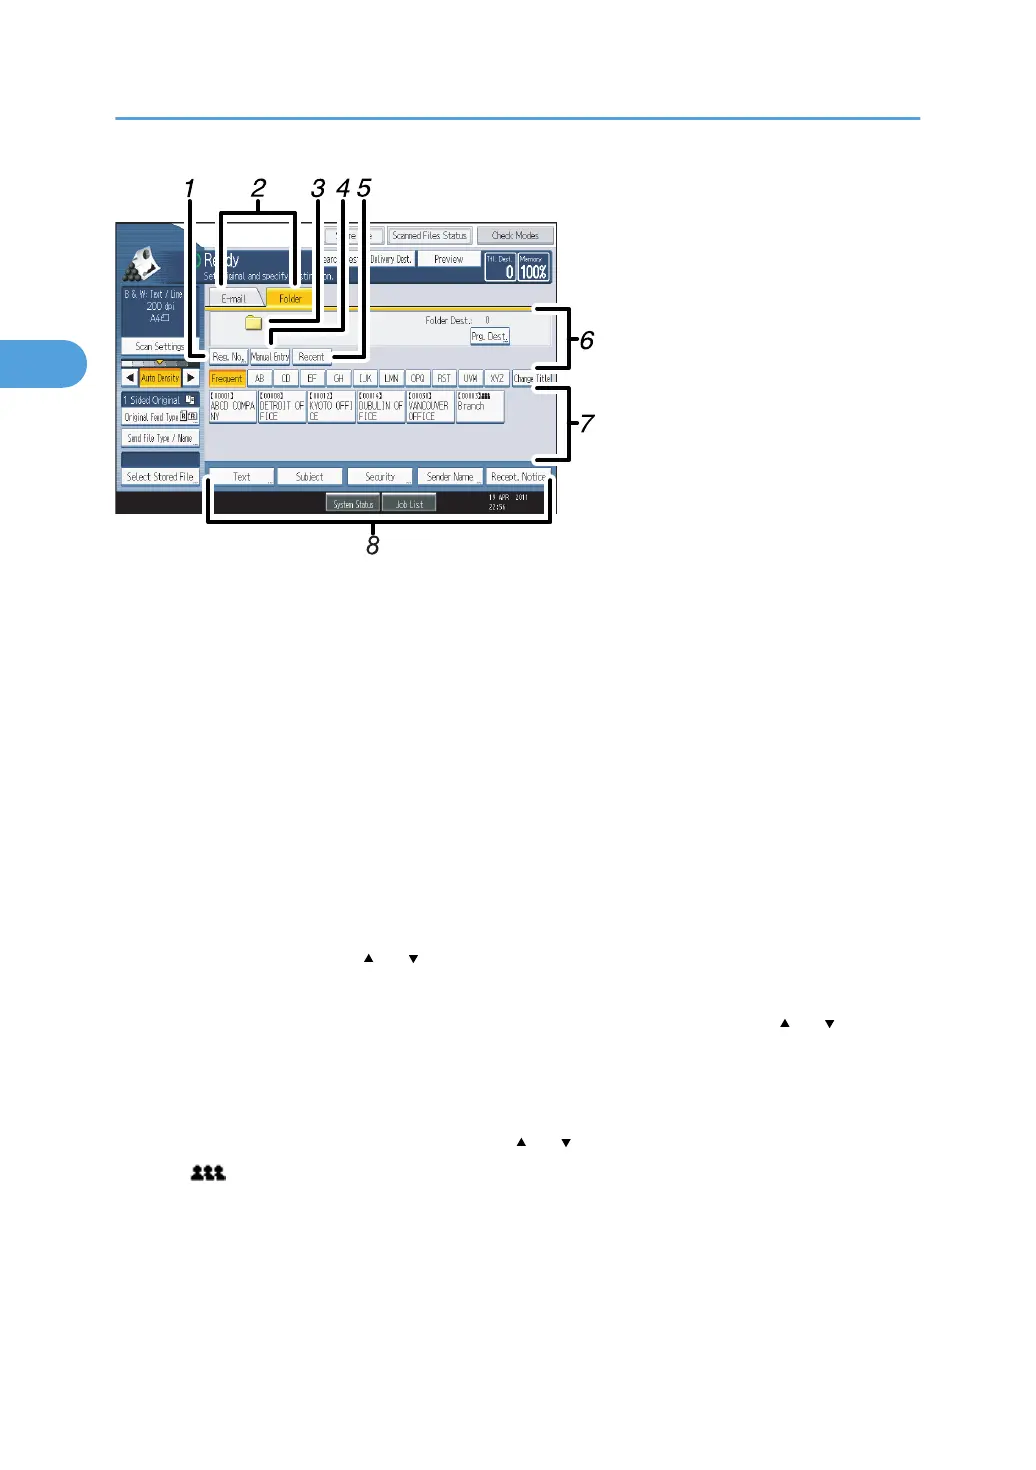
1. [Reg. No.]
Press to specify a destination using a five-digit registration number.
2.
E-mail / Folder
Press to switch between the Scan to Folder screen and E-mail screen.
Also switch the screen when sending a file simultaneously by both Scan to Folder and e-mail.
3. Scan to Folder icon
Shows that the Scan to Folder screen is displayed.
4. [Manual Entry]
To specify destinations not registered in the address book, press this key to display the soft keyboard, and then
enter the address of the destination folder.
5. [Recent]
Press this key to select destinations that have been recently specified using [Manual Entry]. If there is more than
one recent destination, press [
] or [ ] to scroll through them.
6.
Destination field
The specified destination appears. If more than one destination has been specified, press [
] or [ ] to scroll
through the destinations.
7.
Destination List
The list of destinations registered in the machine appears.
If all of the destinations cannot be displayed, press [
] or [ ] to switch the screen.
The ( ) symbol indicates a group destination.
8.
[Text] [Subject] [Security] [Sender Name] [Recept. Notice]
Enter the message and specify the subject, e-mail security (encryption and a signature), sender, and whether
or not to use Message Disposition Notification. The entries will be used for e-mail transmission when sending
files simultaneously by Scan to Folder and e-mail. For details, see "Sending Scan Files by E-mail".
2. Sending Scan Files to Folders
64