Basic Procedure for Sending Scan Files Using WSD
This section explains the basic procedure for sending scan files using WSD (Push Type).
• If the message "Updating the destination list has failed. Try again?" appears, press [OK]. The
destination list will then be updated.
1. Make sure that no previous settings remain.
If a previous setting remains, press the [Clear Modes] key.
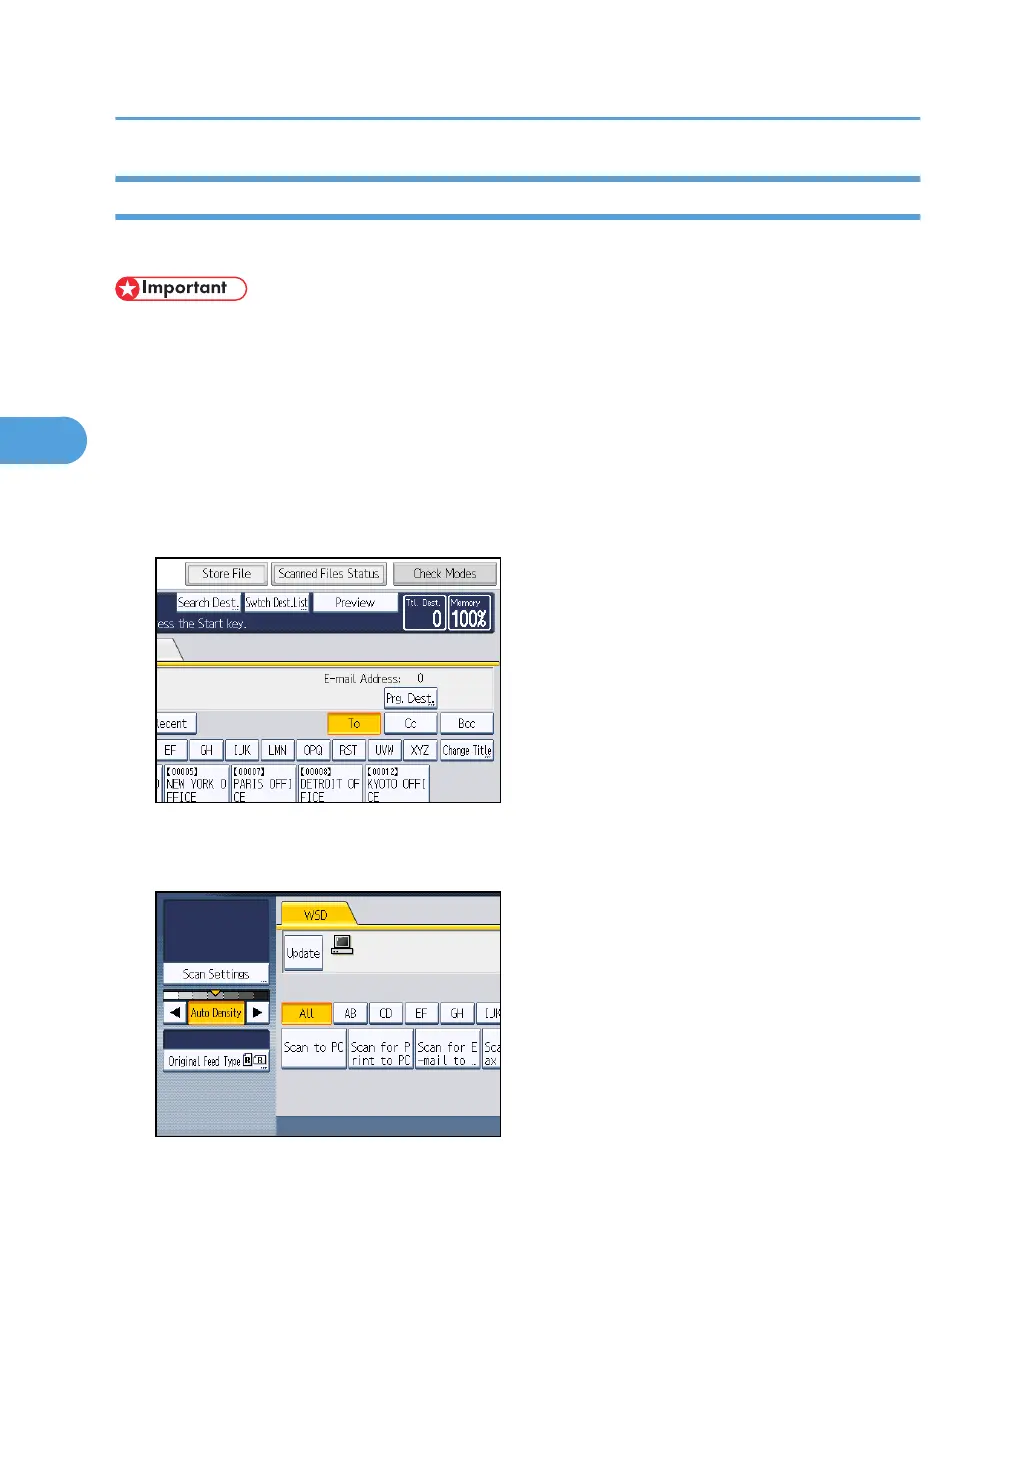
2. If the E-mail screen, Scan to Folder screen, or network delivery scanner screen is
displayed, switch to the WSD scanner screen.
For details, see "Switching to the WSD Scanner Screen".
3. Place originals.
4. If necessary, press [Scan Settings] to configure the scan settings.
Note that only [Erase Border] can be specified directly from this machine. Use the client computer
to configure the other scan settings. For details, see "Changing a Scan Profile".
5. If necessary, specify the scanning density.
For details, see "Adjusting Image Density".
6. If necessary, press [Original Feed Type] to configure the original orientation settings.
For details, see "Setting of Original Feed Type".
3. Sending Scan Files Using WSD
94