Quick Reference Scanner Guide
cPlease put this guide above your machineg
Chapter references in this guide refer to the bundled OI CD; Scanner Reference and Network and System Settings Reference.
© 2011 Printed in China EN
US
D595-7317
To use the scanner functions, several
settings must be made beforehand.
For details about these settings,
see Scanner Reference chapter 9
on the supplied CD-ROM.
A Press the {User Tools/Counter} key.
B Press [System Settings].
C Press [Administrator Tools].
D Press [Address Book Management].
E Check that [Program / Change] is selected.
F Press [New Program].
G Confi gure the user details.
H Press [E-mail].
I Press [Change], which is on the right side of the e-mail
address.
J Enter the e-mail address, and then press [OK].
K Press [OK].
For details about registering folders, see 5. Registering
Addresses and Users for Facsimile/Scanner Functions,
Network and System Settings Reference
.
How to scan...
A Press the {Scanner} key.
B Press the {Clear Modes} key.
C If the network delivery scanner screen appears, switch to
the E-mail screen or Scan to Folder screen.
D Place the originals and confi gure the necessary settings
such as original size and orientation.
How to use Scan to E-mail/
Scan to Folder...
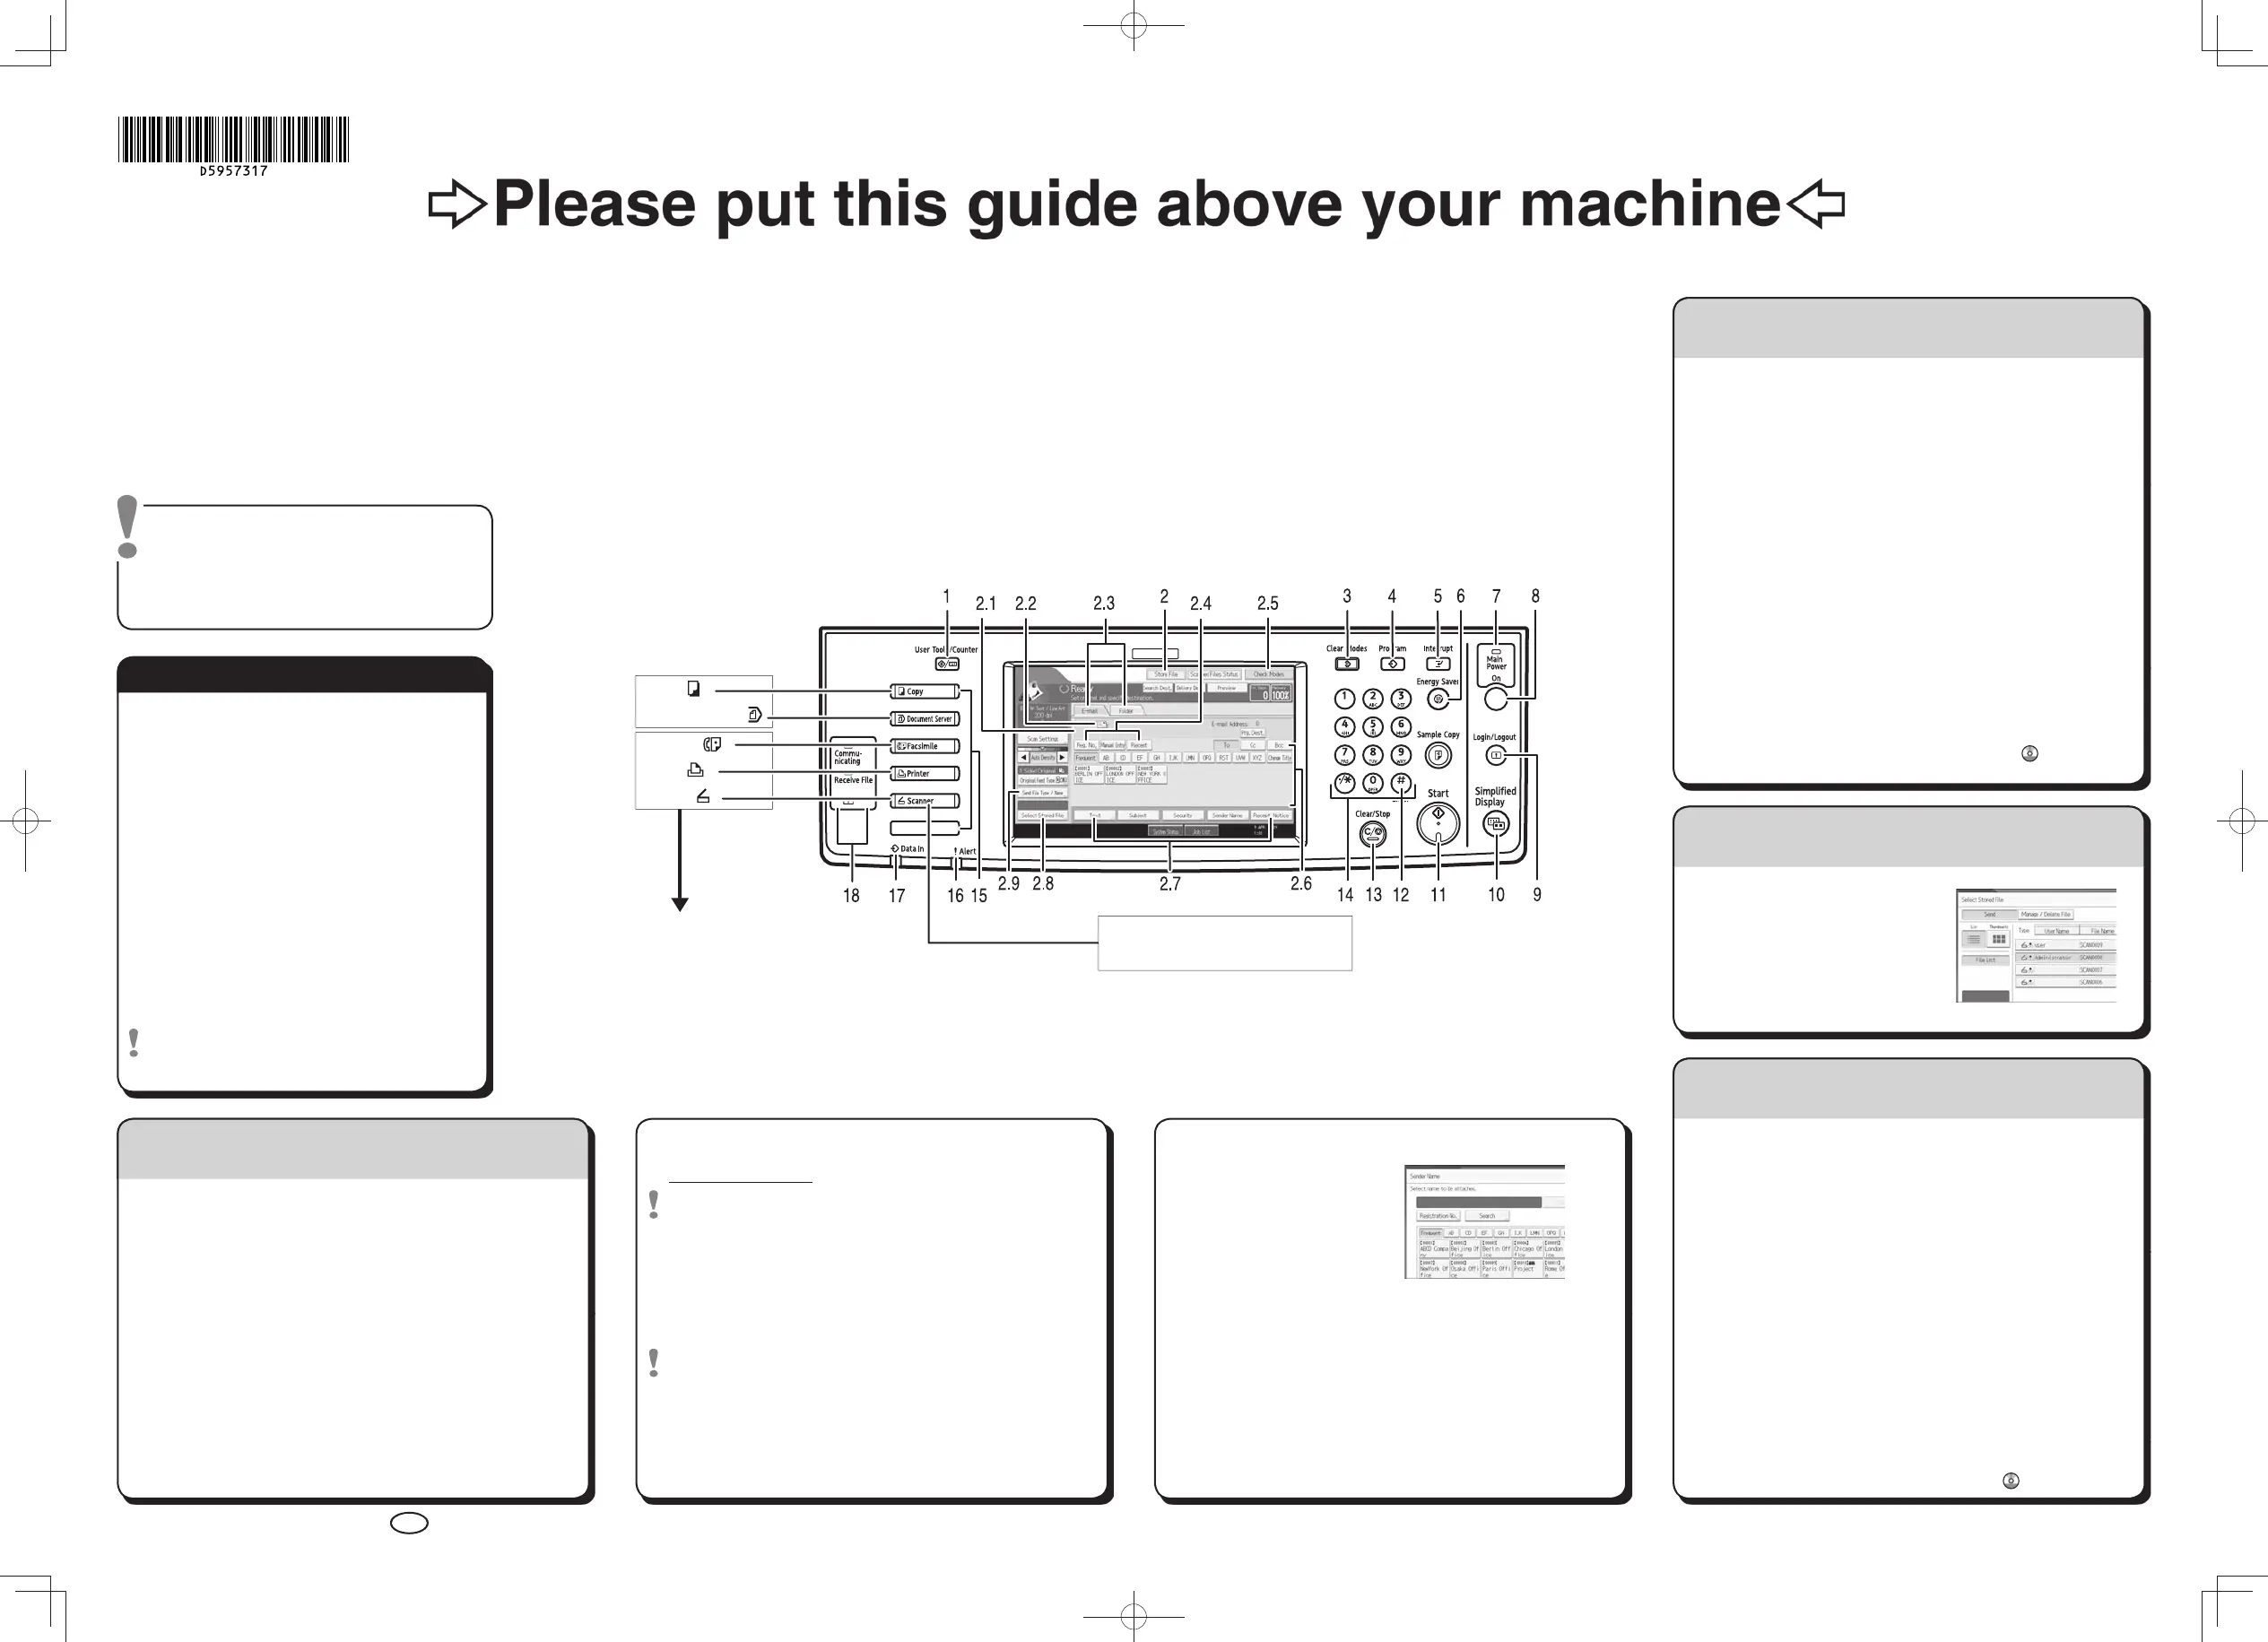
1. {User Tools/Counter} key
2. Display panel
2.1 Destination fi eld
2.2 E-mail icon
2.3 E-mail/Folder
2.4 [Reg. No.] [Manual Entry]
[Recent]
2.5 [Check Modes]
2.6 Destination list
2.7 [Text] [Subject] [Security]
[Sender Name] [Recept. Notice]
2.8 [Select Stored File]
2.9 [Send File Type / Name]
3. {Clear Modes} key
4. {Program} key
5. {Interrupt} key
6. {Energy Saver} key
Press this to switch the machine
into or out of Energy Saver mode.
7. Main power indicator
8. Operation switch
Press this to turn the machine
on/off.
9. {Login/Logout} key
10. {Simplifi ed Display} key
11. {Start} key
Press this to begin scanning,
storing, or sending.
12. {#} key (Enter Key)
13. {Clear/Stop} key
- clears an entered numeric value
- stops scanning
14. Number keys
15. Function keys
Press the {Scanner} key to
activate these keys.
16. Alert indicator
17. Data In indicator
18. Indicators
(1. Sending Scan Files by E-mail)
(2. Sending Scan Files to Folders)
E Select destination(s).
In total, up to 500 destinations can be specifi ed.
For scan to e-mail:
Before selecting the destination, be sure to select [To].
When necessary, select [Cc] or [Bcc] and destination(s).
F If necessary, press [Send File Type / Name] to specify
settings such as fi le name and fi le format.
G For scan to e-mail only
Specify the e-mail sender.
Depending on the security settings, the logged-in user may
appear in the [Sender Name] fi eld.
• To specify the e-mail sender, press [Sender Name].
• Select a sender.
• Press [OK].
• For reception
confi rmation e-mail,
press [Recept. Notice].
H For scan to e-mail only
Enter a subject line if necessary.
• Press [Subject].
• Enter the subject.
• Press [OK].
I Press the {Start} key.
Registering an
E-mail destination...
(Network and System Settings Reference
5. Registering Addresses and Users
for Facsimile/Scanner Functions)
3. (3. Storing Files Using the Scanner Function) (3. Storing Files
Using the Scanner Function) (3. Storing Files Using the Scanner
Function) (3. Storing Files Using the Scanner Function)
Standard available:
Copier:
Document Server:
Facsimile:
Printer:
Scanner:
Available scan functions:
A Scan to E-mail
B Scan to Folder (SMB/FTP/NCP)
C Scan Using WSD (Web Services on Devices)
D Store to Hard Disk
E Save to Removable Memory Device
F Scan to Delivery Server
G Scan via TWAIN Driver
For details about C, E, F, and G, see Scanner
How to save to the machine’s hard disk...
(4. Storing Files Using the Scanner Function)
A Press the {Scanner} key.
B Press the {Clear Modes} key.
C Make settings for storing scanned data fi les:
- Press [Store File] and [Store to HDD].
D Specify the fi le information: user name, fi le name, and
password. Press [OK].
E Place the originals and confi gure the necessary settings via
[Original Feed Type].
F Confi gure the basic settings (original type, resolution, etc.)
via [Scan Settings].
G Press the {Start} key.
For details about saving to removable memory devices,
see 5. Saving Scan Files on a Removable Memory Device,
Scanner Reference on the supplied CD-ROM.
Why use it?
To store scanned fi les in the hard disk of the machine for
later (shared) use. (See Scanner Reference .)
Displaying a list of fi les stored
on the machine’s hard disk
(4. Storing Files Using
the Scanner Function)
A Press the {Scanner} key.
B Press [Select Stored File].
The list of stored fi les is
displayed.
☺
You can also fax on
this machine!
Please ask your sales
person for this option.
Reference on the supplied CD-ROM.
This button needs to be
selected as a fi rst step.