4-182 Service Manual
5058-030
6. Detach the upper printer engine PCBA by moving it to the right.
7. Remove the upper printer engine PCBA.
Upper engine PCBA reinstallation
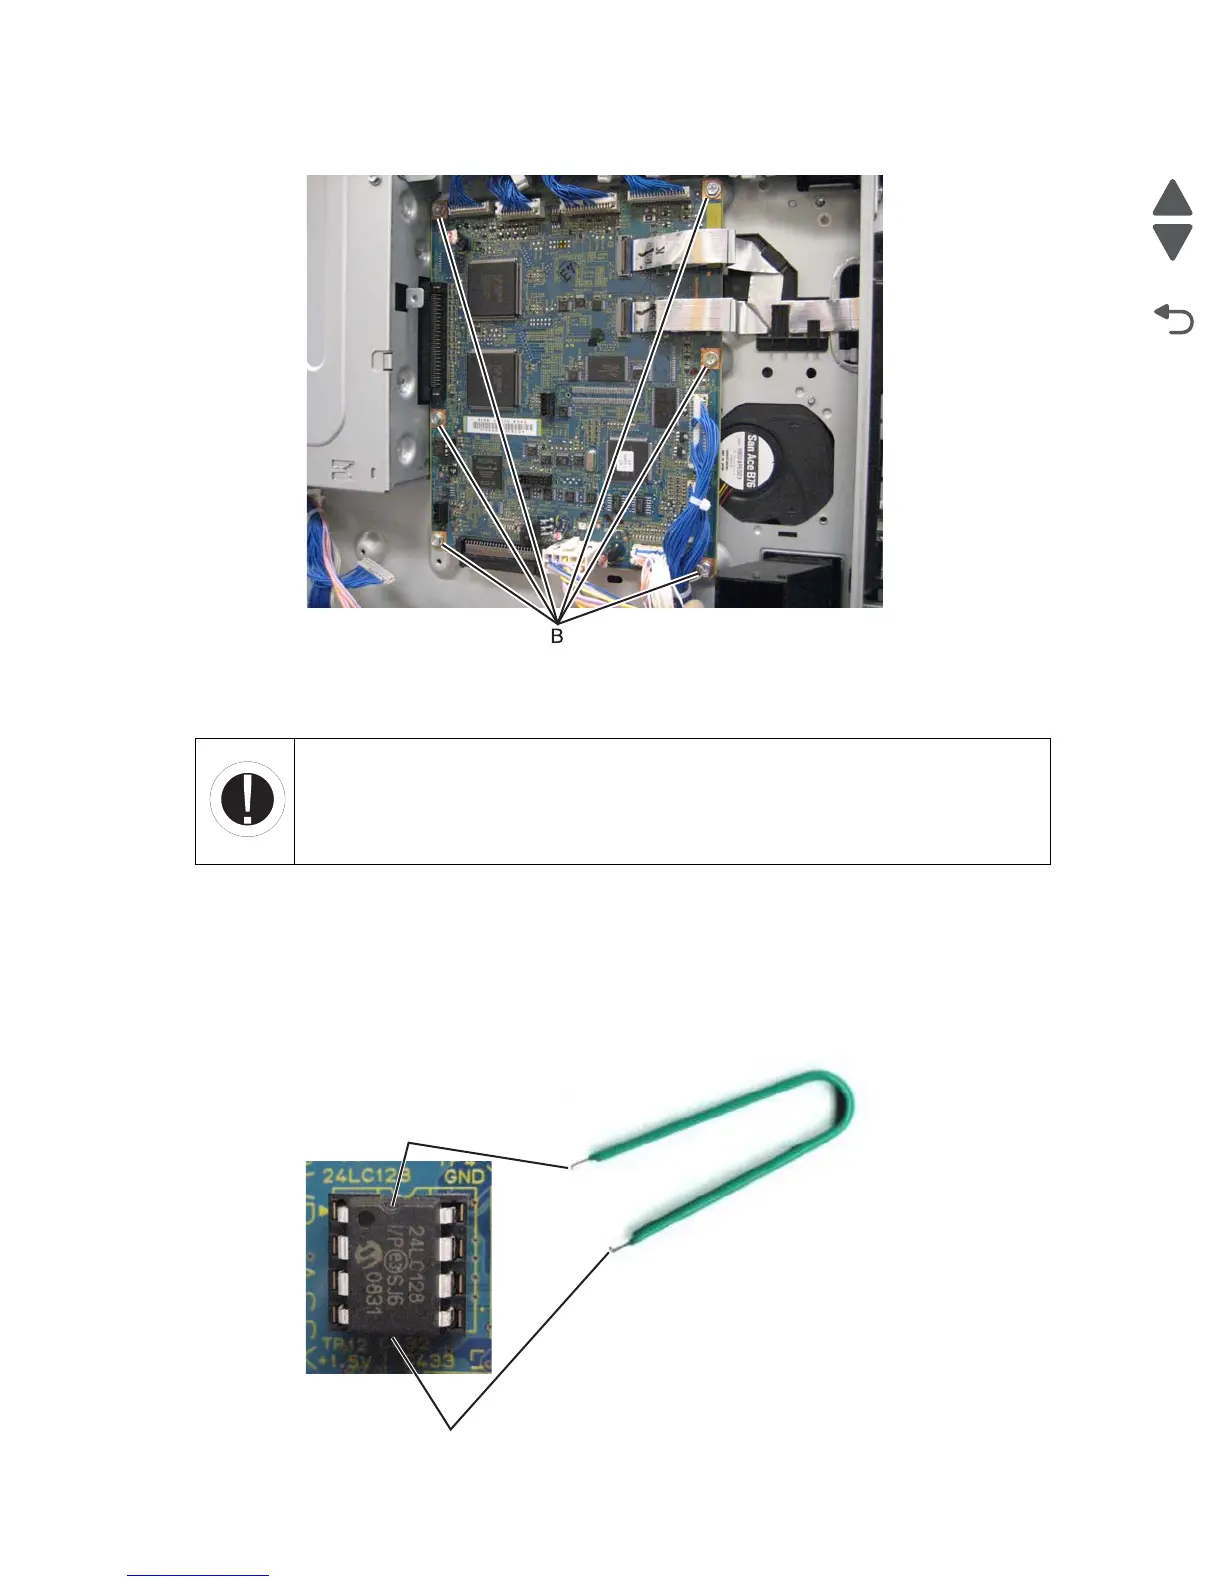
1. Install the NVM EPROM from the defective PCBA to the replacement PCBA.
1.1 Remove the NVM EPROM from the defective PCBA using a chip puller. Hold the chip on the touch
positions shown, then gently pull the chip away from the board.
Warning: The chip must be pulled away in the direction perpendicular to the PCBA. The pins may get
deformed if the chip is not pulled straight and evenly.
WARNING
Failure to perform this procedure correctly may cause:
• damage to the replacement PCBA
• loss of memory settings