Repair information 4-267
5058-030
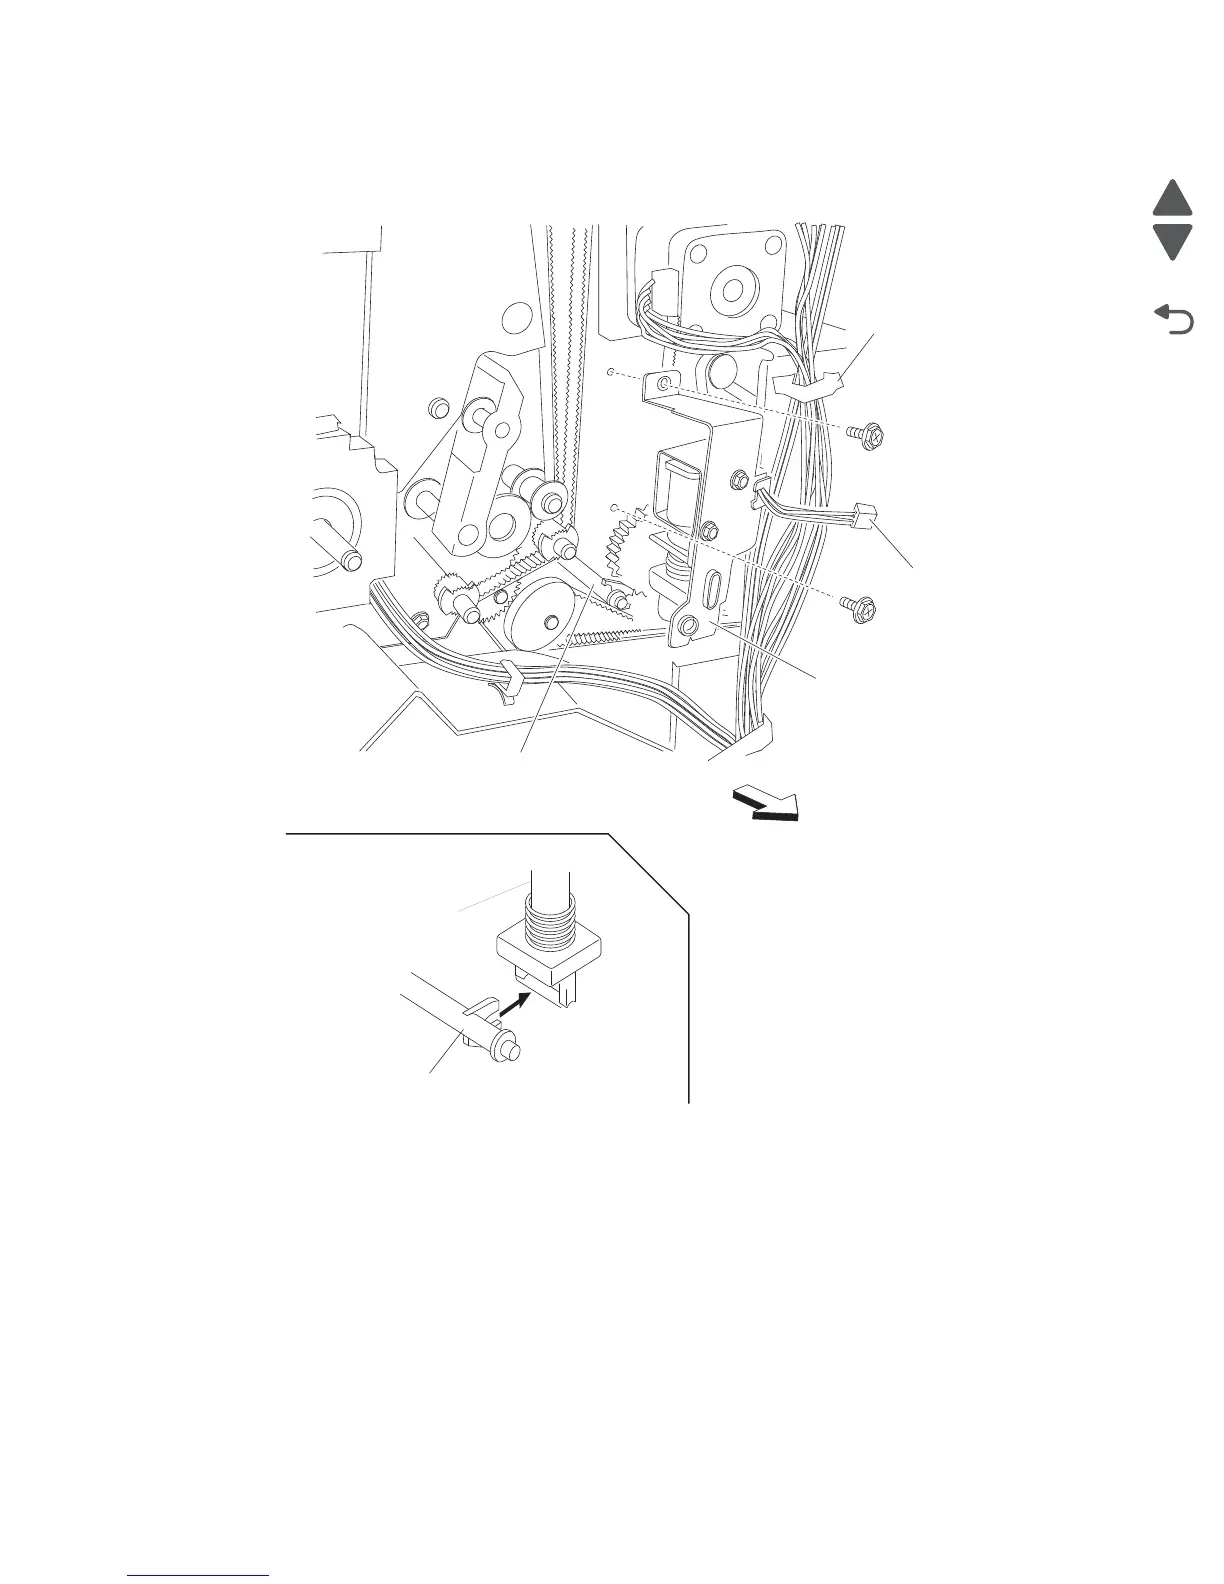
5. Remove the two screws securing the buffer diverter gate solenoid to the finisher.
6. Remove the buffer diverter gate solenoid.
Note: The link (B) may remain inserted into the finisher.
7. Remove the link.
Note: When the link is removed, the buffer diverter gate may become detached. See “Buffer diverter
gate removal” on page 4-265.
Buffer pinch guide assembly removal
1. Remove the finisher front door assembly. See “Finisher front door assembly removal” on page 4-276.
2. Remove the rear upper cover. See “Rear upper cover removal” on page 4-309.
3. Remove the rear lower cover. See “Upper media bin front cover removal” on page 4-353.
4. Remove the stapler unit frame. See “Stapler unit frame removal” on page 4-342.
5. Lower the buffer pinch guide assembly (A) as far as it will go.