Repair information 4-357
5058-030
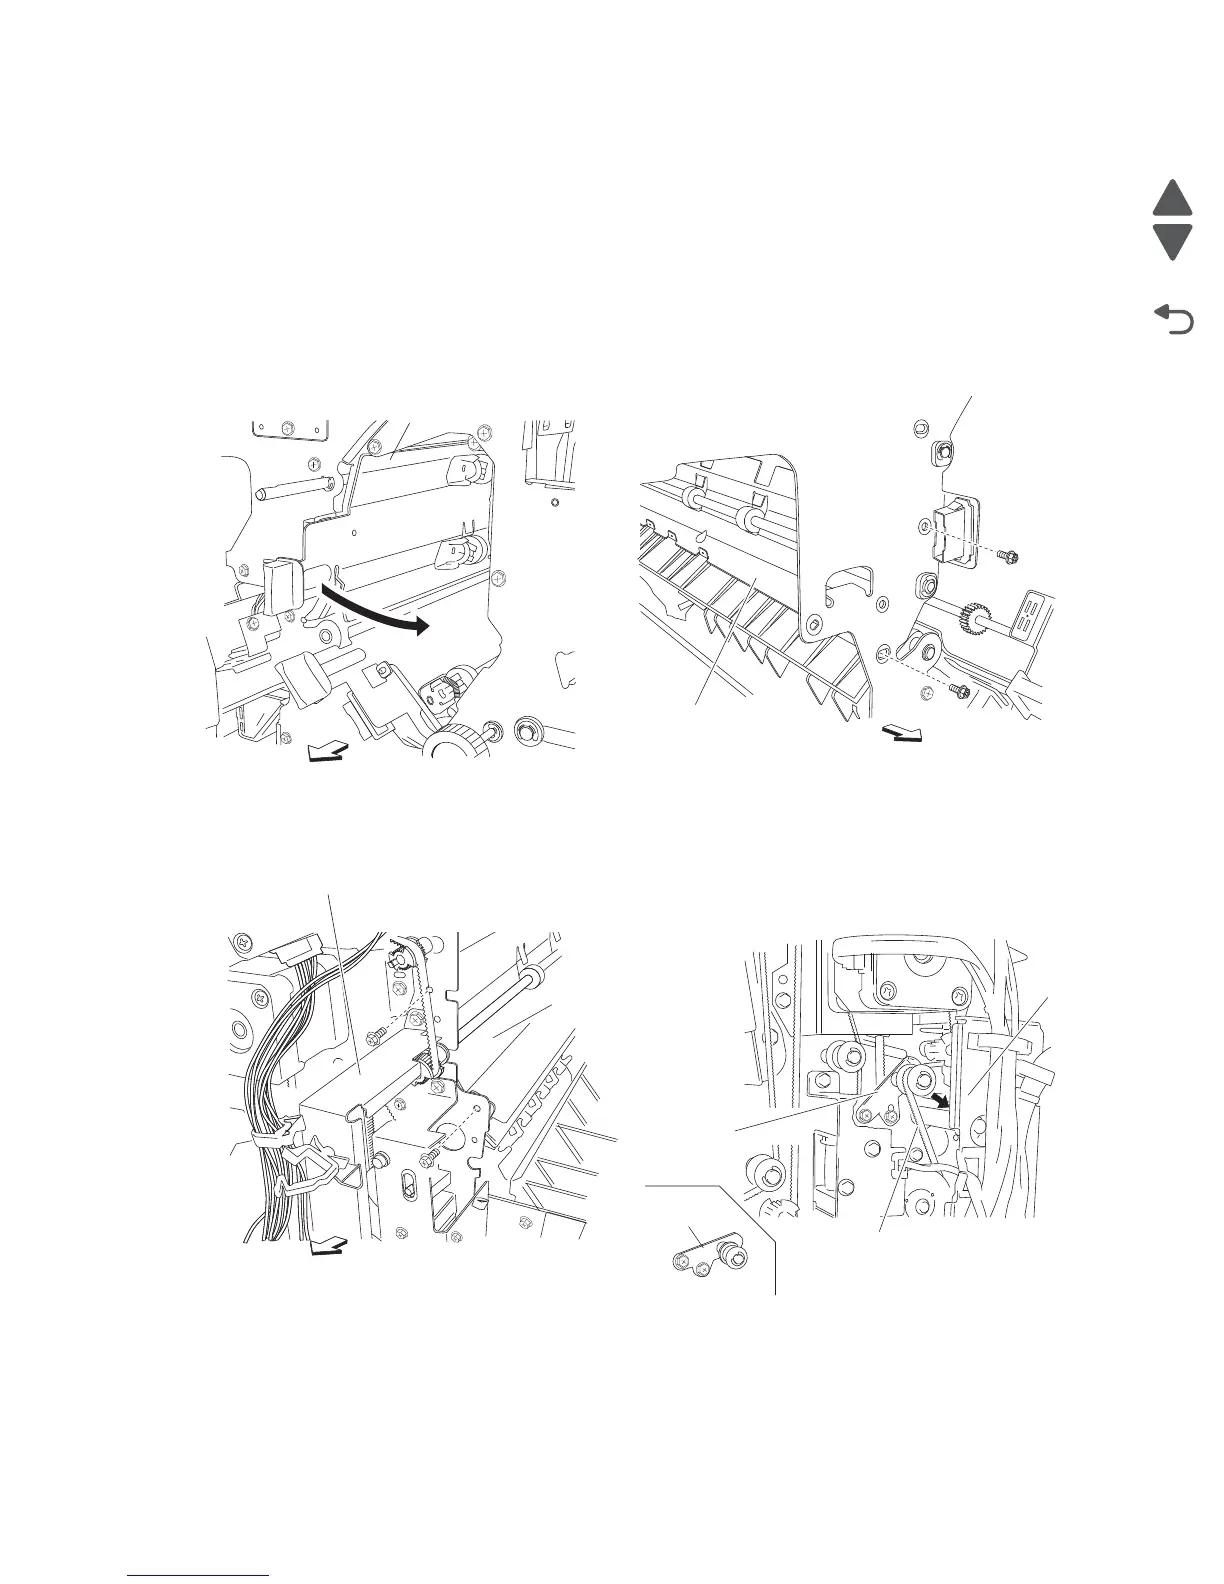
Upper transport roll removal
1. Open the finisher front door assembly.
2. Remove the rear upper cover. See “Rear upper cover removal” on page 4-309.
3. Remove the top cover. See “Top cover removal” on page 4-351.
4. Remove the left lower cover. See “Left lower cover removal” on page 4-288.
5. Remove the left upper cover. See “Left upper cover removal” on page 4-289.
6. Remove the punch carriage assembly. See “Punch carriage assembly removal” on page 4-304.
7. Open the upper pinch guide assembly (A) toward the right.
8. Remove the two screws securing the bracket (B) on the rear of the finisher.
9. Move the bracket (B) slightly toward the exit side of the finisher.
Note: It is not necessary to remove the bracket from the finisher; it should only be slightly moved to
provide better access to the two upper media transport roll assemblies (C) for removal.
10. Remove the two screws securing the bracket (D).
Note: It is not necessary to remove the bracket from the finisher; it should only be slightly moved to
provide better access to the two upper media transport roll drive pulleys 20T(E).